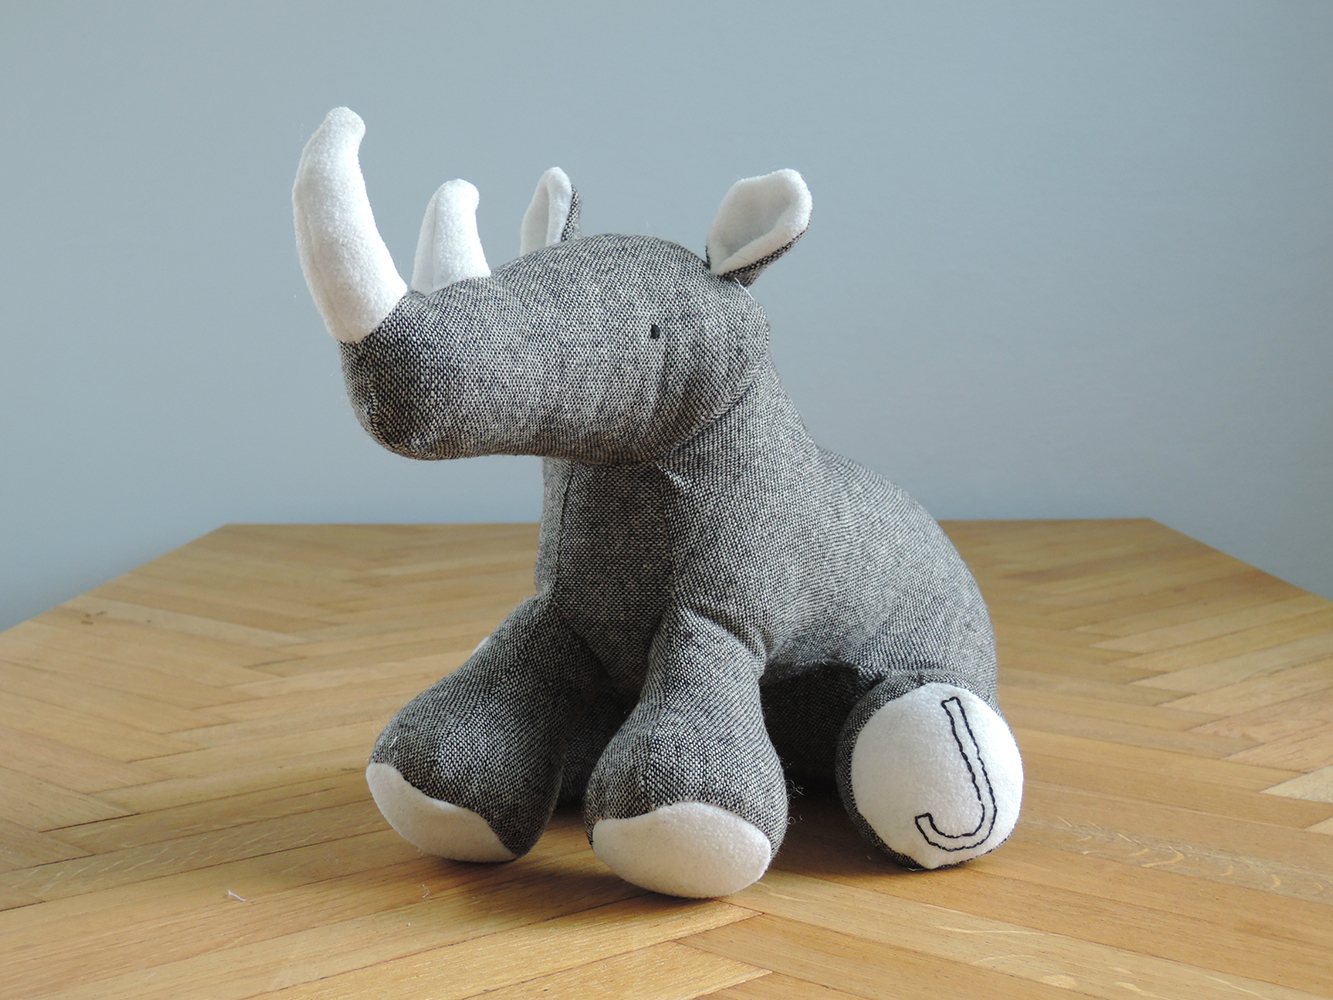
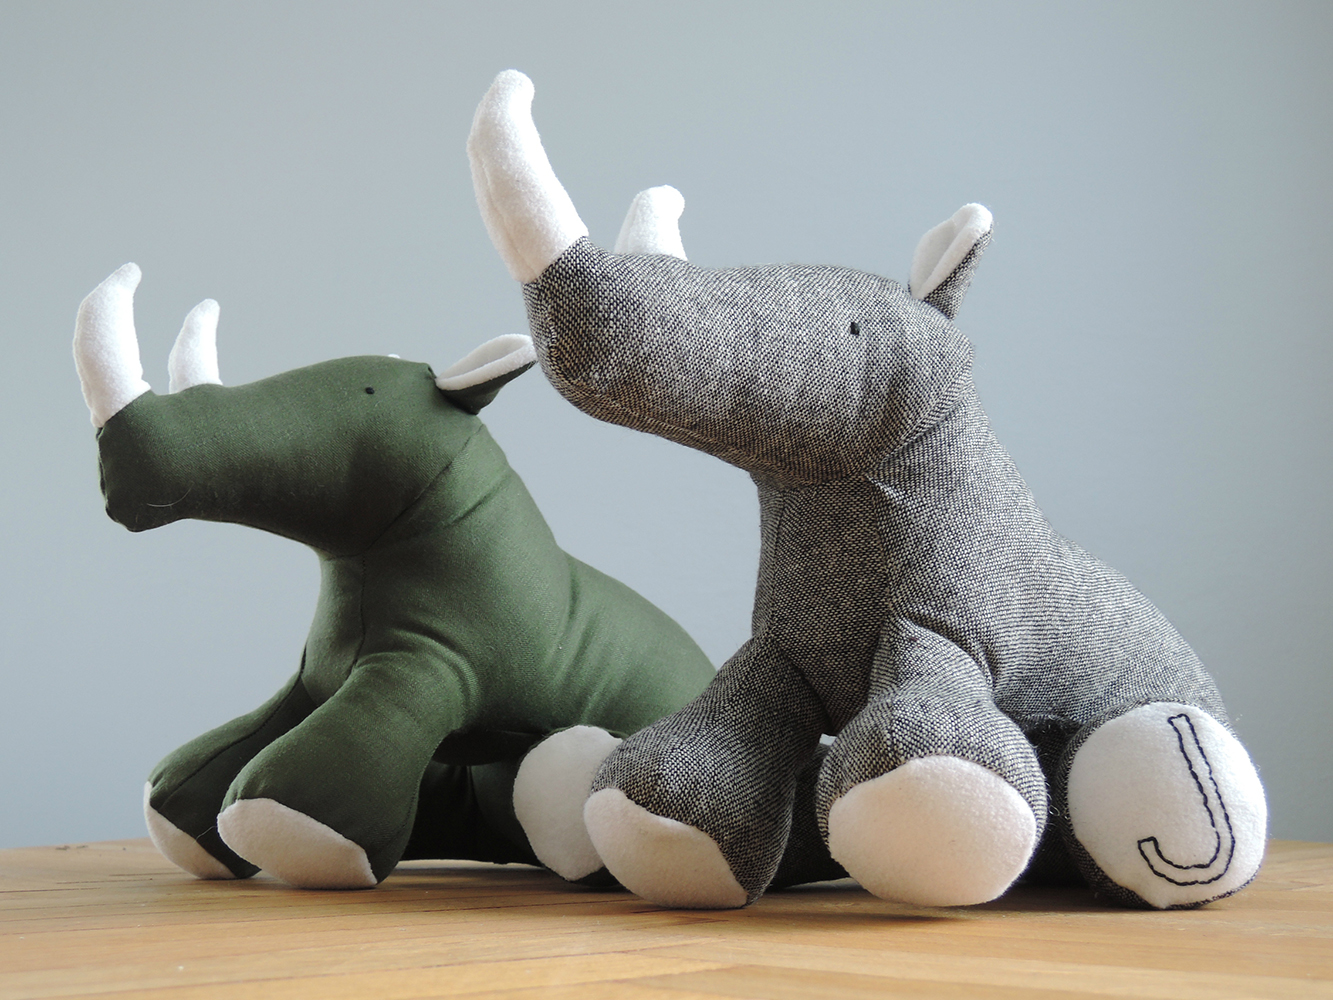
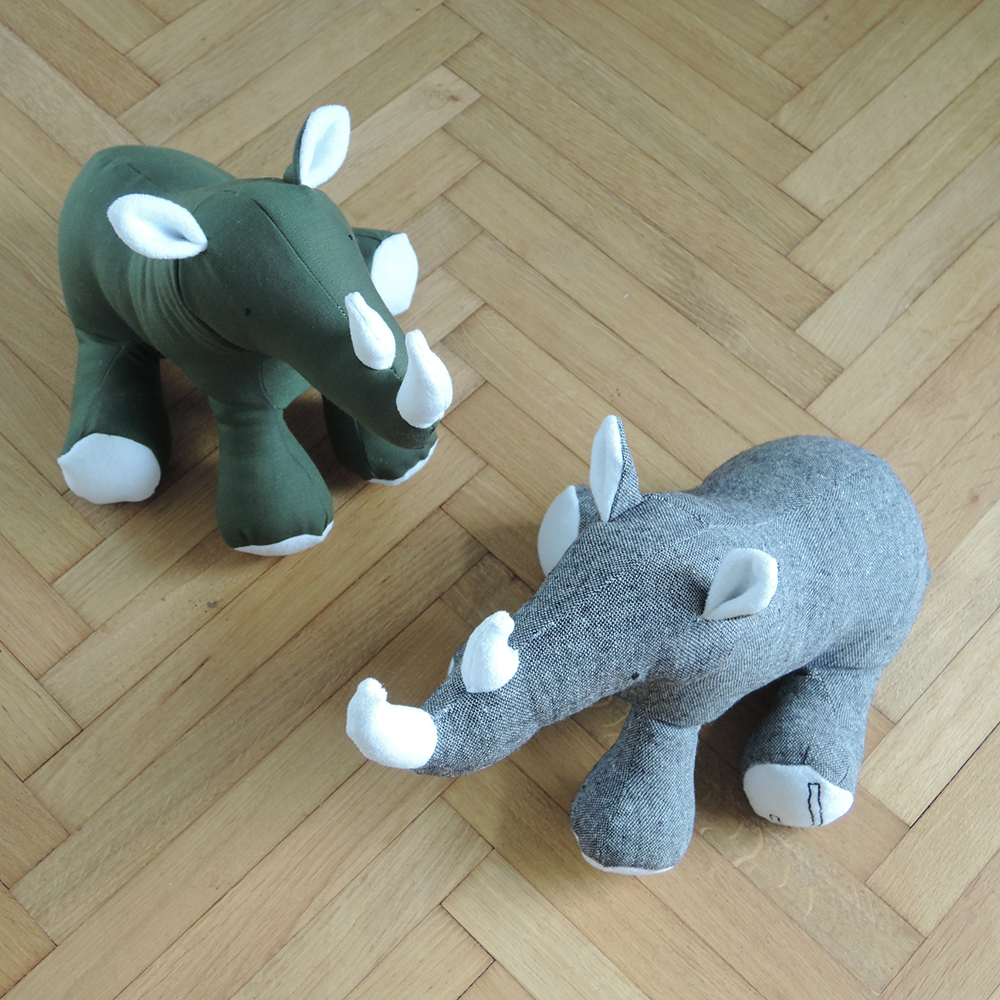
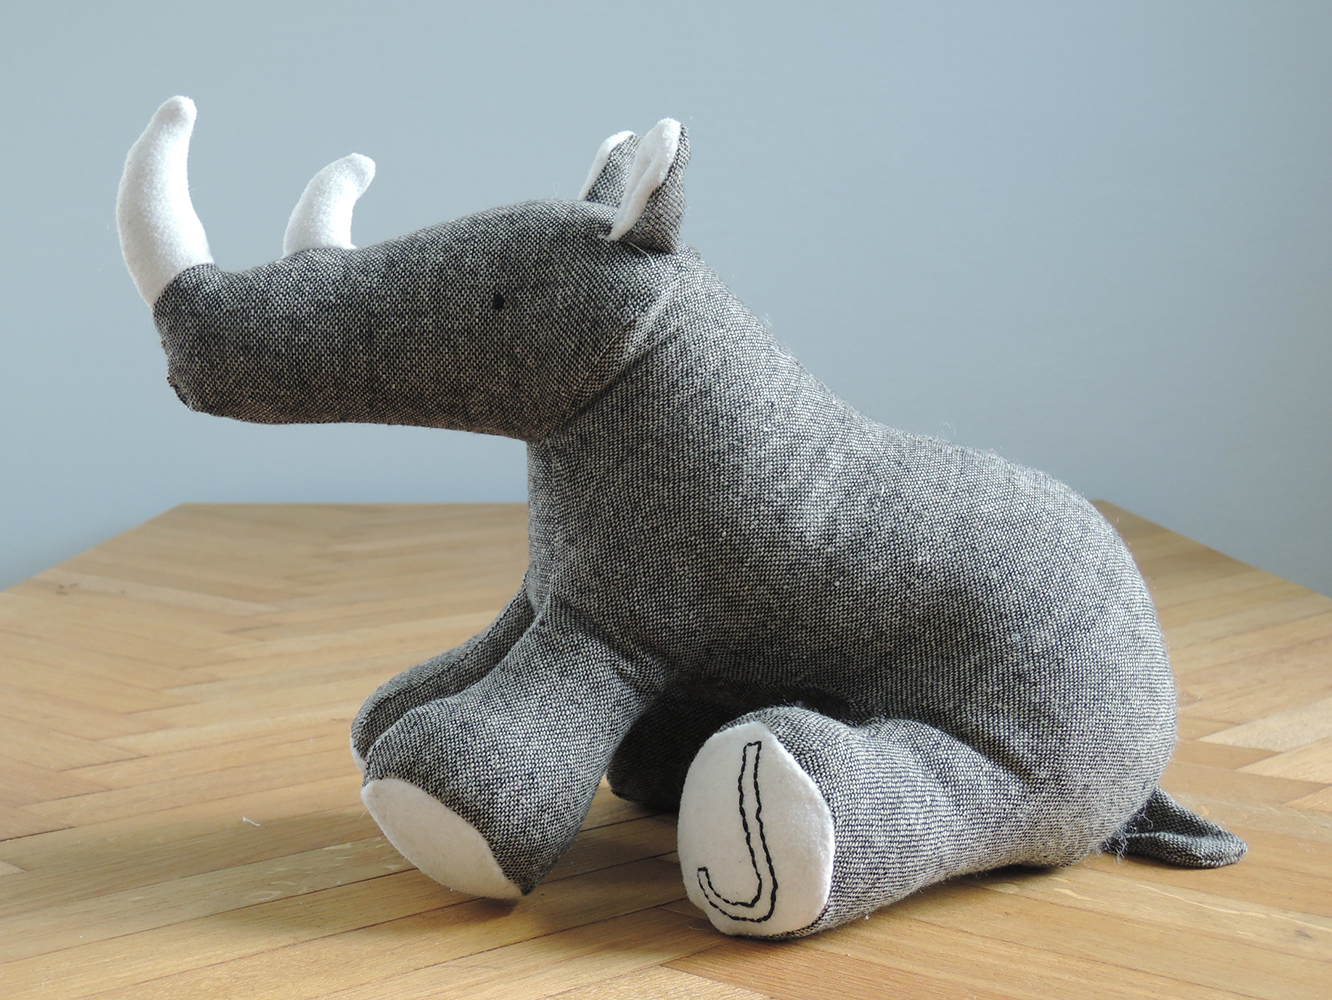
When family/friends birthdays come along I try always to give something handmade. My other passion, besides love of everything diy, is sewing. So that is how the little Mr. Rhino came to be. I was looking online for a tutorial or at least a pattern of a rhino, but I didn’t find anything I liked. I decided to make my own and share it if anyone is interested in making one. It is really not that hard as it seems.
The young little recipient of this particular Mr. Rhino has named his Tim. 🙂
Also, if you’re not best friends with your sewing machine, you can order it here. Just send me an email. 🙂 I can make one personalised with a stitched name or a letter.
Here we go!
Materials:
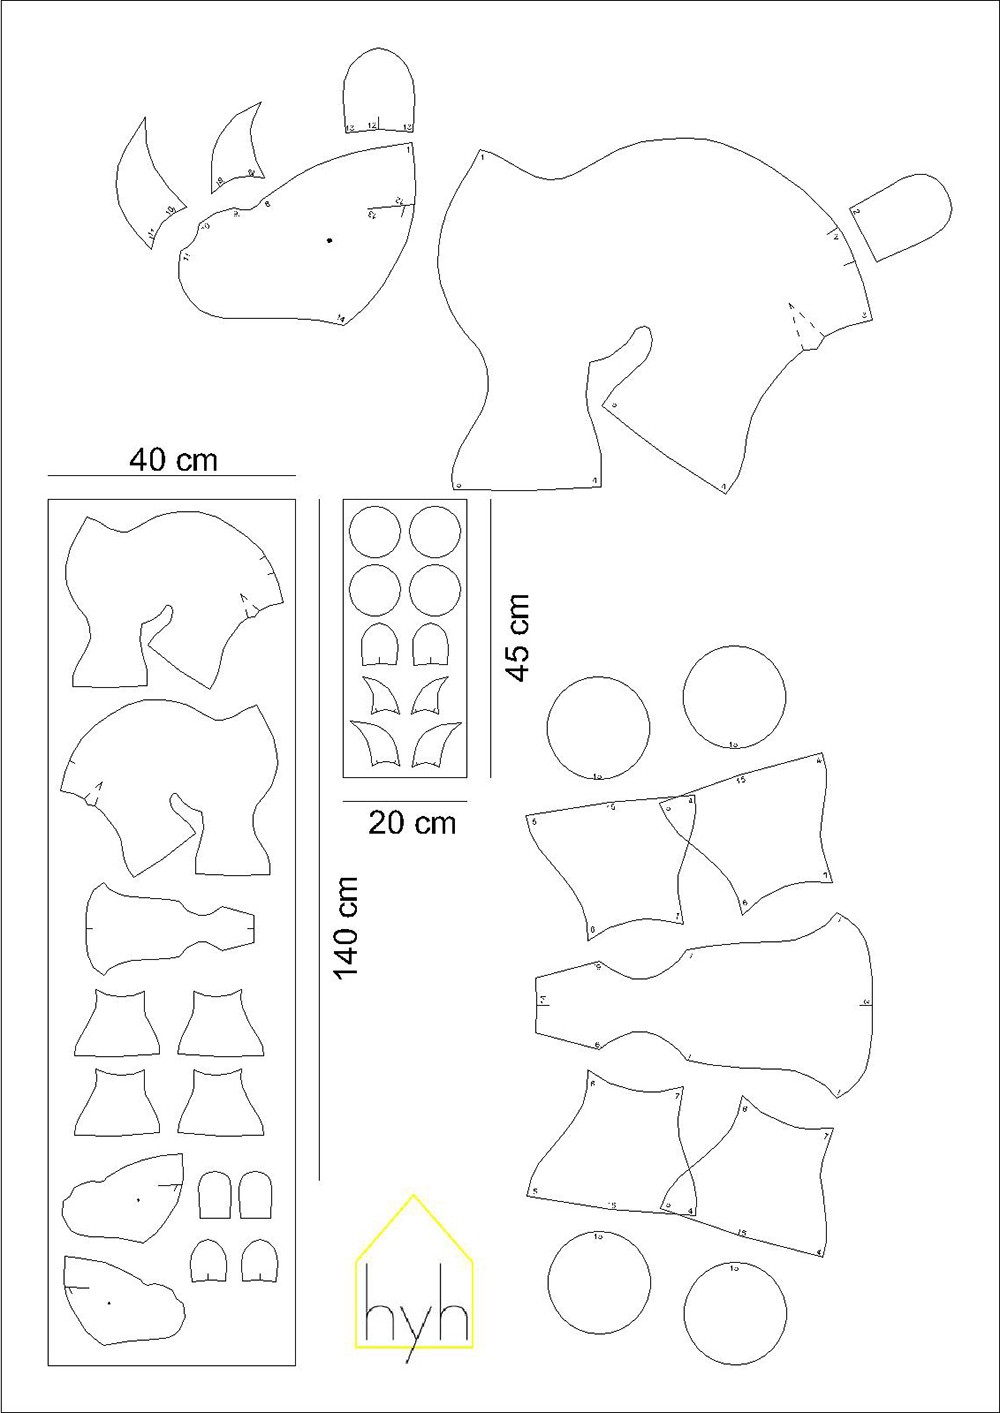
- 40 cm x 140 cm (16 x 56 inch) of fabric of your choice (use heavyweight fabric, so that Mr. Rhino will last longer)
- 20 cm x 45 cm (8 x 18 inch) of fabric in a different color for legs, ears and horns
- stuffing (I use the cheapest Ikea or Jysk pillows)
- a little strand of yarn for eyes and lettering
Instructions:
1. Wash your fabric before you start your project. It is possible that the fabric will shrink or bleed a little. Iron it after it has dried.
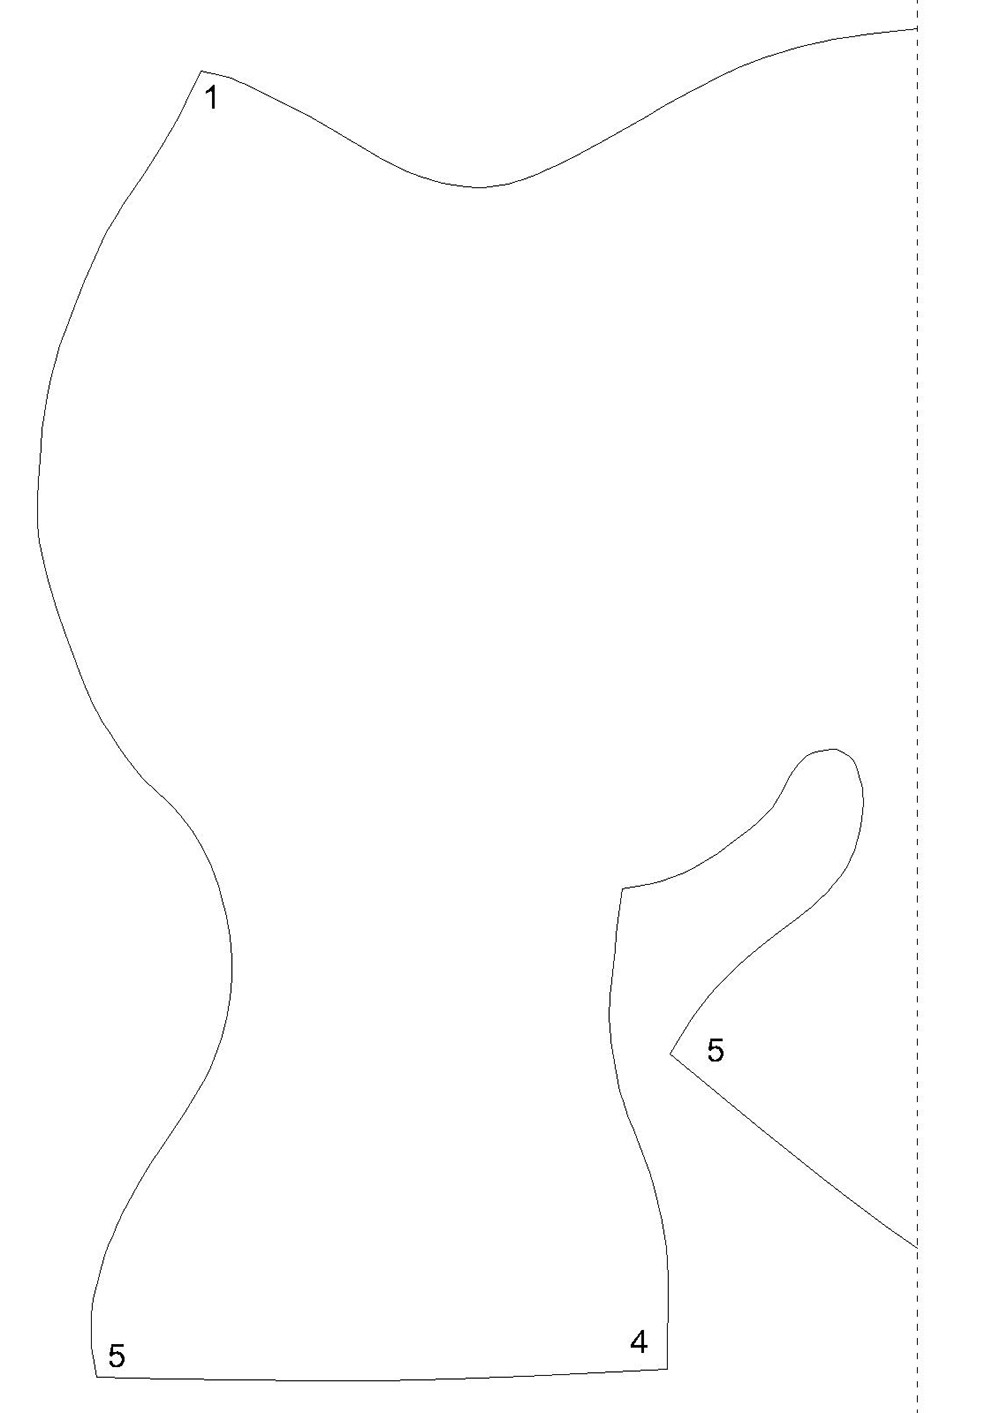
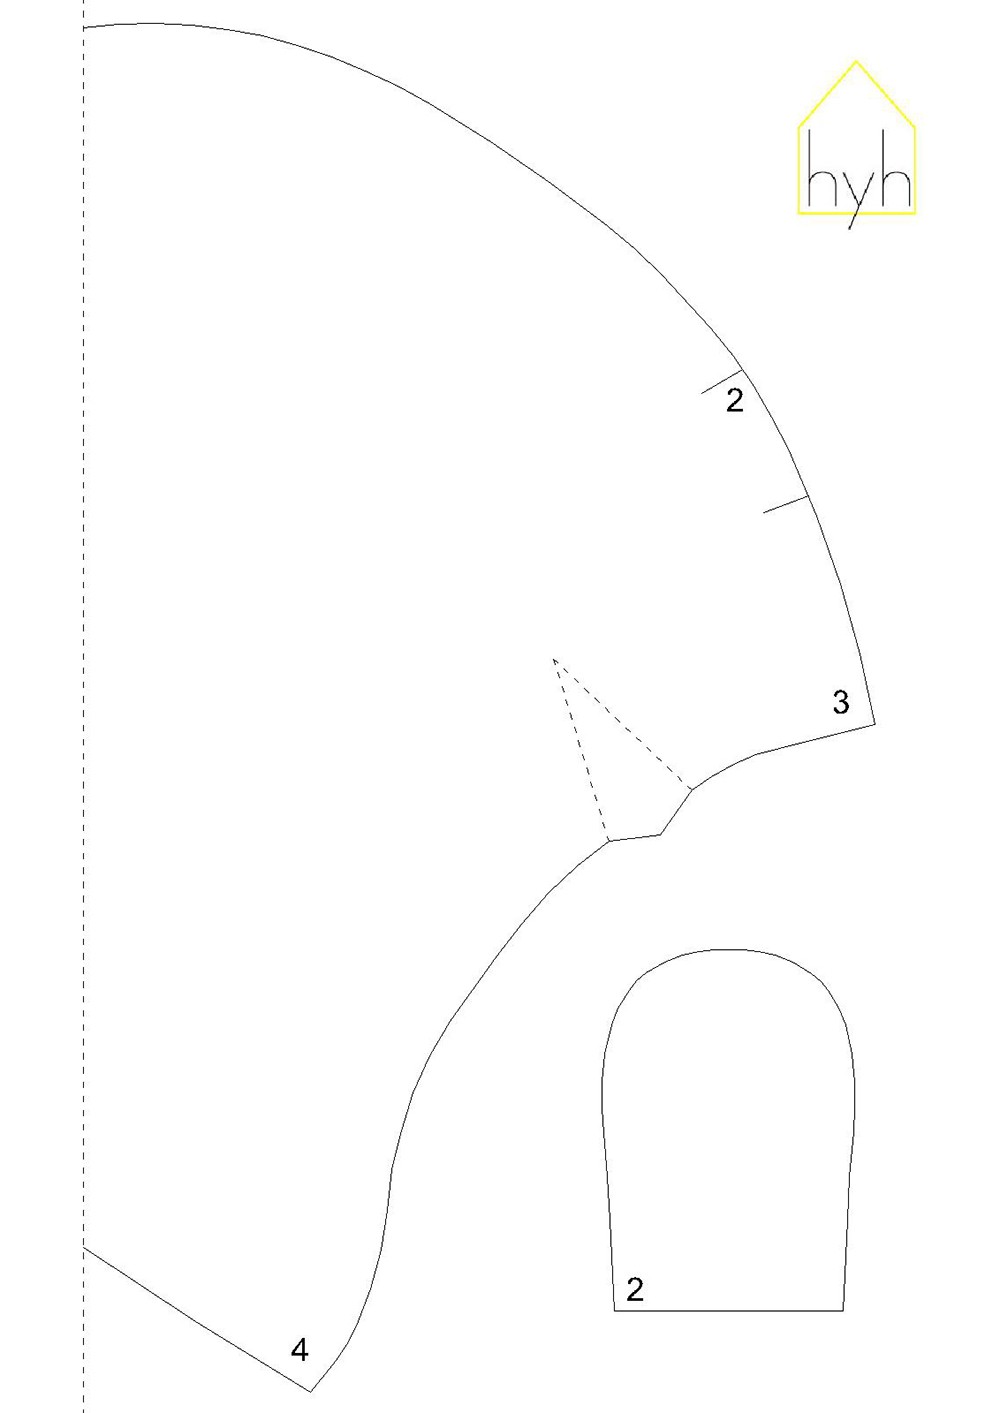
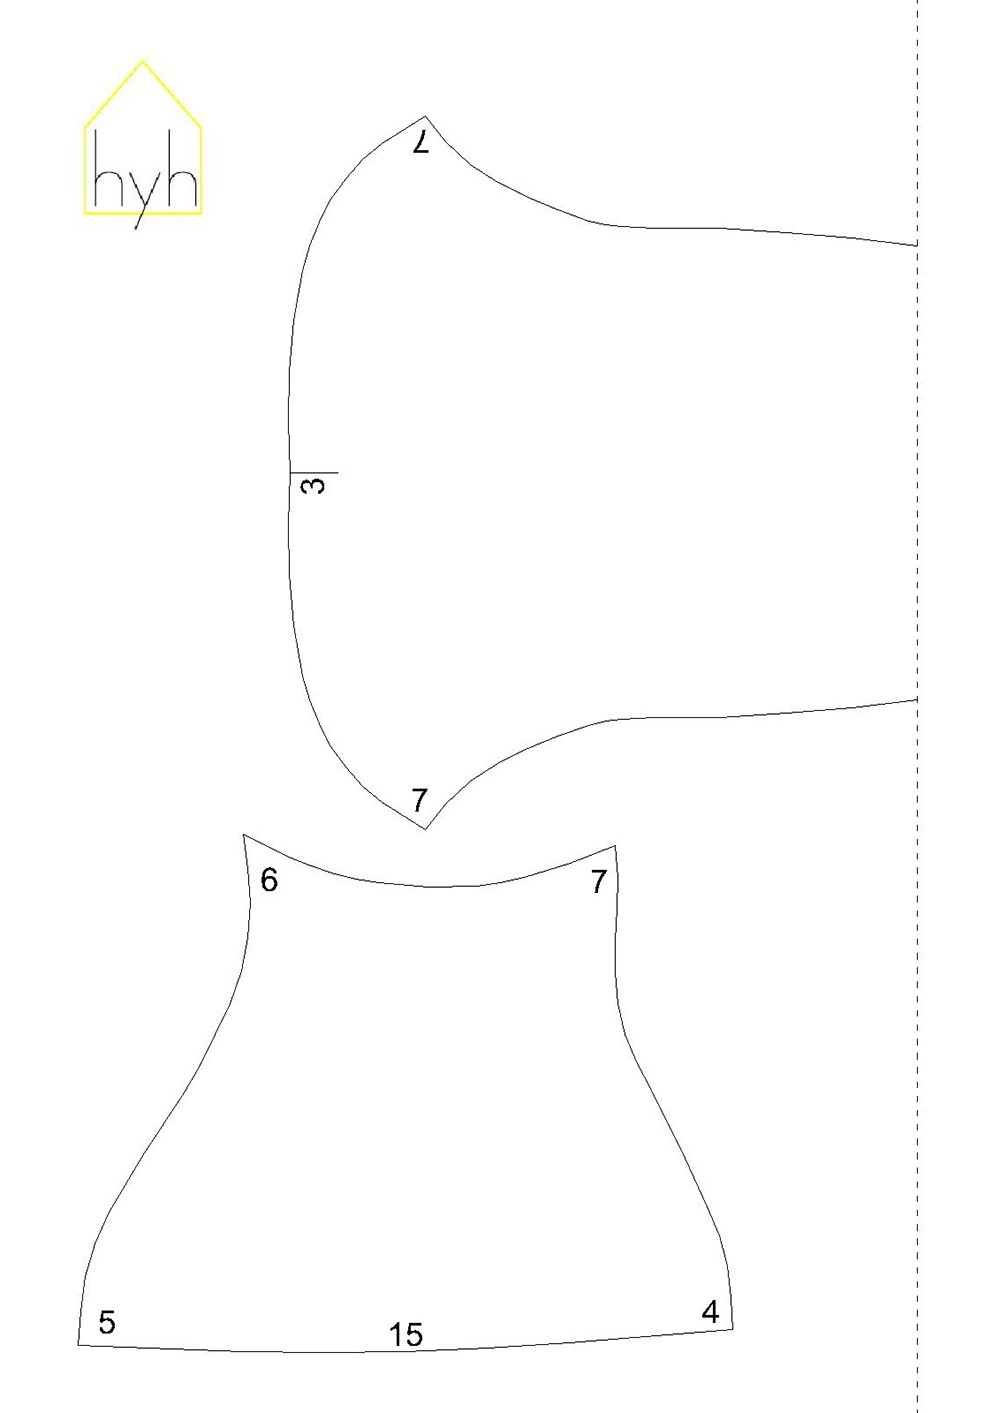
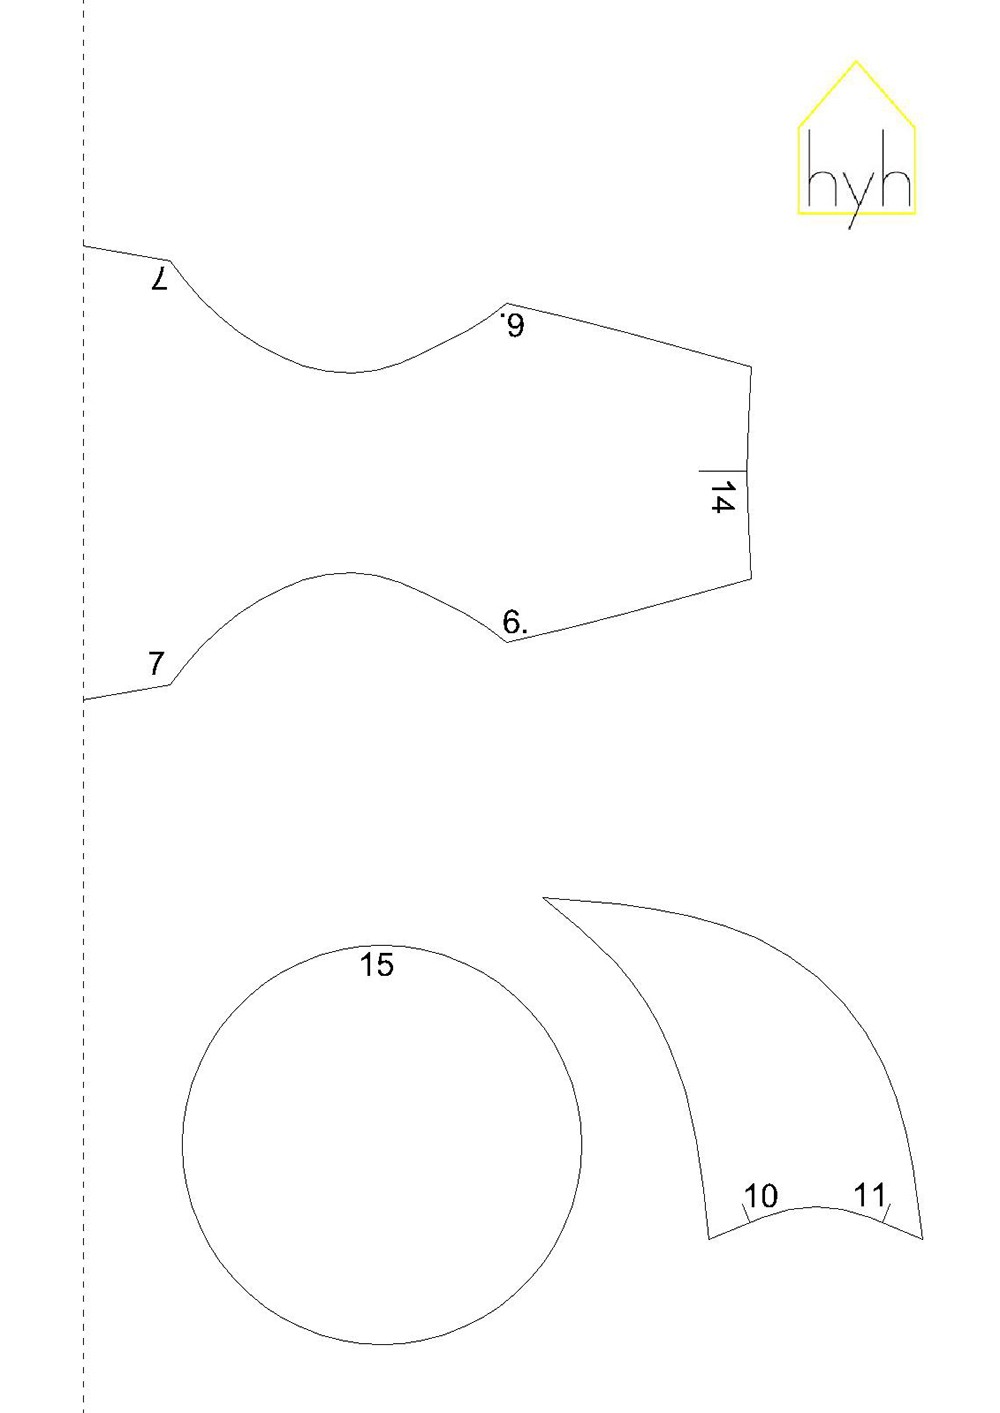
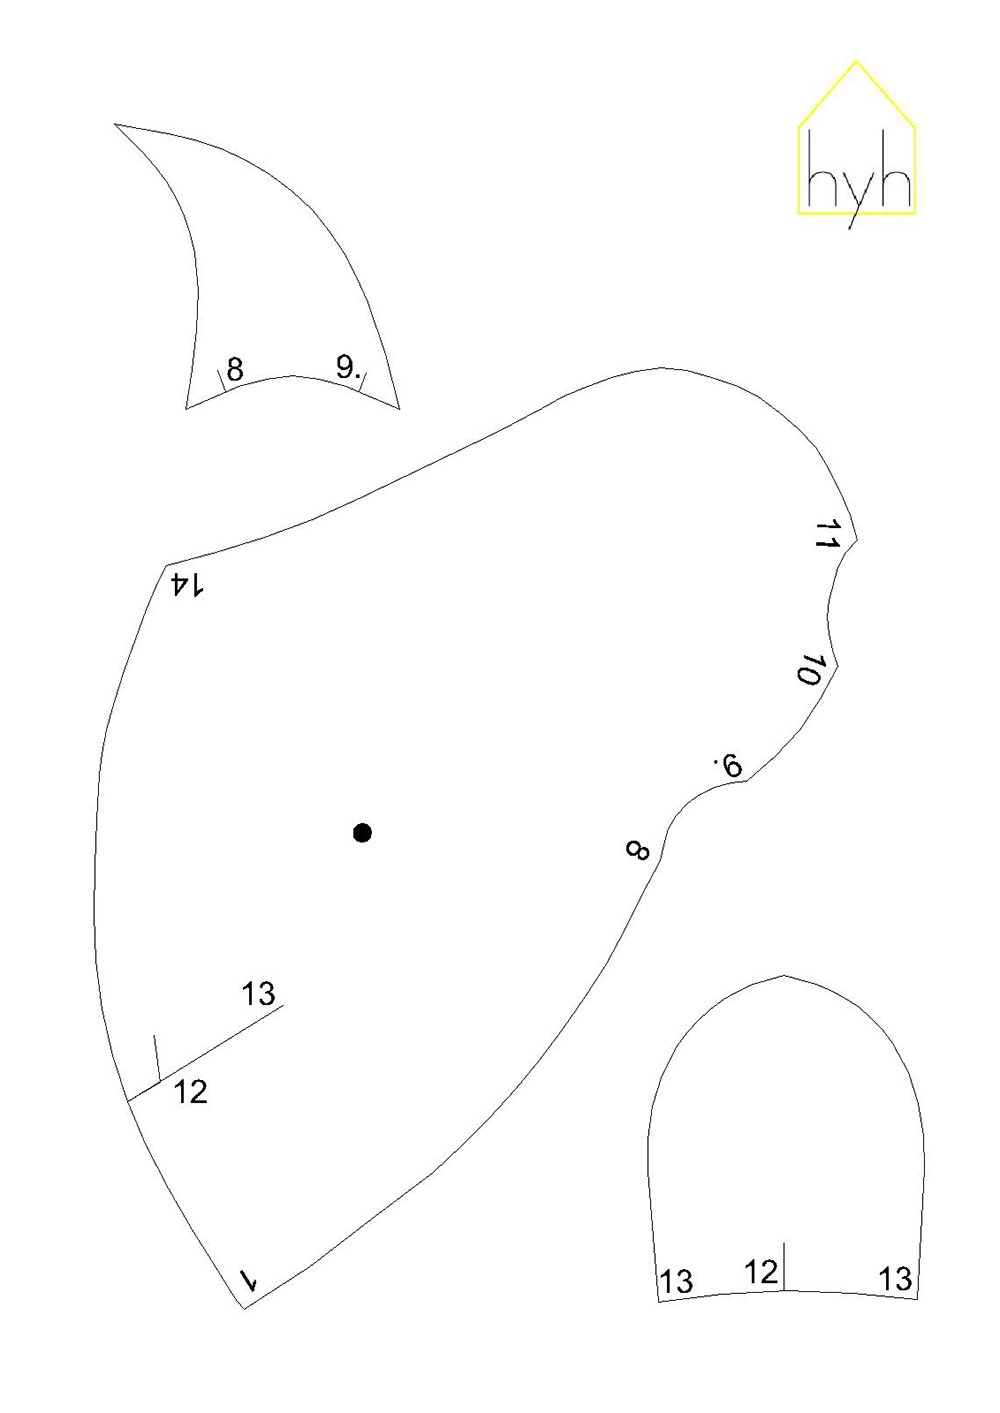
2. Print the pattern that is on the bottom of the post on five A4 sheets of paper. Cut it out and tape together the parts for the body and belly.
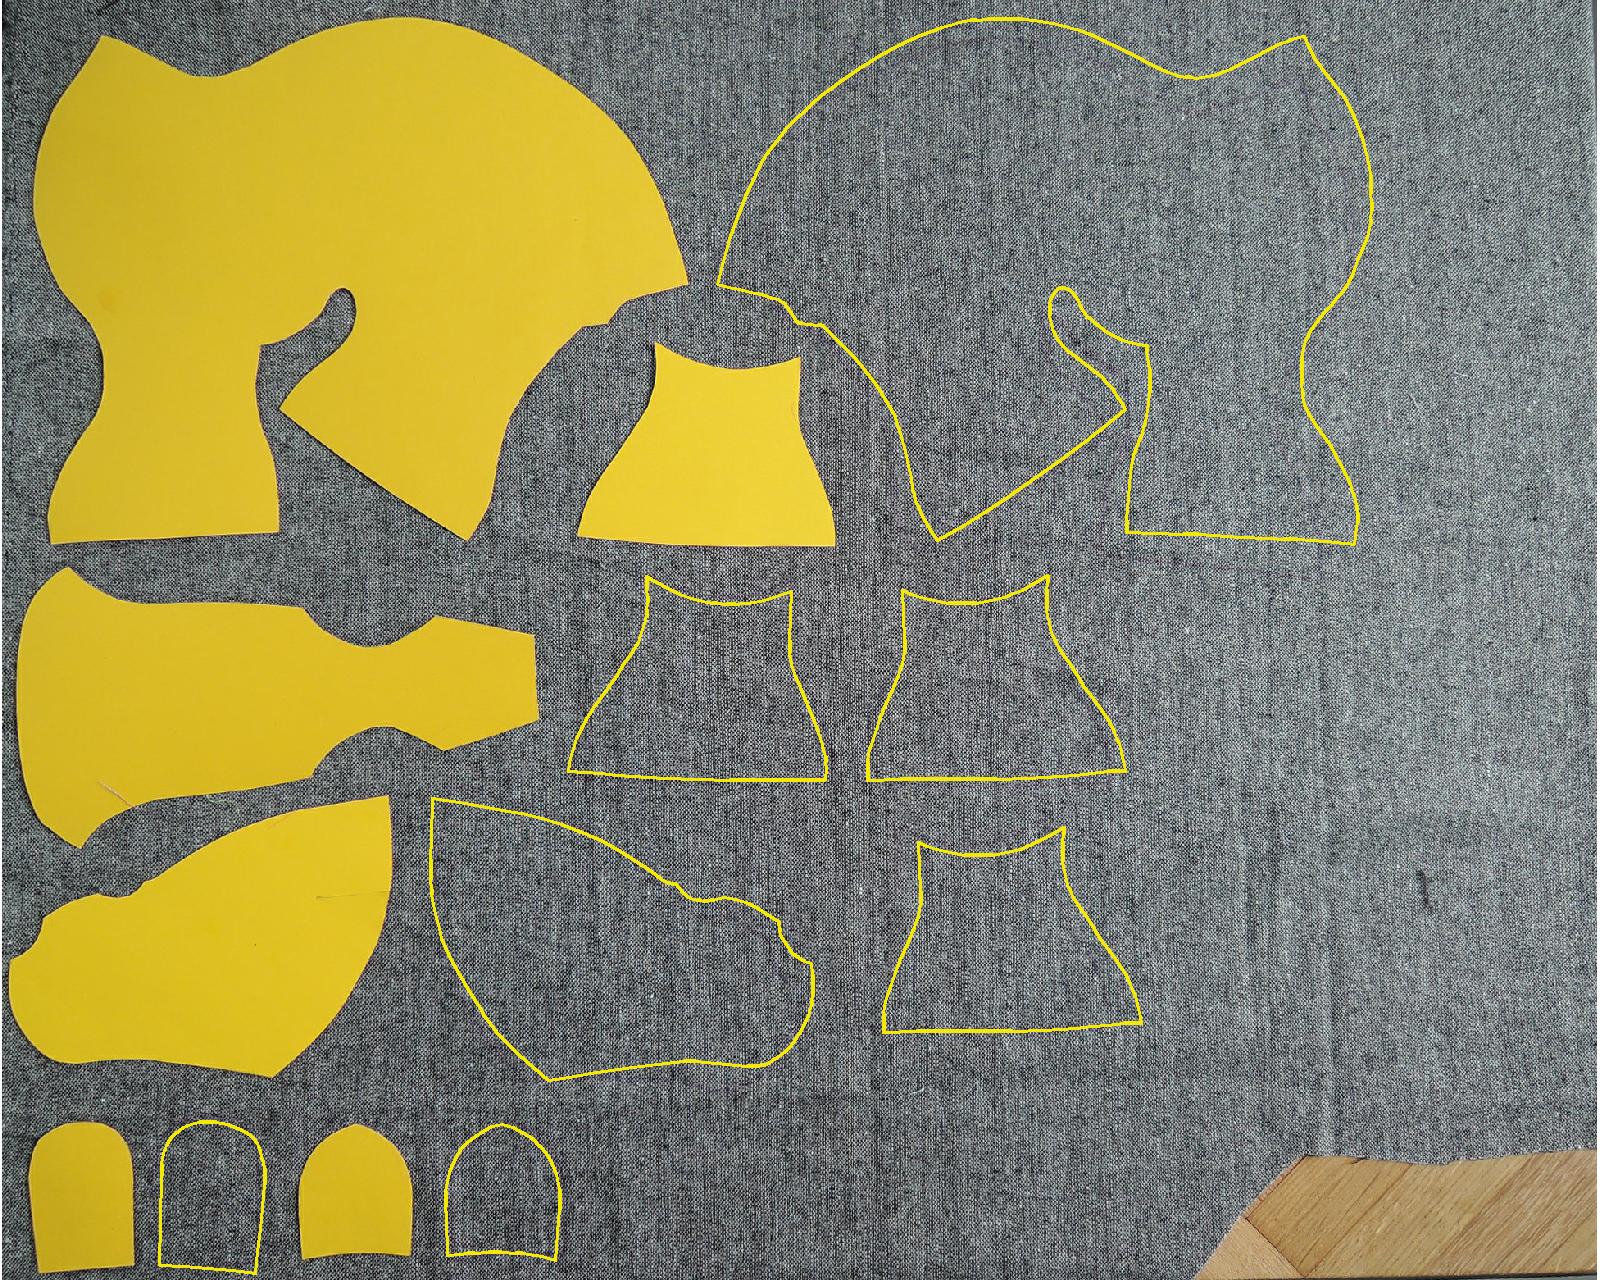
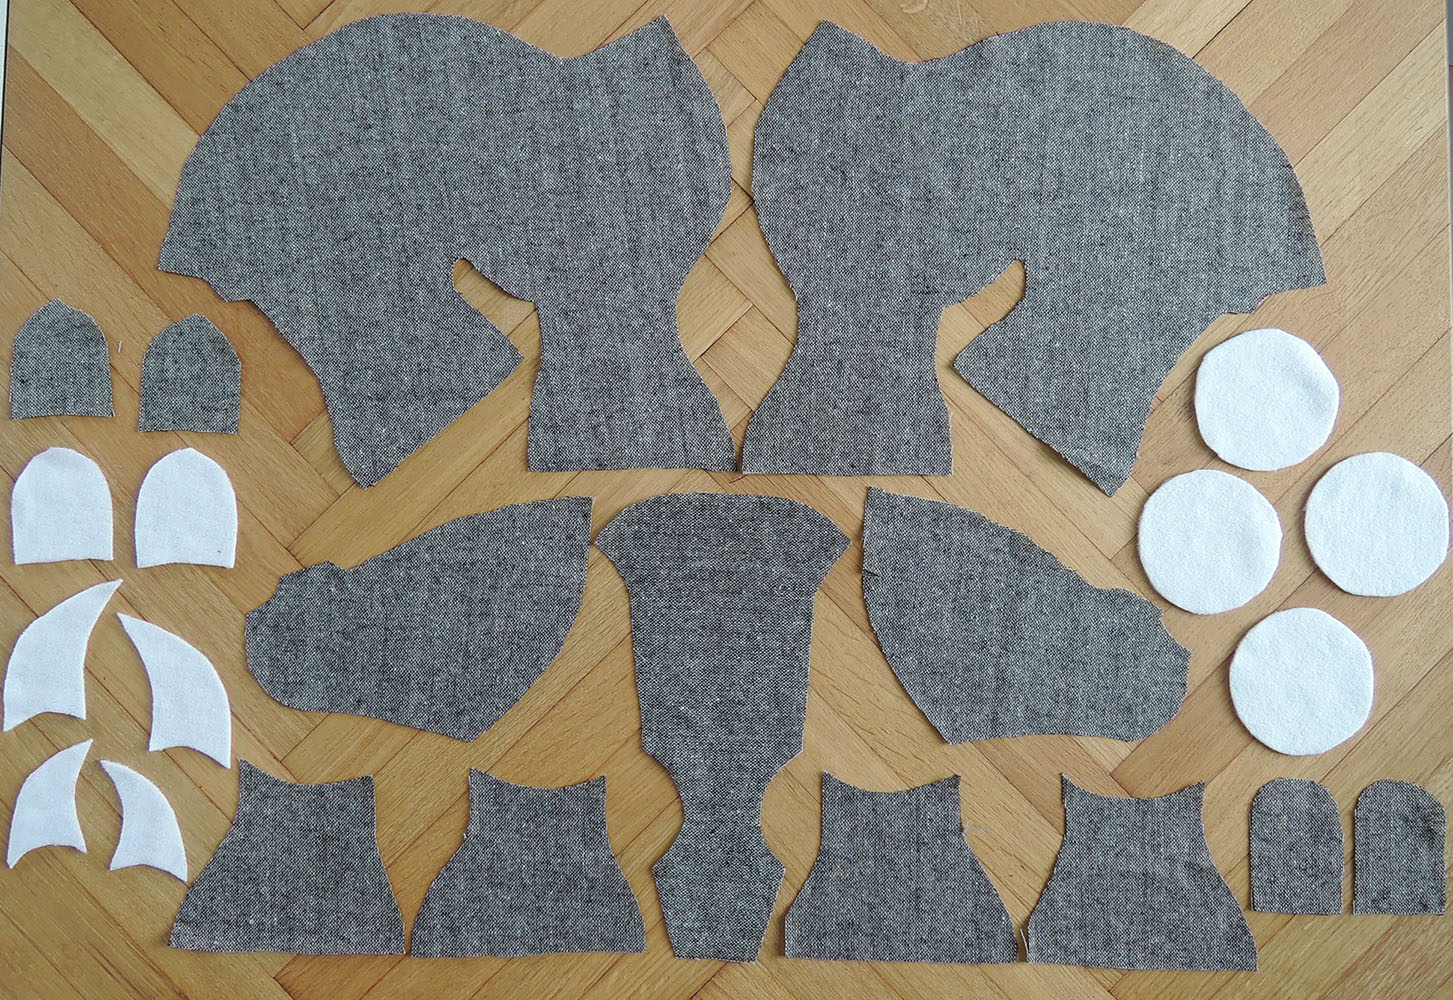
3. Lay down your ironed piece of fabric and place your pattern pieces on it. The pattern already contains seam allowance. Don’t forget to mirror the pieces of the body, the head and the legs. With a self erasing pen or a chalk transfer the pattern to the fabric. Cut it out.
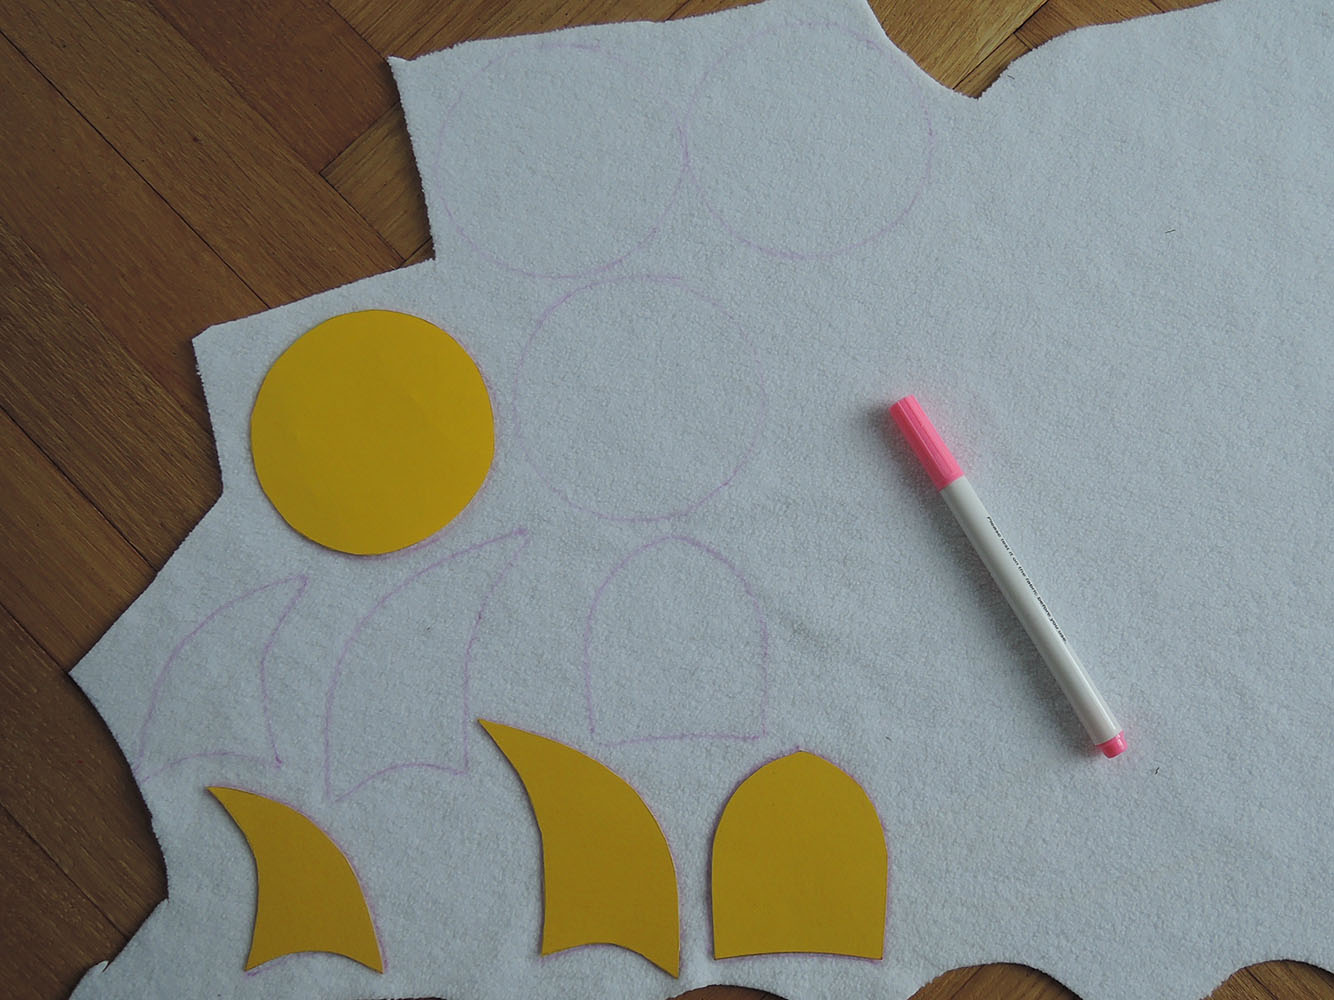
4. Repeat the process with the fabric for the legs, ears and horns. For the ears cut two pieces of each fabric.
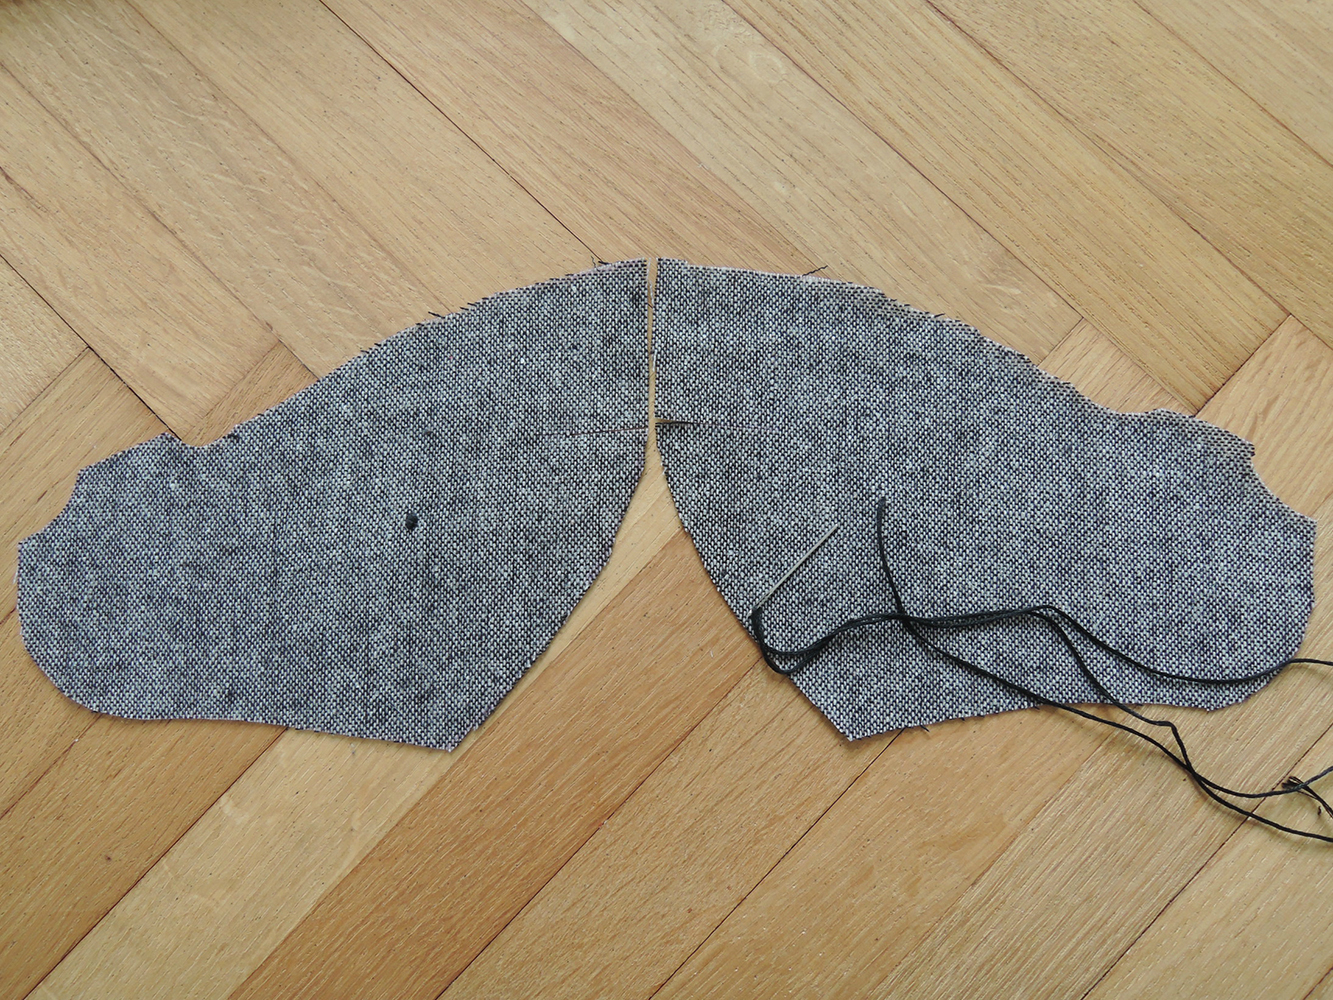
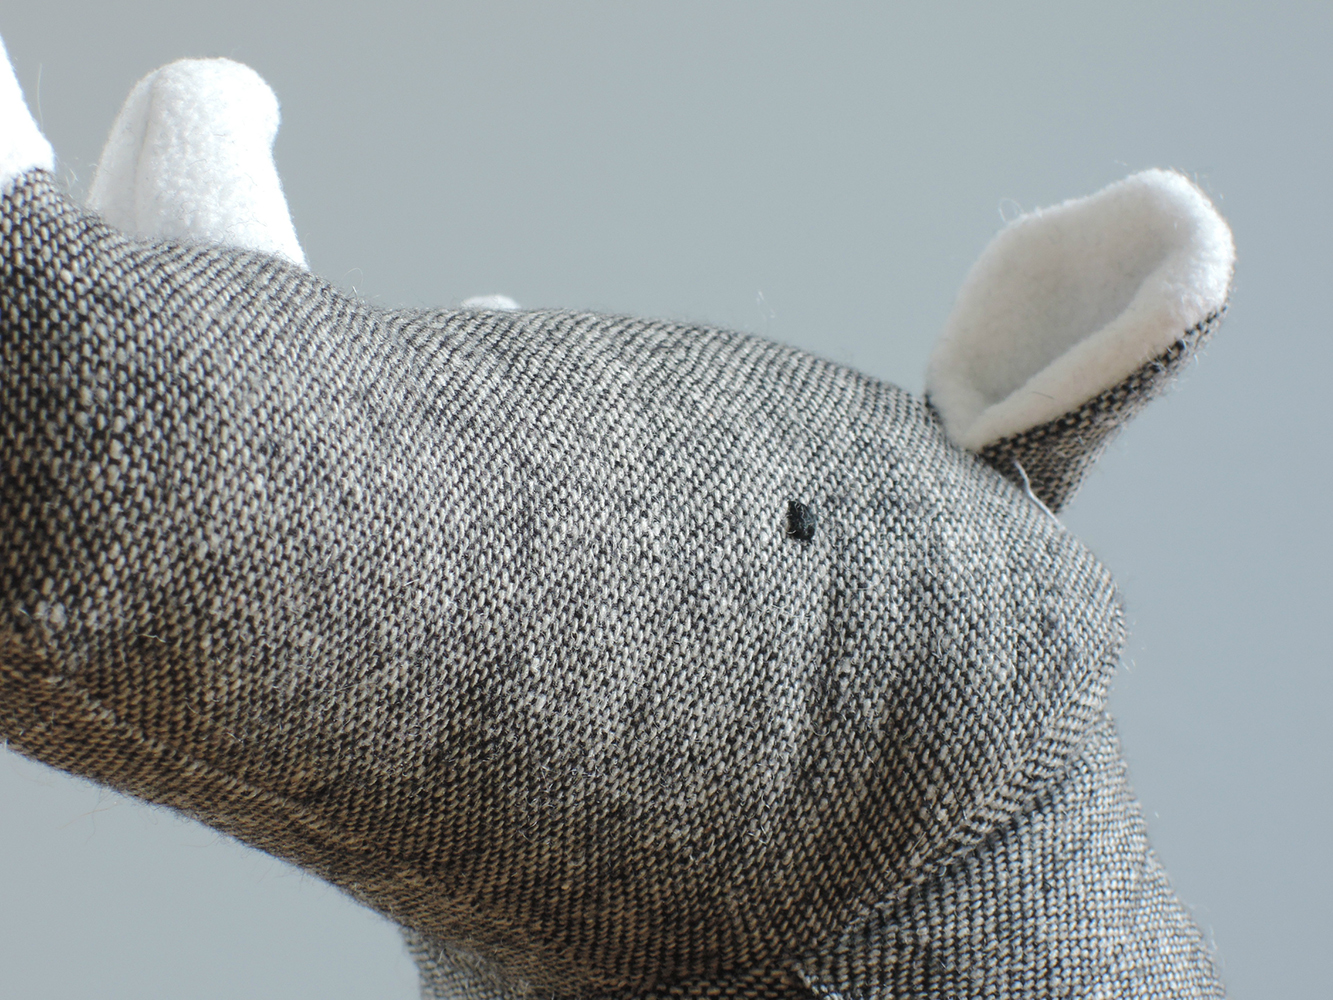
5. Before sewing the pieces for the head together, stitch the eyes on the marked spot. You can even sew on buttons if you would like. But I like to keep my Mr. Rhino toddler safe.
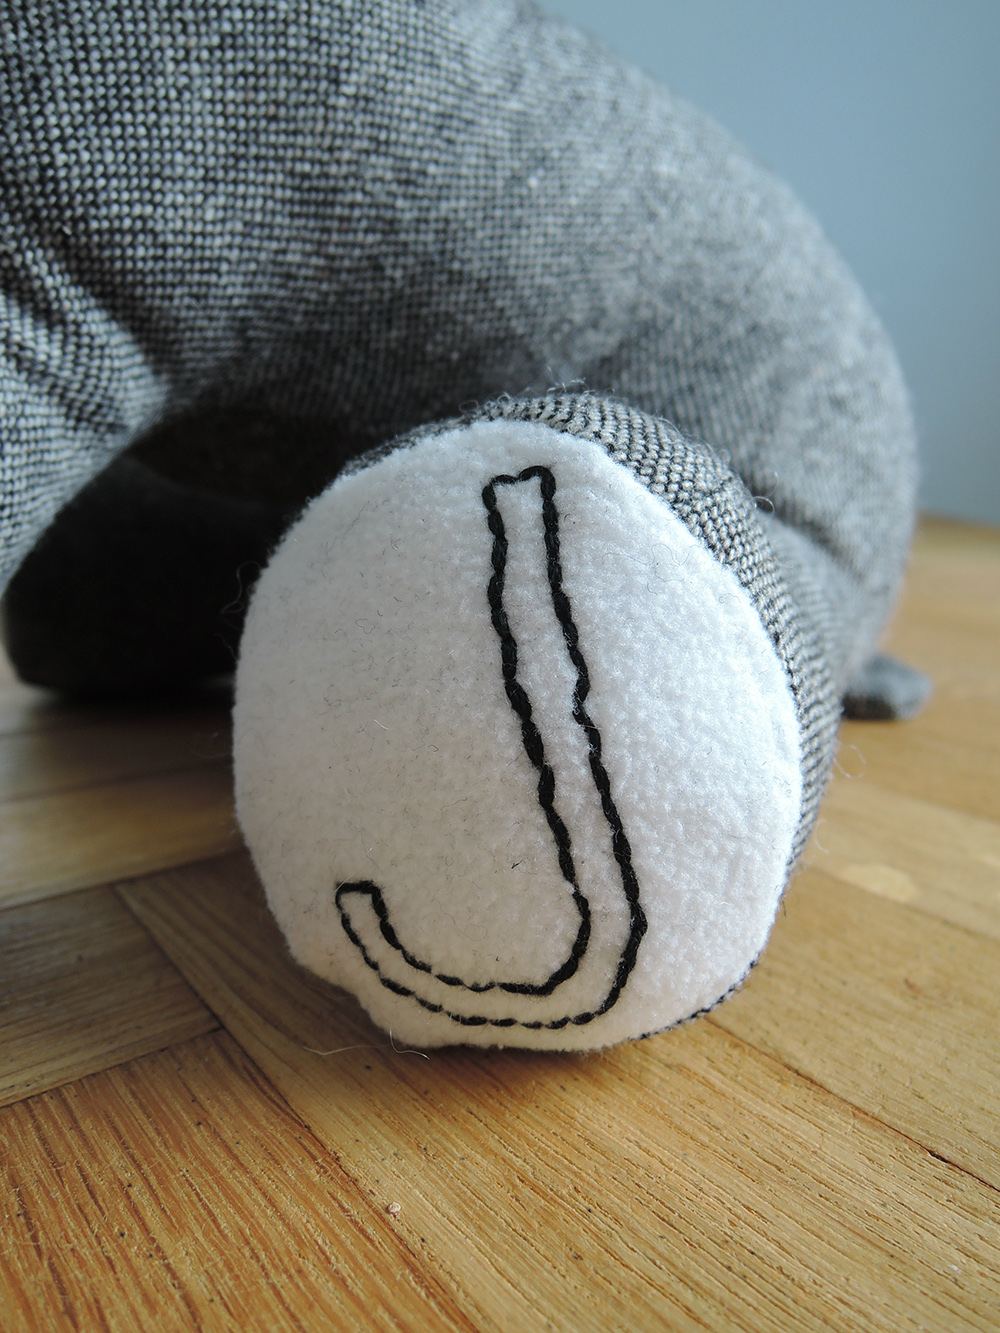
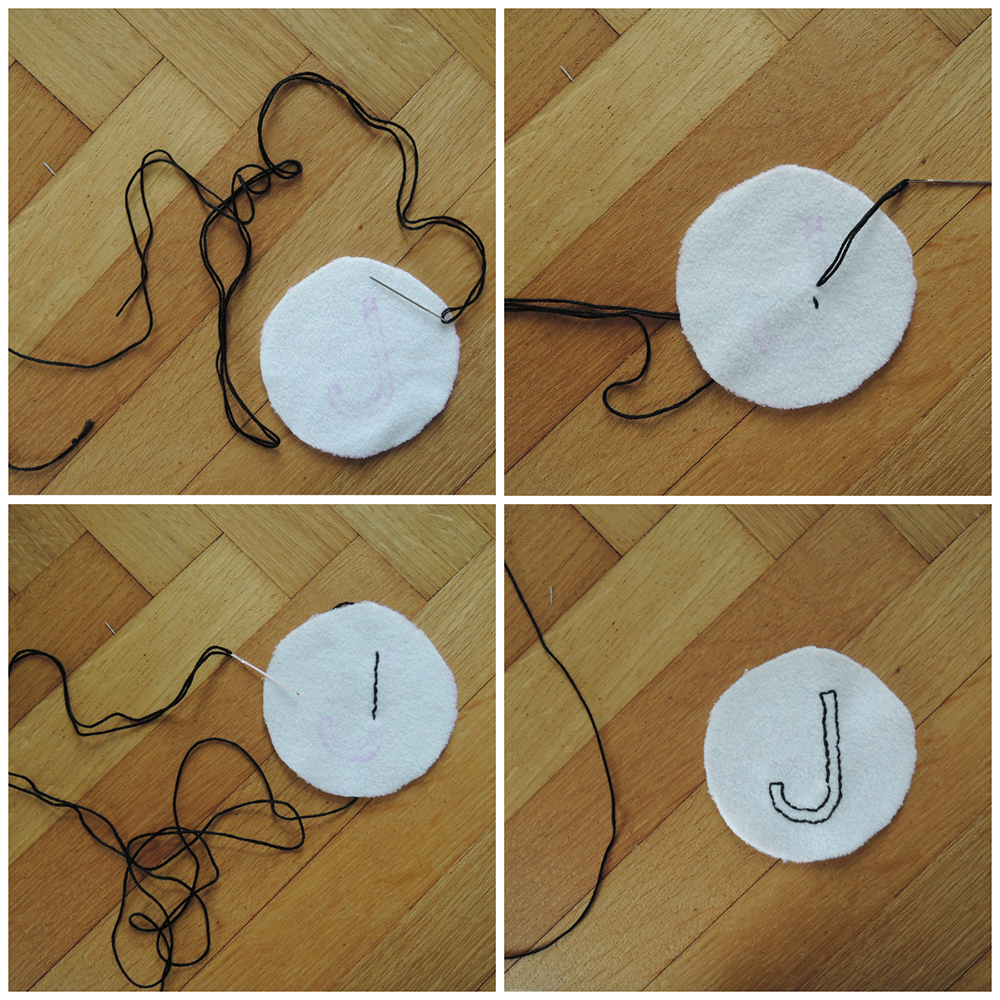
6. You can skip this part if you like. On one of the circles for the legs draw a letter or a name with a self erasing pen. Then stitch the letter using a back stitch with a yarn and an embroidery needle.
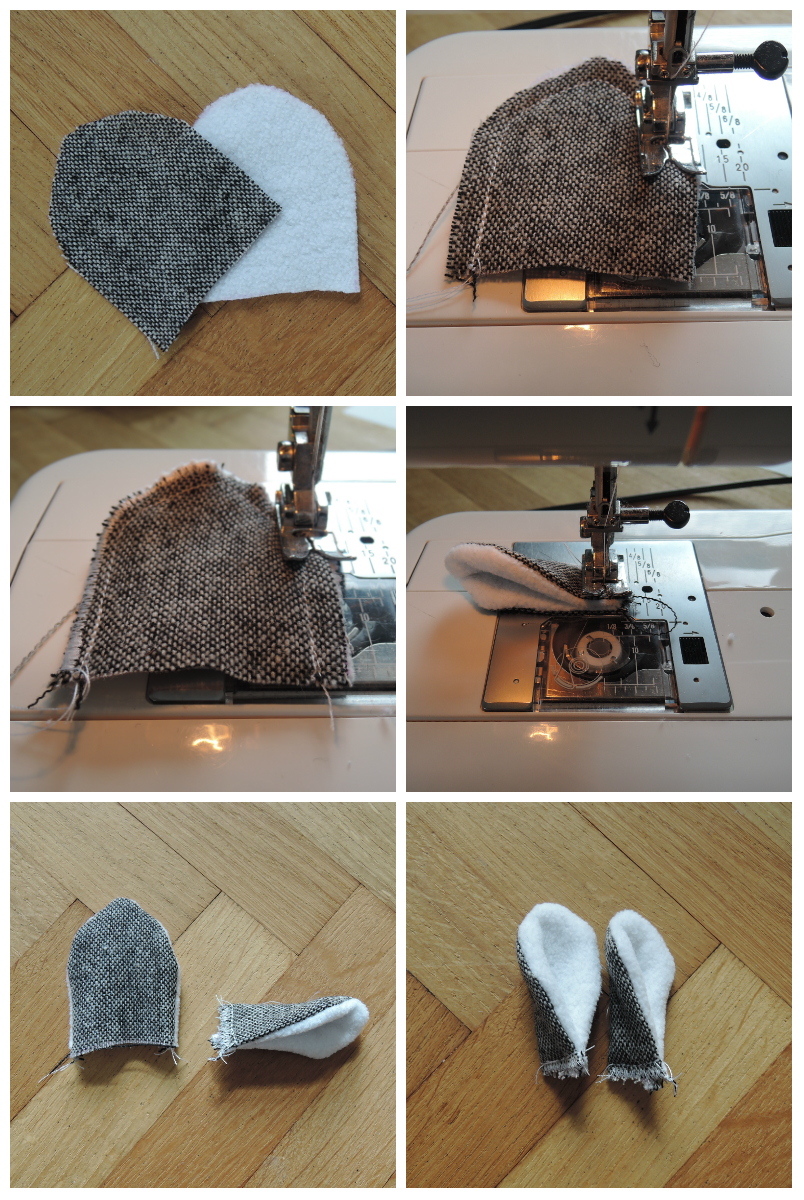
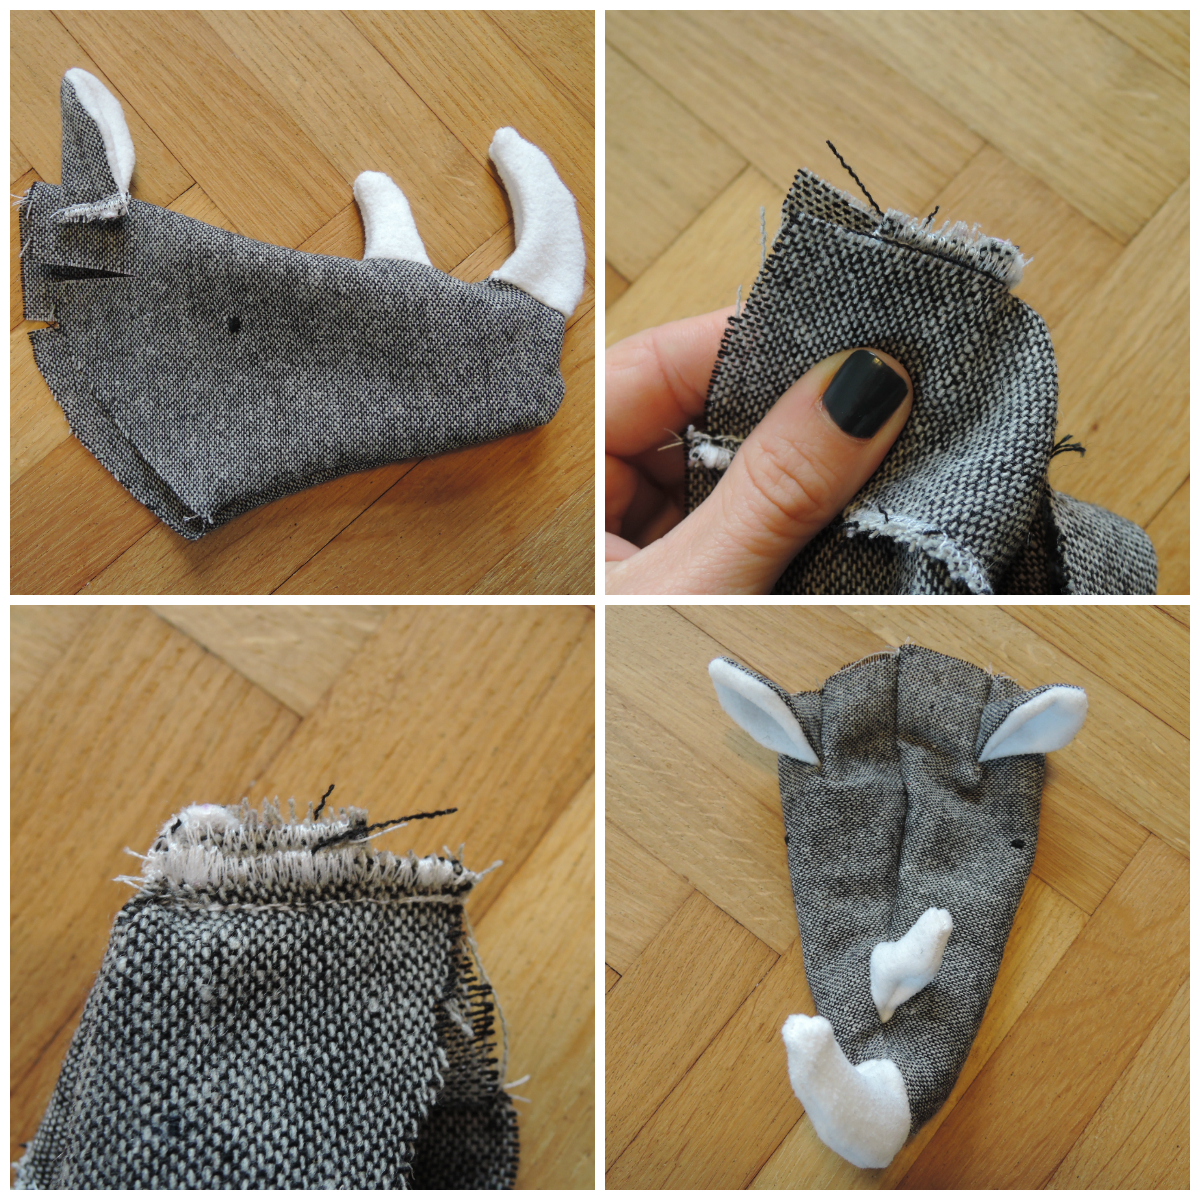
7. Now it is time for the ears. Take one of each pieces for the ears and put them right sides together and sew around the sides (but not the bottom) with about a 1 cm (1/4 inch) seam allowance. I like to finish all the parts of the toys with a zig zag stitch to keep the fabric from tearing and to strengthen the whole toy. Turn the ear right side out and press the seam. Fold the ear in half and stitch to hold the fold in place. Repeat for the other one. Set them aside.
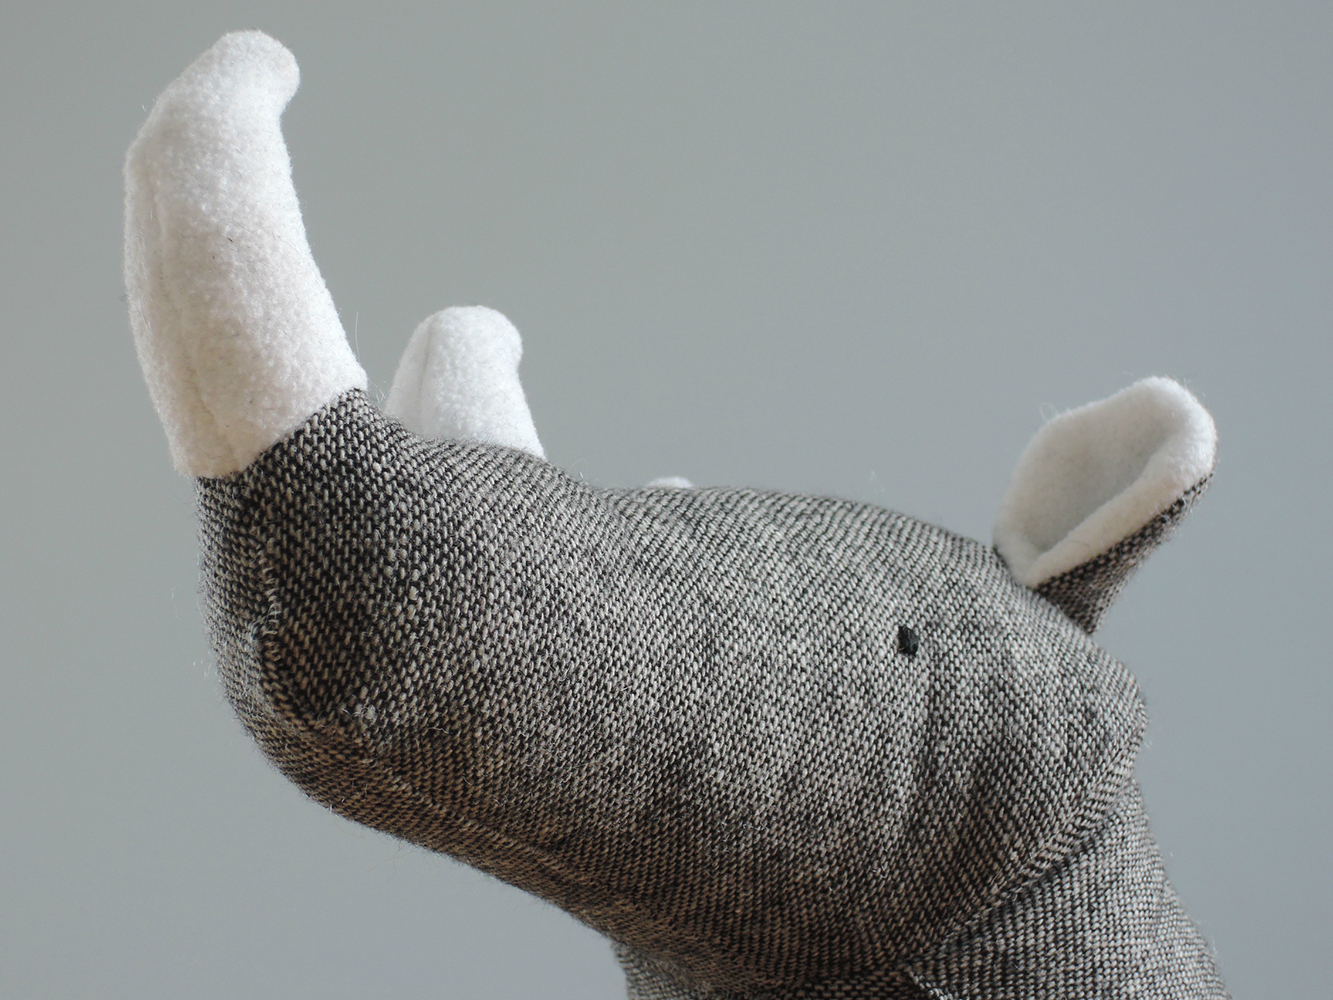
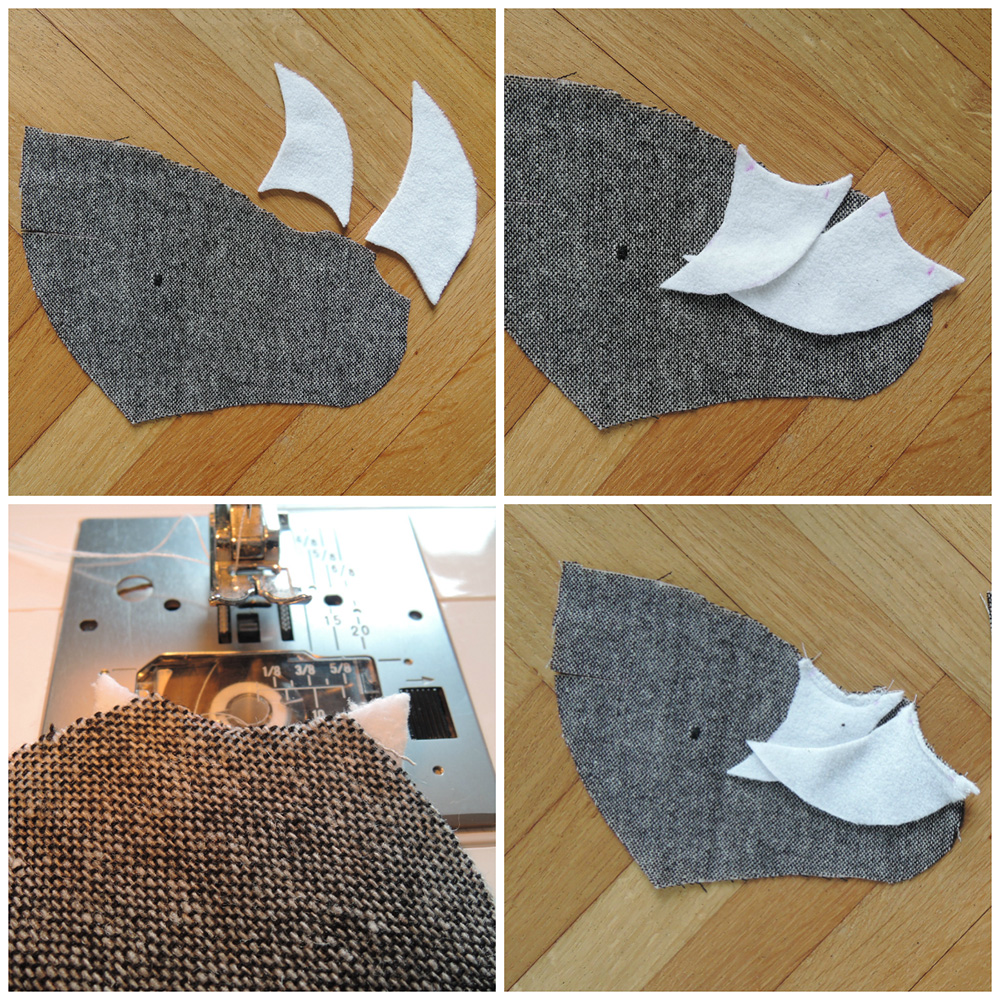
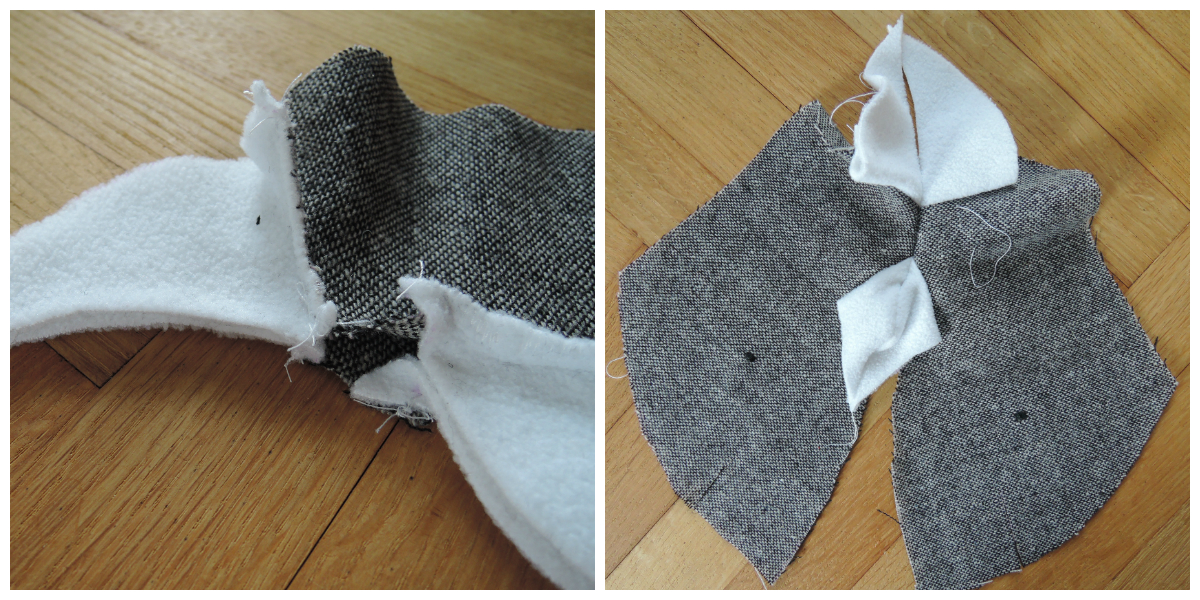
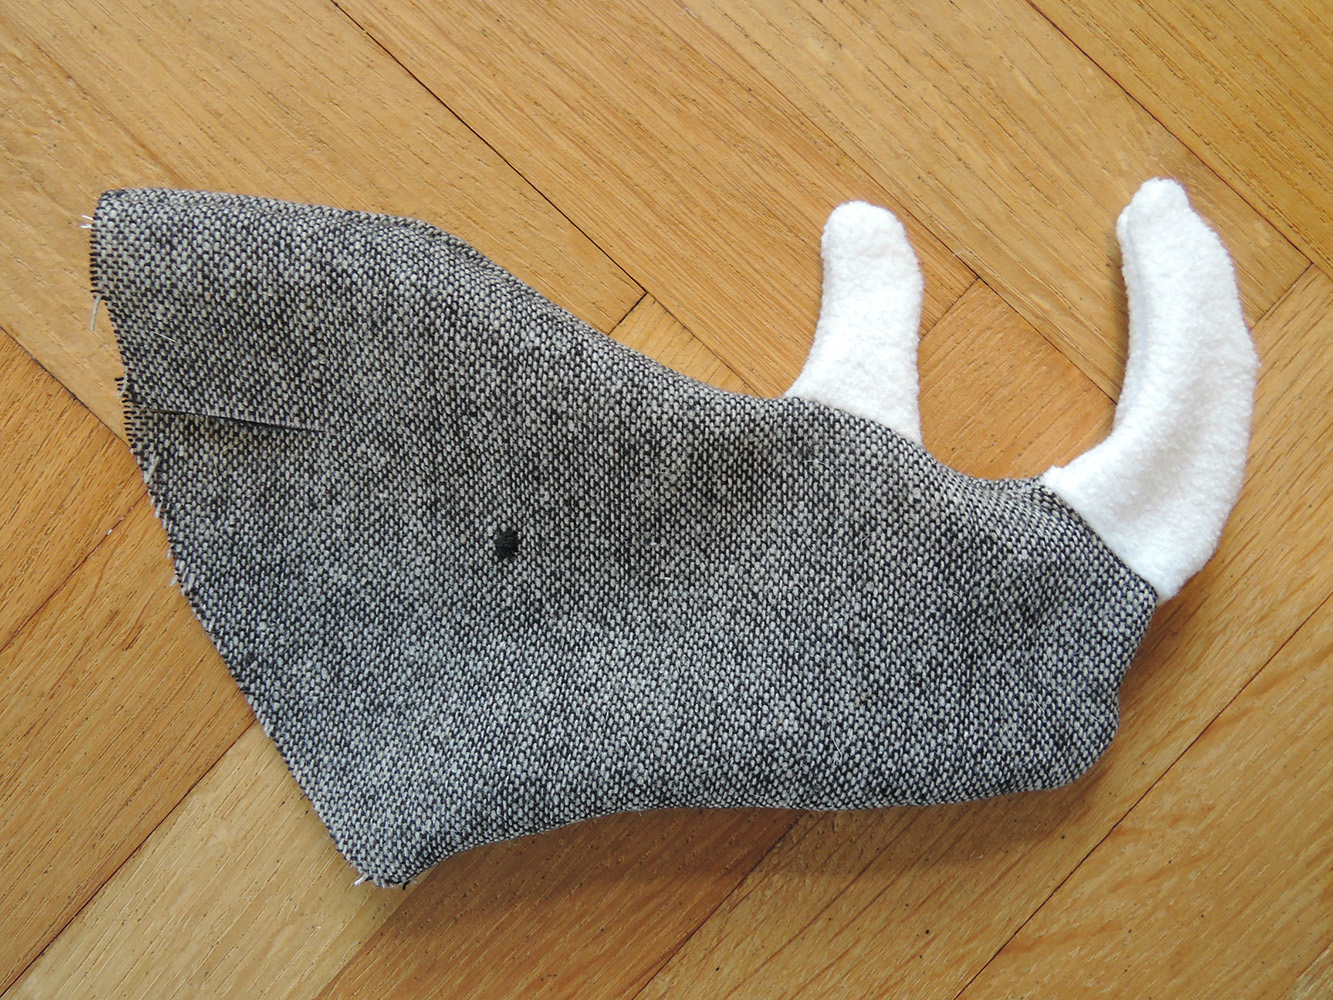
8. Take one small and one big horn. Turn them upside down and set them right sides together with one side of the head. Sew along the curved line with a 1 cm (1/4 inch) seam allowance and follow with a zig zag stitch. Repeat for the other side.
9. Flat out the seams and set both pieces of the head right sides together. Match the little horn to little horn and big horn to big horn. Be careful to align the seams together. They are the most visible when the toy is finished. This is the hardest part of this tutorial. I promise! I always sew just a little bit, from the middle of the little horn to the middle of the big horn. Just to make sure they are aligned and if they are not to tear the seam and redo it.
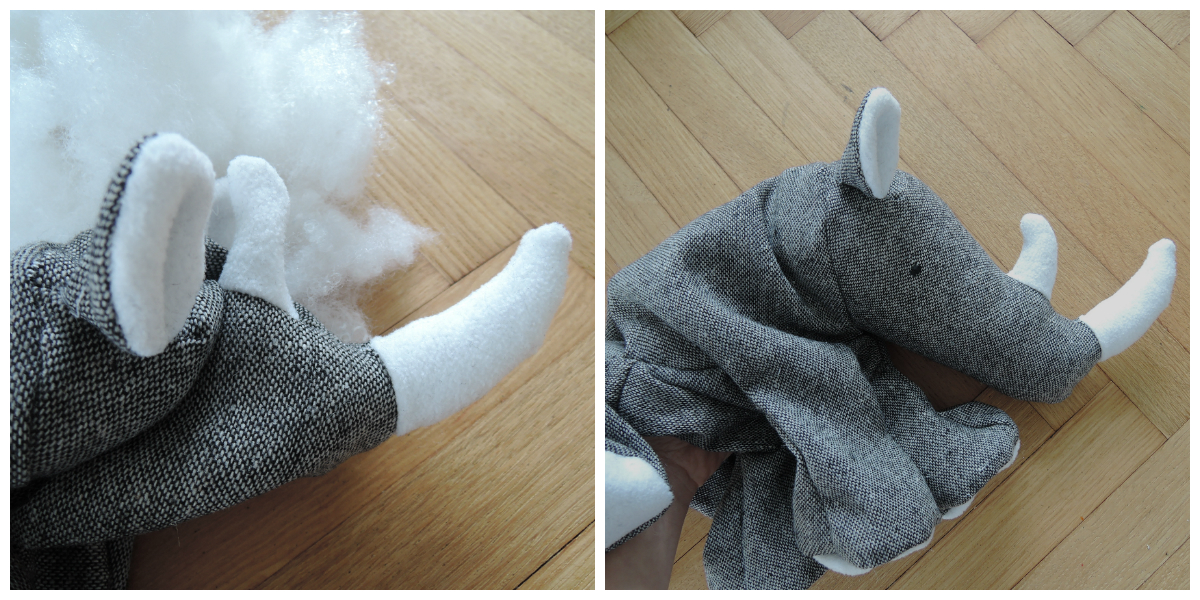
10. Align the outer seams of the horns. Sew around the whole head, except the side where the ears are going to be. Zig zag around. Trim the top of the horns. That way they will stand nicely when turned right side out.
11. Turn the head right side out and press out the seams. Use a pencil or a knitting needle to help you turn the horns out.
12. Now let’s give our Rhino some ears! Pin your ear and sew it in place. Zig zag. Repeat on the other side.
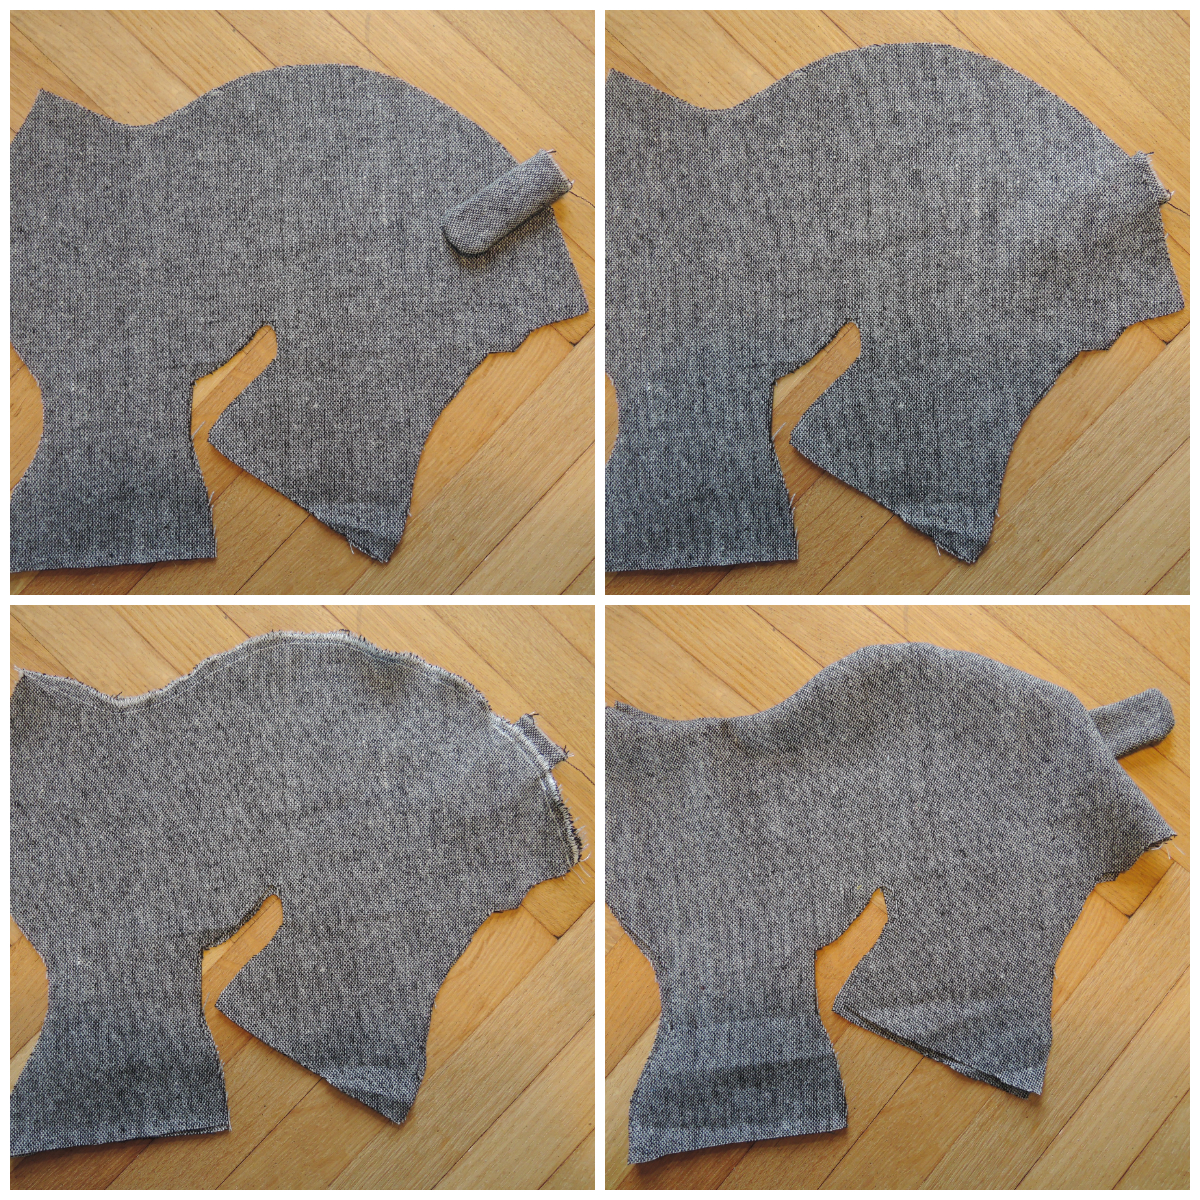
13. Put the pieces for the tail right side together and pin it in place. Sew around with 1 cm (1/4 inch) seam allowance. Zig zag, turn right side out and press the seam.
14. Set the parts for the body right sides together and pin in between the tail on the marked spot. Sew along the back of the rhino with 1 cm (1/4 inch) allowance. Turn it right side out.
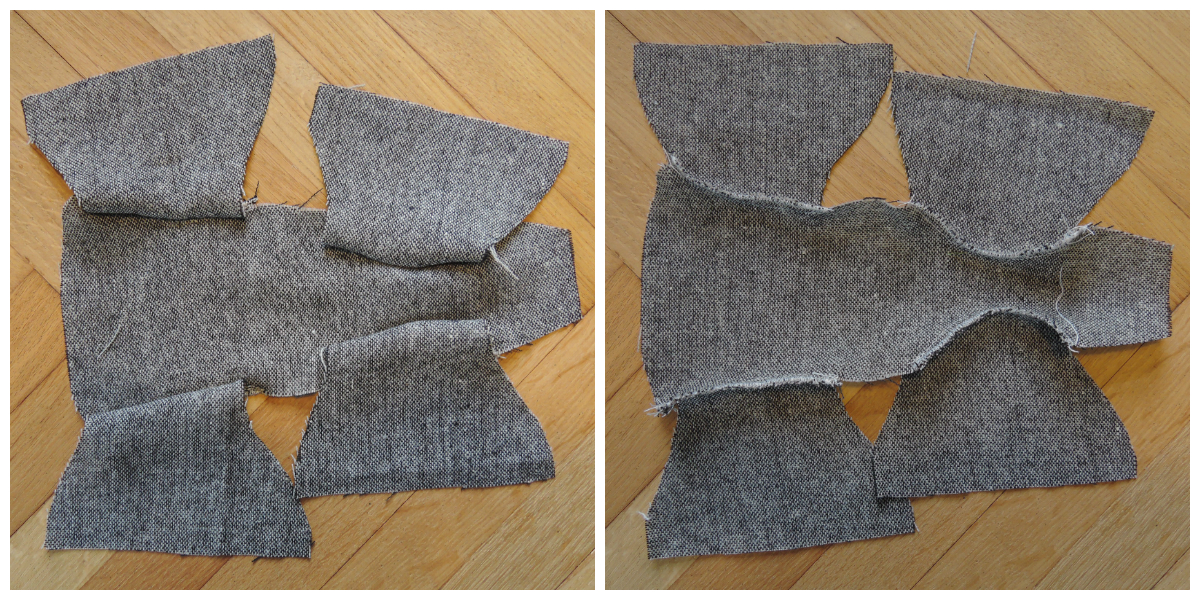
15. Set the belly and legs as marked on the first picture. Turn the legs upside down and right sides together with the belly. Pin in place. Sew and zig zag around the curve with 1 cm (1/4 inch) seam allowance.
16. Repeat the previous step with all the four legs.
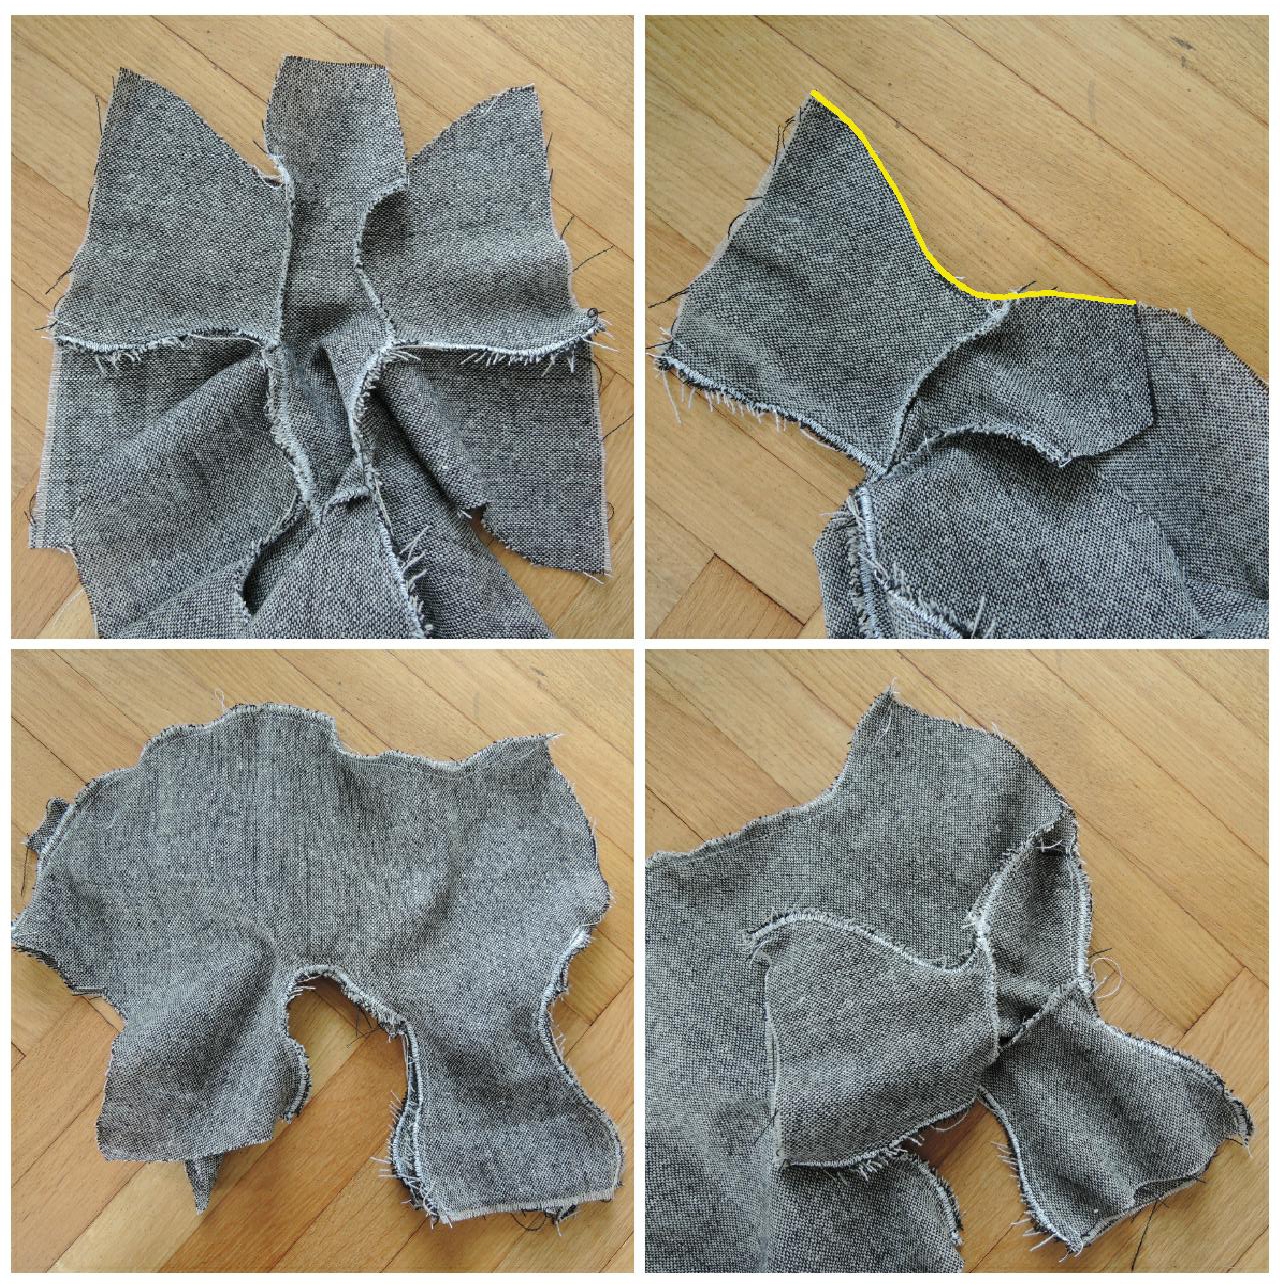
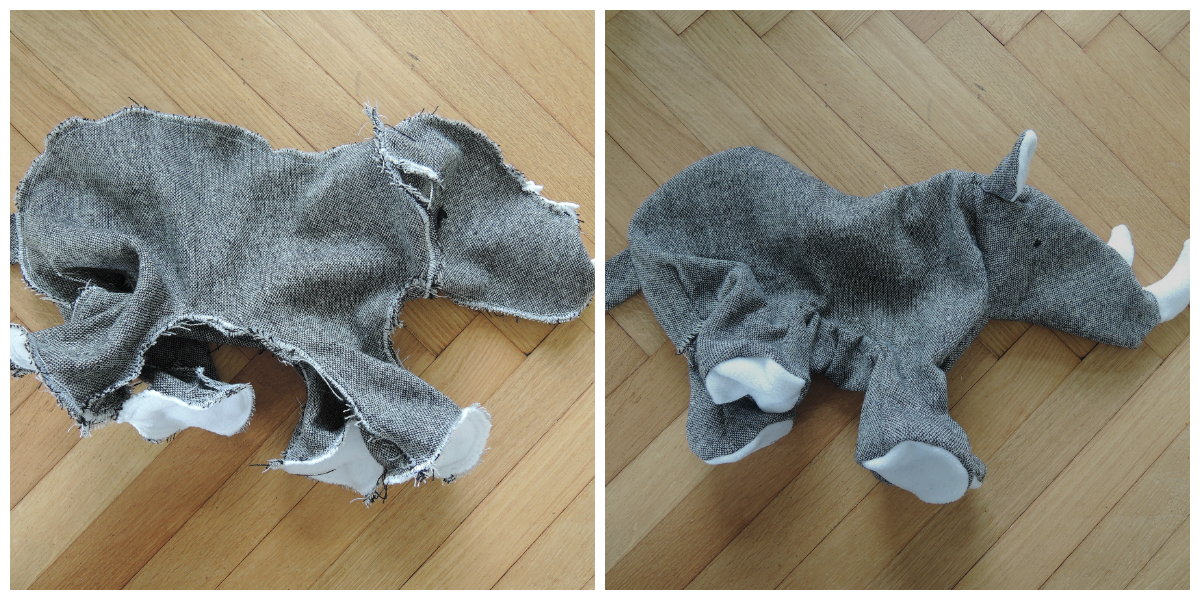
17. Align the ‘belly’ part of the legs with the ‘body’ part of the legs. Sew and zig zag from front leg to hind leg with 1 cm (1/4 inch) seam allowance. Repeat on the other side.
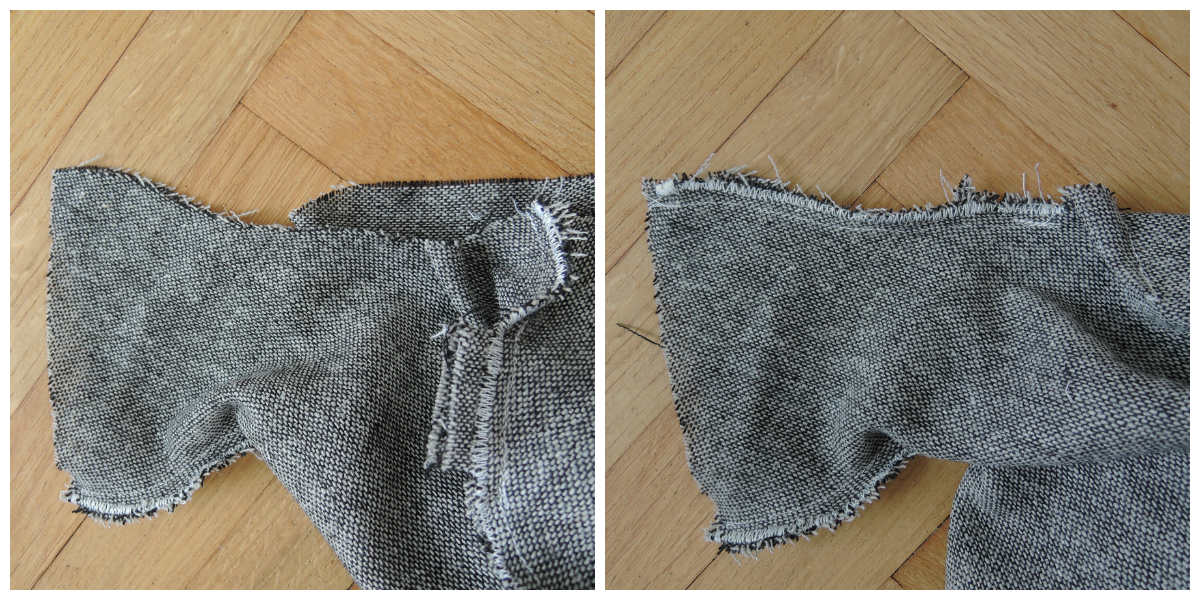
18. Now we’ll finish the front legs. Fold the front leg as seen in the second picture. Align the seams. Sew and zig zag to the end of the belly piece. Repeat on the other side.
19. We can’t have a headless rhino, so align the seam on top of the head with the top seam on the body. Pin the head in place. Sew and zig zag with 1 cm (1/4 inch) seam allowance.
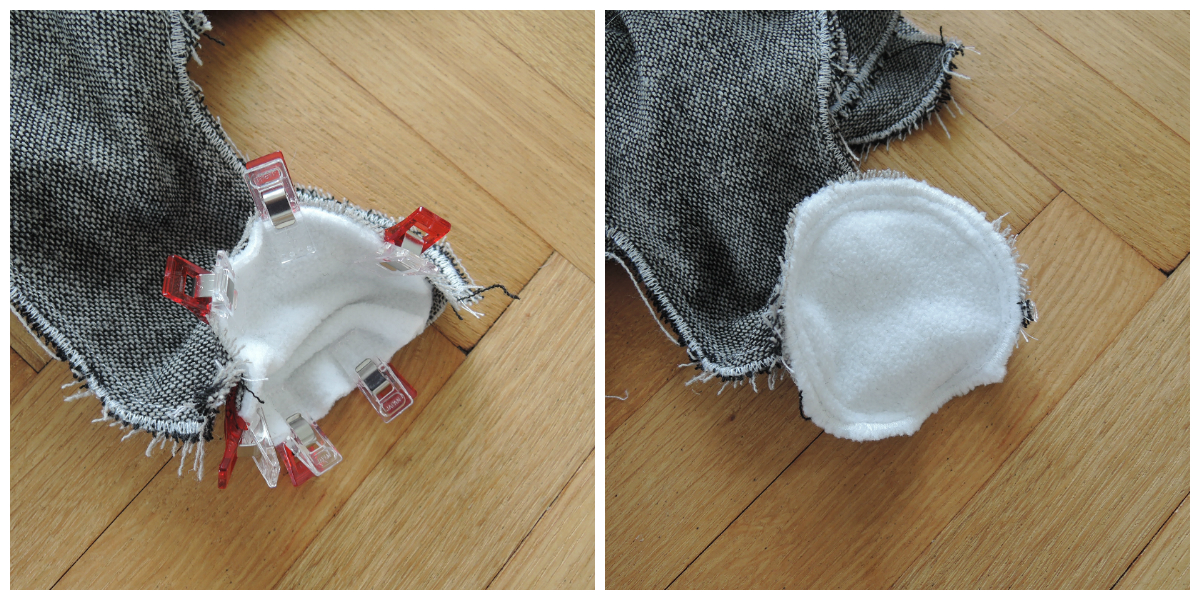
20. Rhino, of course, needs some feet. Pin the circle to the bottom part of a leg. Sew and zig zag around. Repeat on the other front leg.
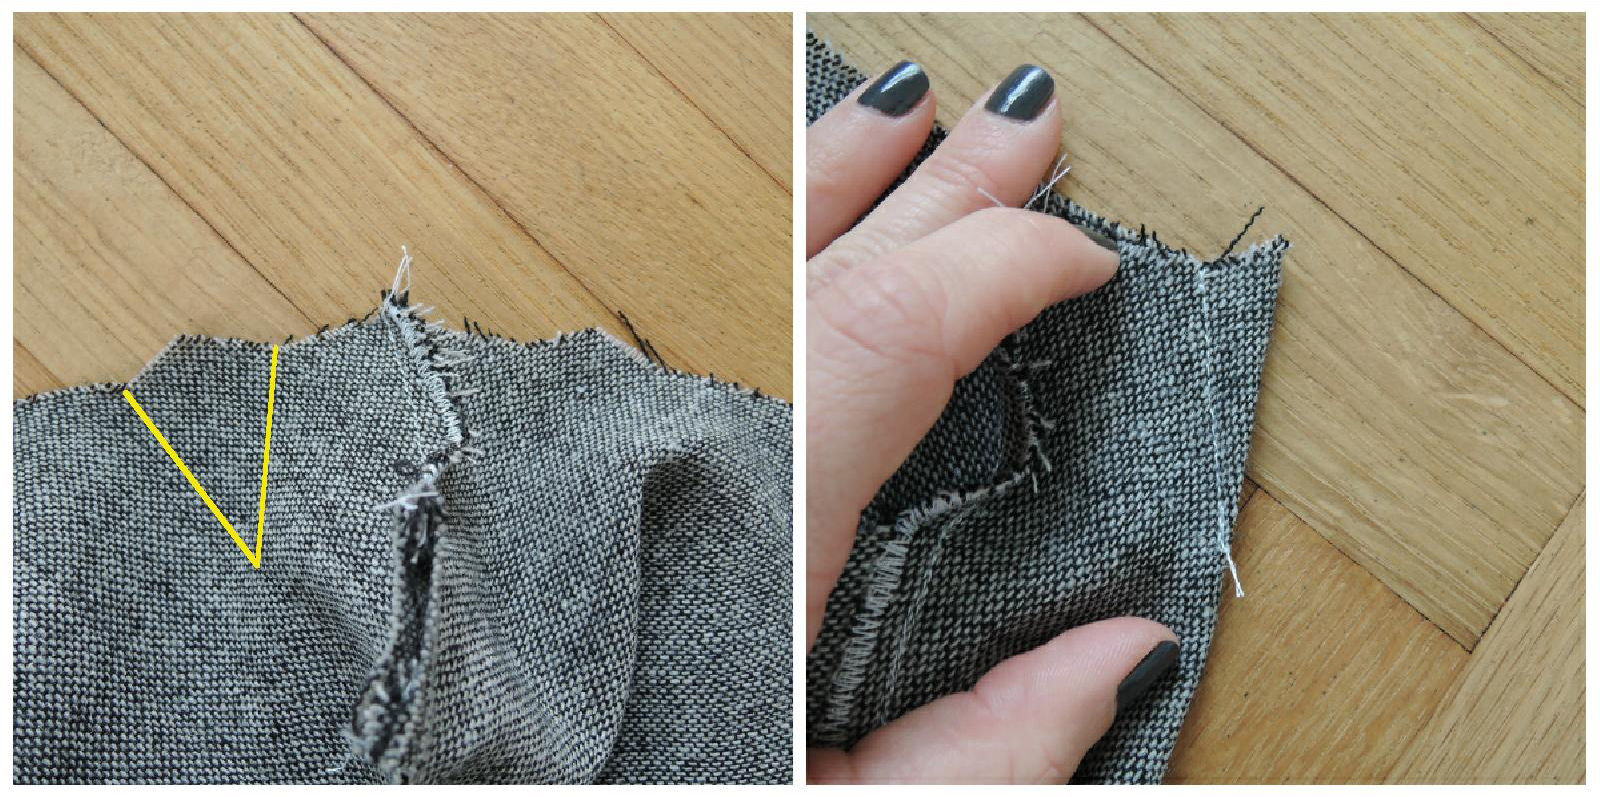
21. At the back of the rhino we need to insert some dart seams. Fold the fabric as marked and sew along the line. Repeat on the other side.
22. Fold the hind leg to align the seam and sew and zig zag to about 2 cm (1/2 inch) from the dart seam. Repeat on the other side. You need to watch out to leave the opening wide enough to slid your hand through.
I like to put the embroidered circle on the hind leg of the Rhino. It’s more visible that way. Pin the circle. Sew and zig zag around. Repeat on the other hind leg.
23. We are almost done now. Turn your Rhino right side out.
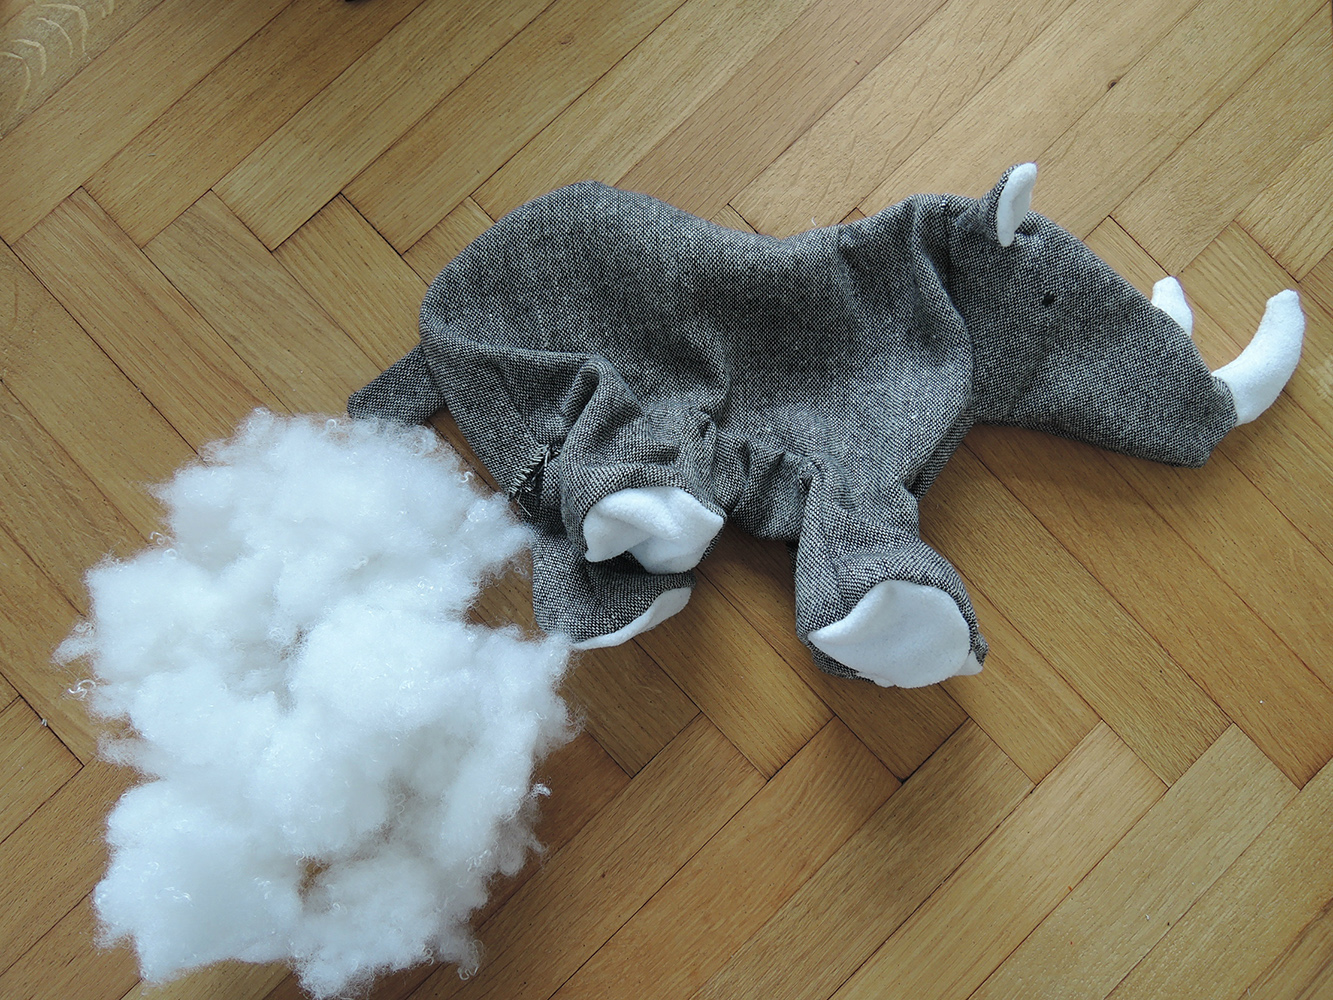
24. Rhino is ready to be stuffed. 🙂 You won’t believe how much stuffing goes inside it. It depends on the stuffing what kind of character your Rhino will have. Just have some fun and try it out. Not two are alike.
25. The last thing is to close the opening. Use a ladder stitch to close the gap.
You are done! YAAAAY! Hello Mr. Rhino! 🙂






3 thoughts on “mr. rhino + tutorial”
Comments are closed.