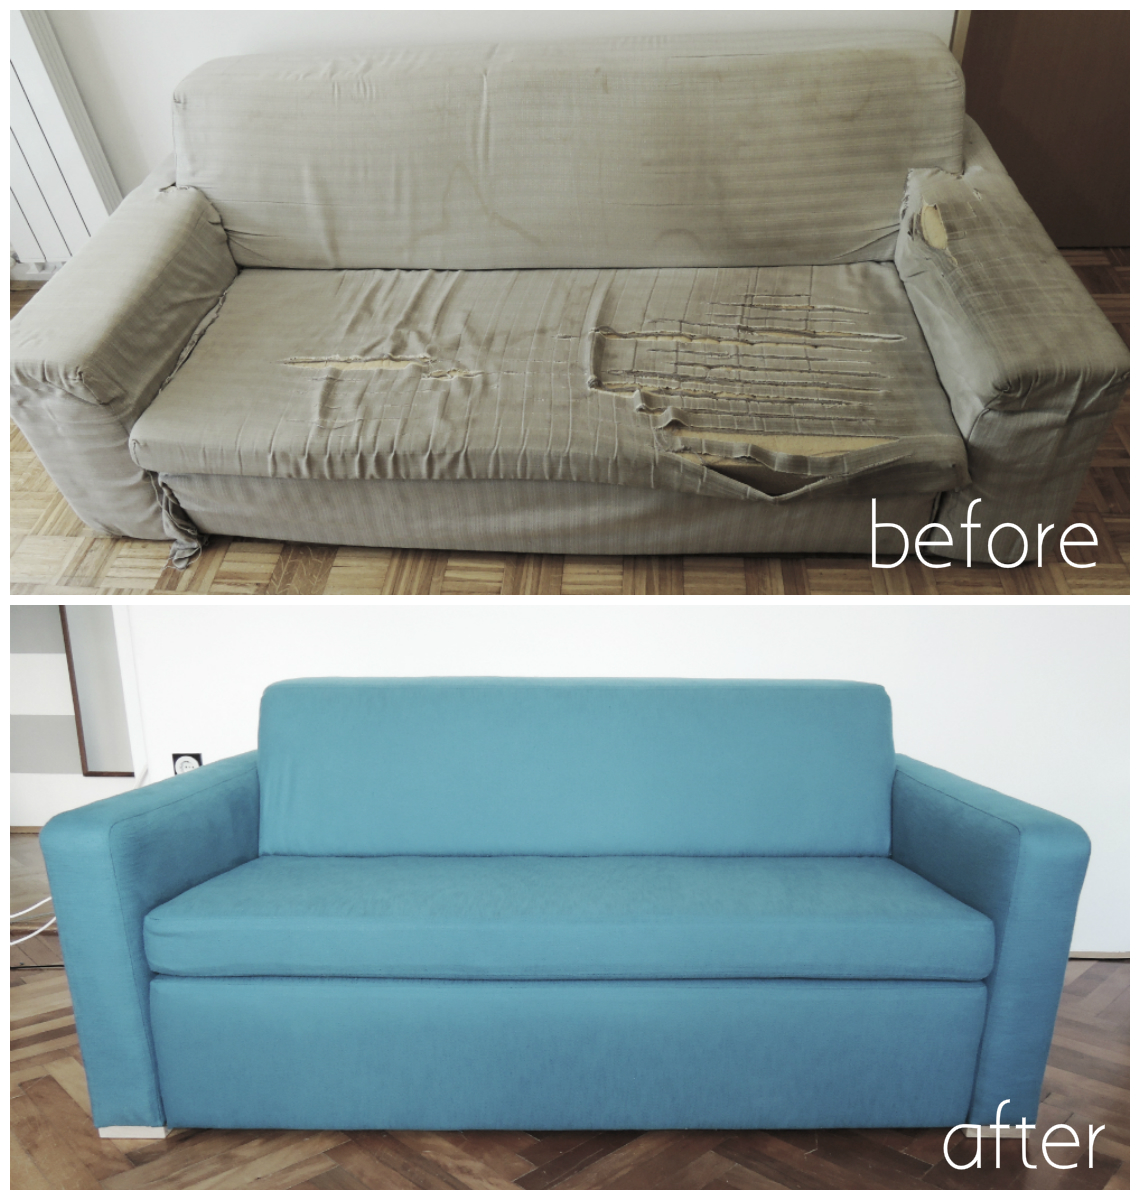
This is going to be quite a long post so pour yourself a cup of coffee or tea and sit tight. 🙂 Sooo… maybe we found this old sofa on a curb and then dragged it inside or maybe we didn’t. 🙂 But we did decide to give it a complete overhaul. Now it happily resides at Mrs N’s place.
Originally this was a sofa bed you could stretch out. And that was the only thing Mrs N requested we keep. The other thing we wanted to try is to make the sofa covers removable and washable. We designed the frame and the covers so you can take off the covers and wash them in the washing machine. This is especially important for pet owners like us.
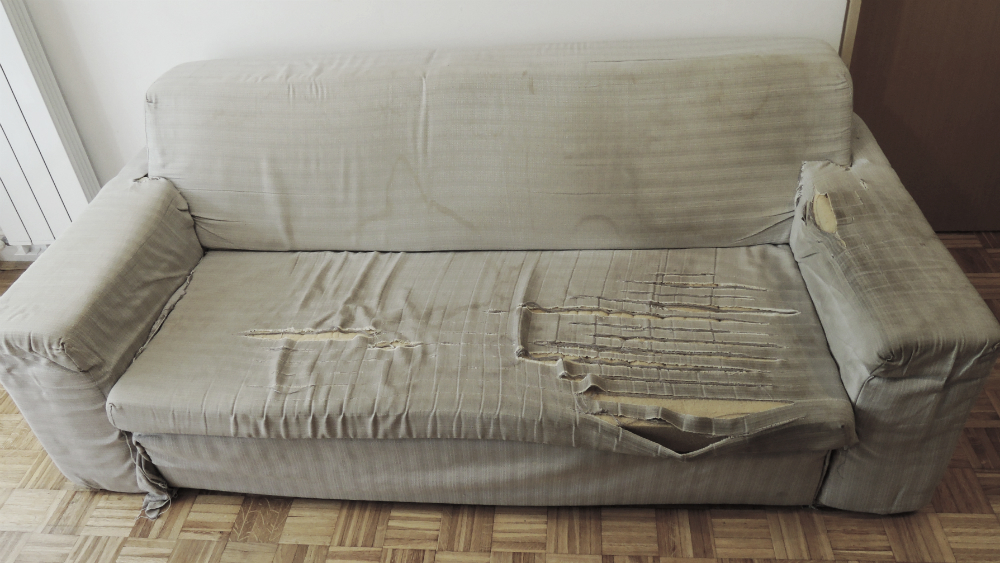

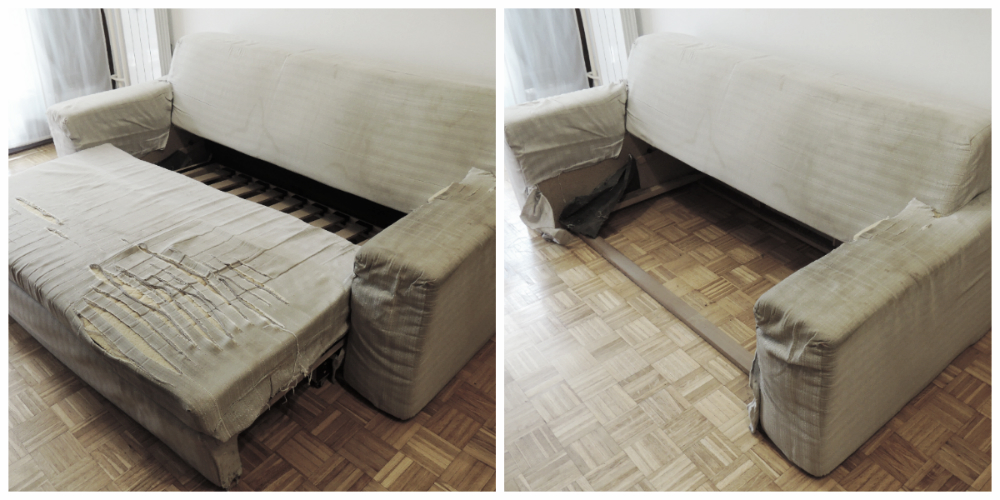
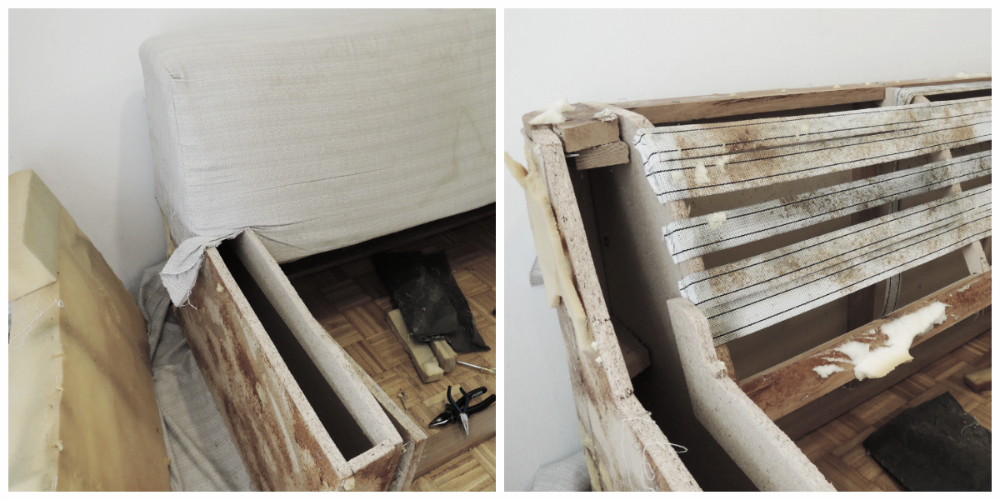
First we stripped the sofa to the bare bones with the help of Evgen’s brother Uroš. Hi Uroš! The old foam was crumbling to pieces and we even found some old spider webs in the hollow arms. It was quite unappealing. When it was stripped we brought it to our place.
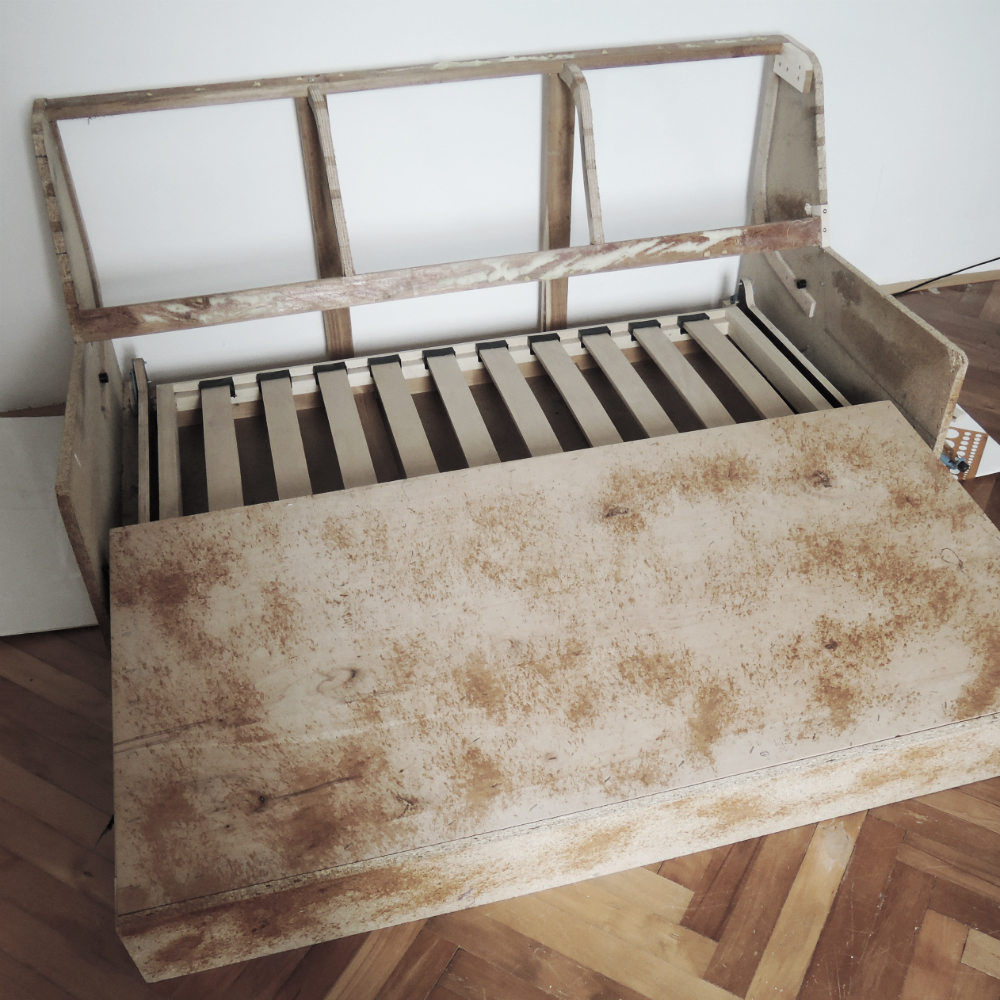
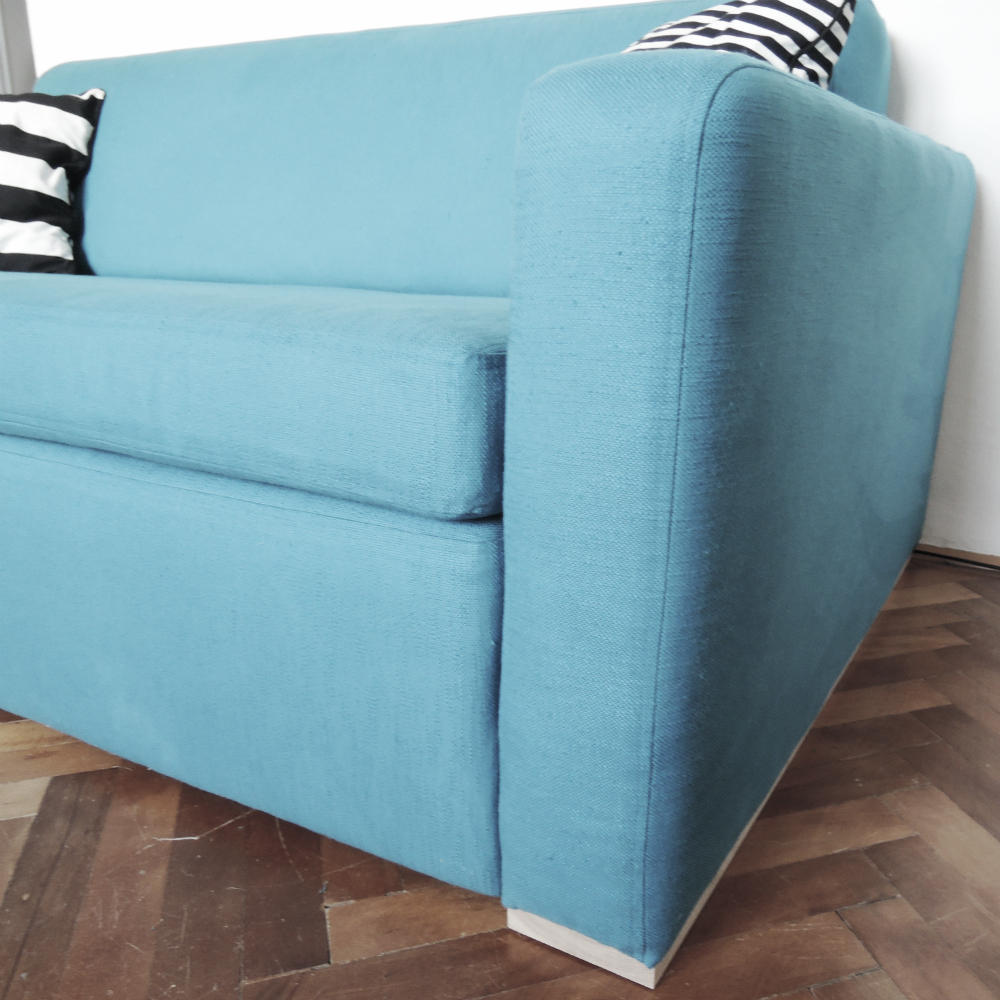
Because we wanted the back of the sofa not to continue over the arms, we decided to tweak the design a little bit. All of the parts needed to be separate pieces so that the covers would be easier to remove. Evgen made almost a new frame but kept as much of the wood as he could. Realistically 2 pieces. 🙂 The bed part was the only thing that remained the same as it was before.

When the frame was adjusted, we made a plan and a list of approximately how much materials we needed. Then it was time for shopping. First we went to the fabric store Svet metraže and Mrs N picked a fabric she liked the most. Luckily it was 25% off, so we paid 160 eur for 13 m. It is a beautiful teal colour and it is a 100 % cotton.
Other materials that we needed:
- 2 m² of polyurethane foam each in 10 cm, 5 cm, 3 cm and 1 cm thickness
- 2 cans of spray adhesive
- 9 m of dacron
- wrapping material
- 12 m of velcro sticky back loop and hoop fastener tape
- 2 m of burlap
- 12 m of webbing
- a lot of staples
- 4 x 500m spools of matching thread
Evgen already had at home some soft wood for the framing and spare pieces of chip board and little oak for the legs. Fortunately that didn’t cost us anything.
All in all we paid for all the stuff around 250 eur. It definitely would be a lot cheaper if the sofa would be made without the bed part and the covers would not be removable. Then the cost would be around 170 eur plus the fabric 120 eur.
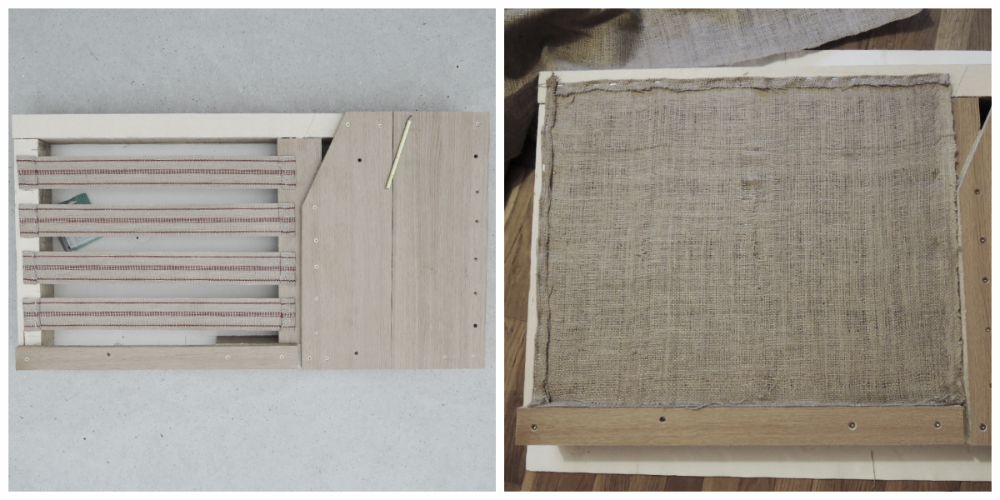
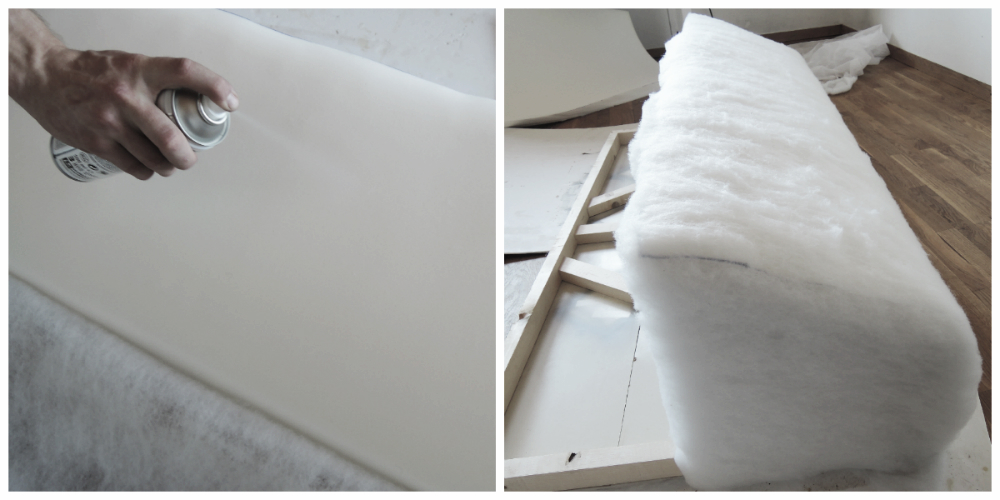
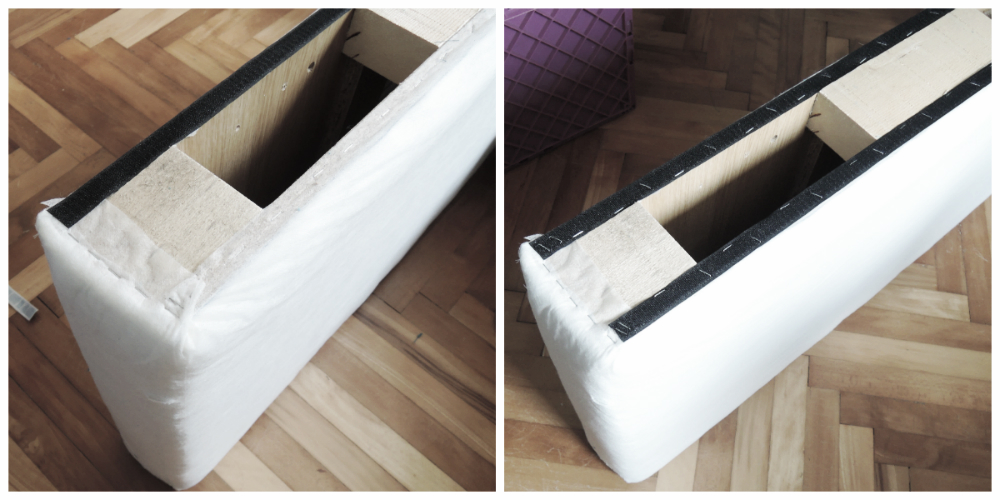
The framing was done, now it was time to re-upholster the sofa. But before we stapled on the foam, we stretched and stapled the webbing over the arms and the back. After the webbing came the burlap.
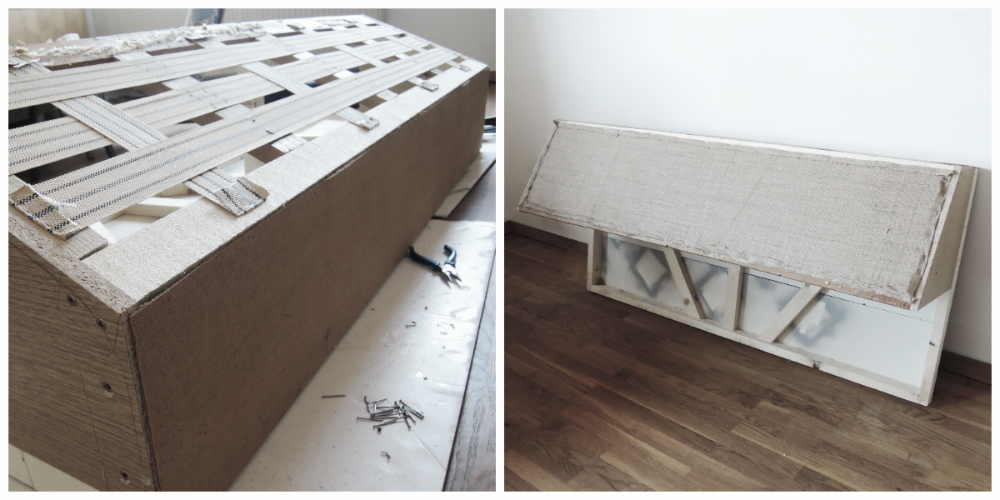
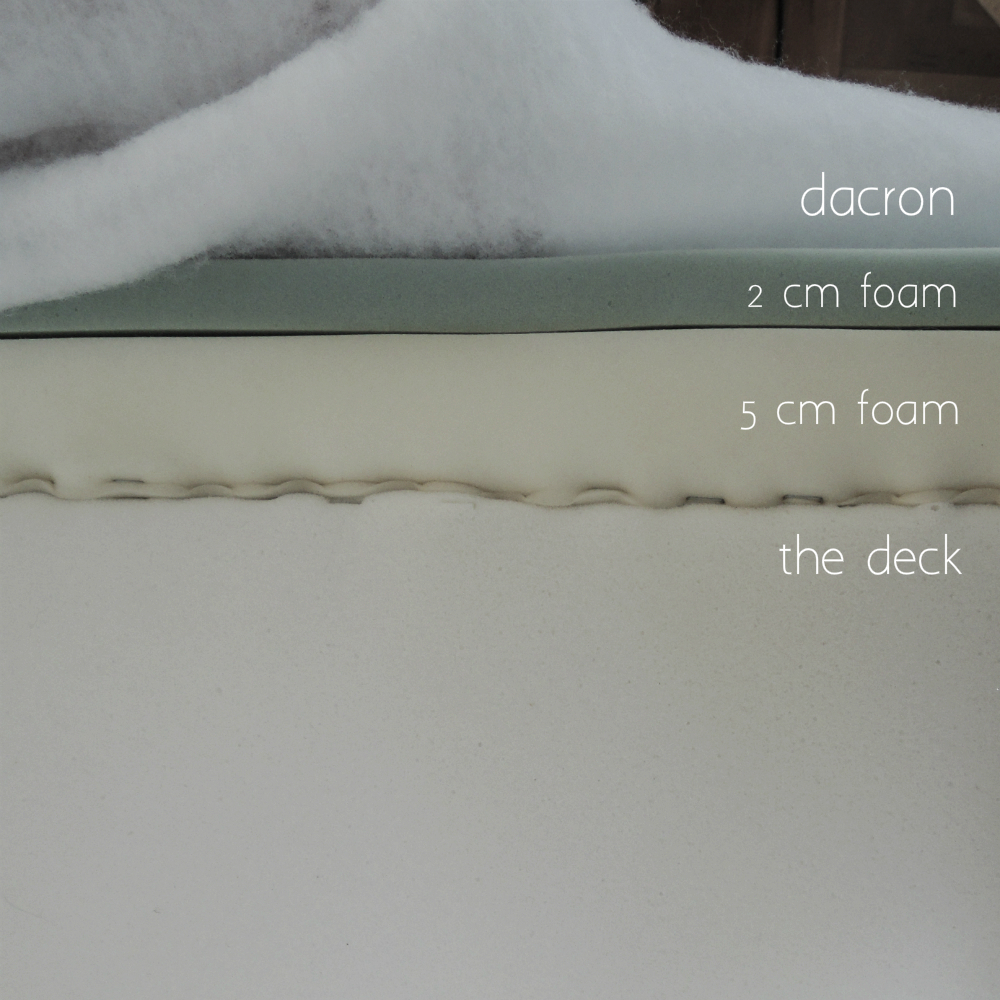
Then finally came the foam. For the arms we used 3 cm and 1 cm thick one, for the back 5 cm and 1 cm and for the cushion 10 cm. For the deck part under the cushion we used the foam in 5 cm and 2 cm thickness. All the foam was stapled on the frame.
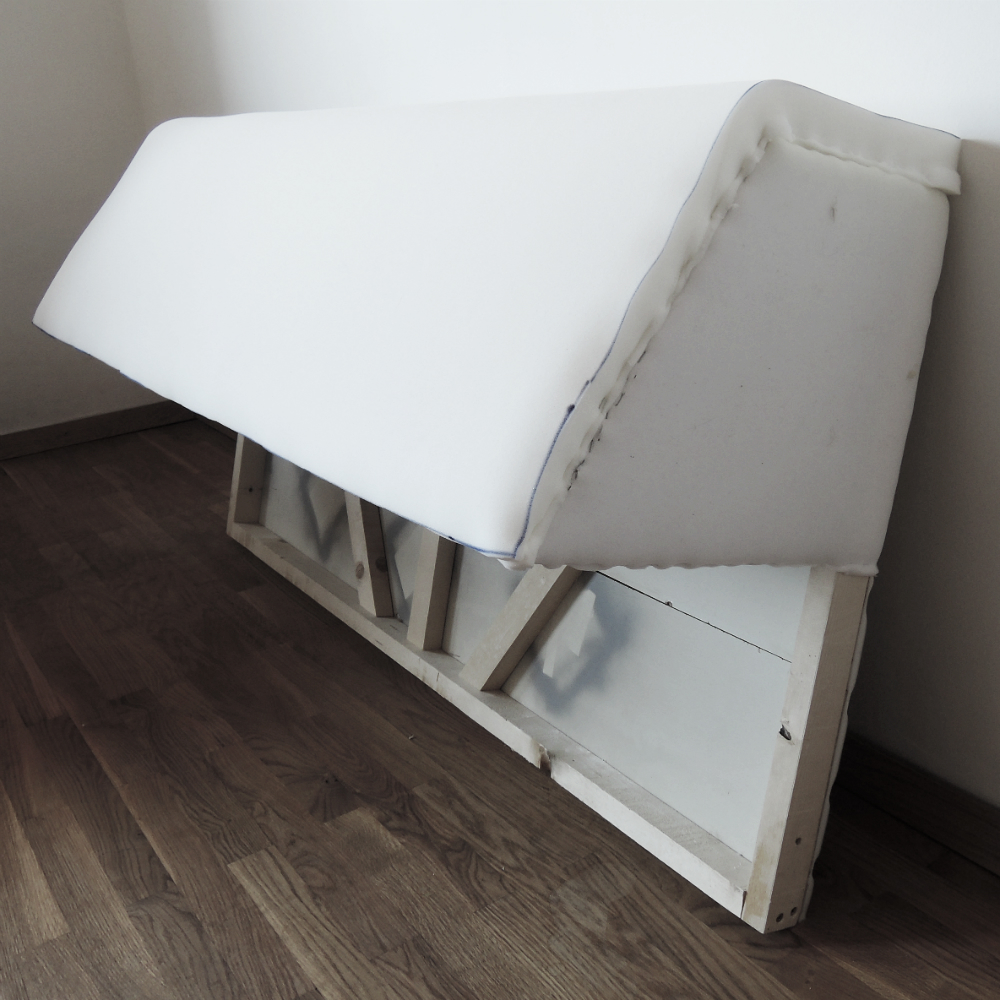
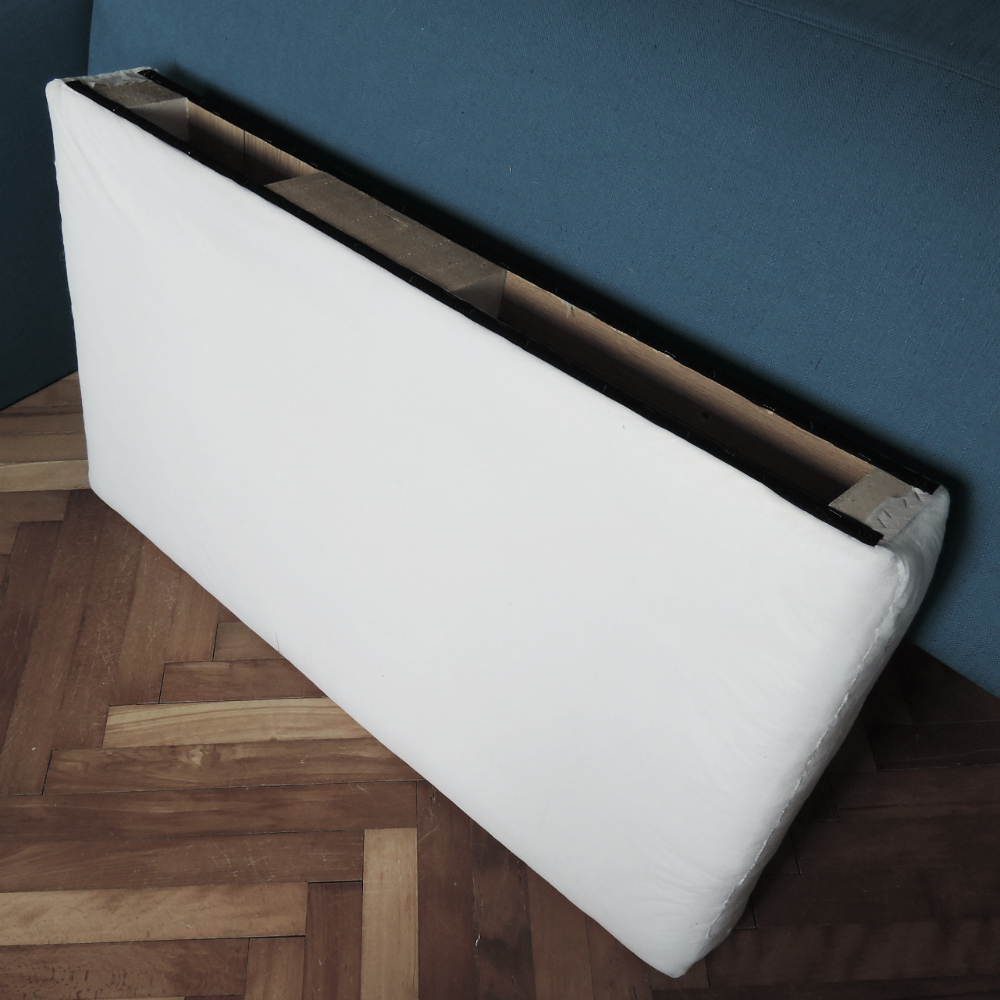
To make the sofa a little bit more comfy and to blend in nicely all the transitions we stretched the dacron all around each piece of the sofa. It was glued on using the spray adhesive.
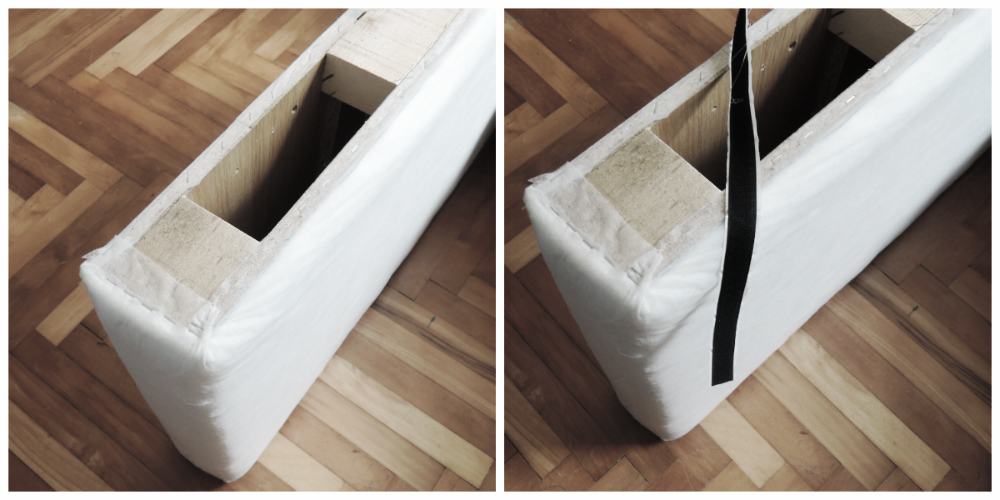
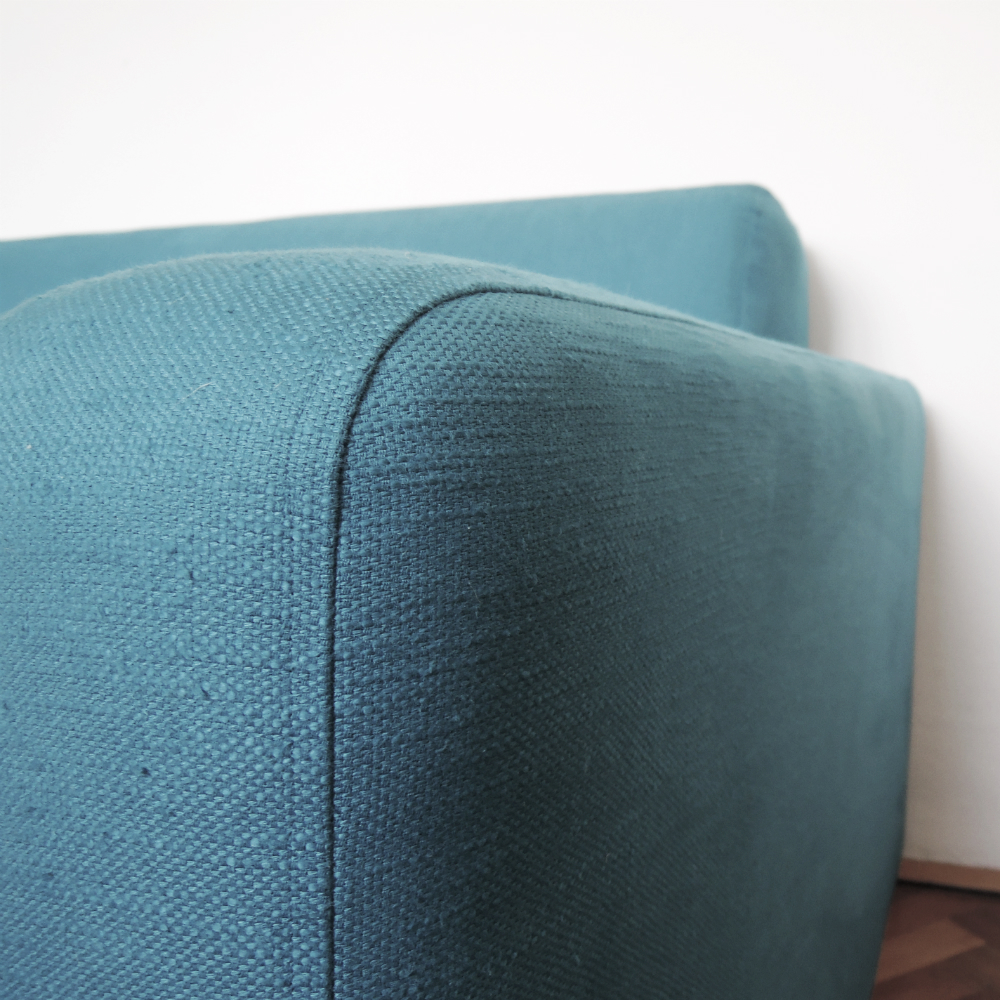
If the covers wouldn’t be washable, that could be the last layer before the fabric. But like I said before, we wanted the covers to be washable. So that meant that we had to wrap each piece of the sofa with the wrapping material. On some parts we stapled it to the frame and on some parts I sewed it in place by hand.
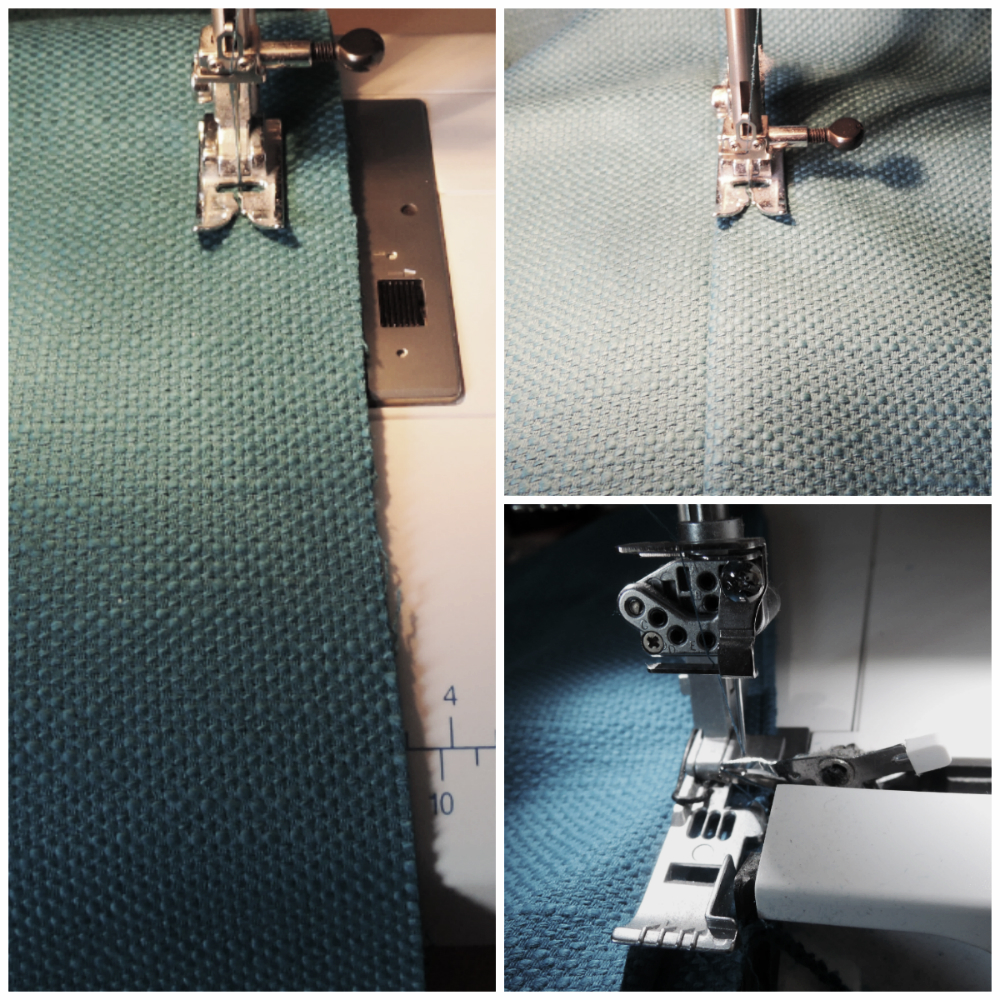
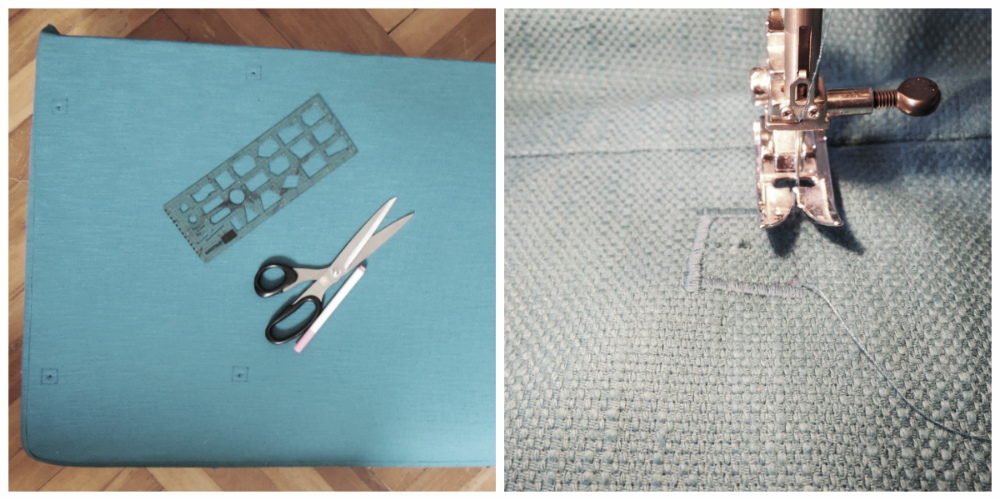
For the covers I first made a plan on how the pieces will be placed on the fabric. It is important to orient the pieces correctly and to think of the seam allowance. Then I cut them all out and stitched them together accordingly.
To make the seams last I first stitched two pieces of fabric together, then topstiched and lastly for the final part I hemmed them together. The covers have to be snug, maybe even a little too tight, because the fabric will stretch a little.
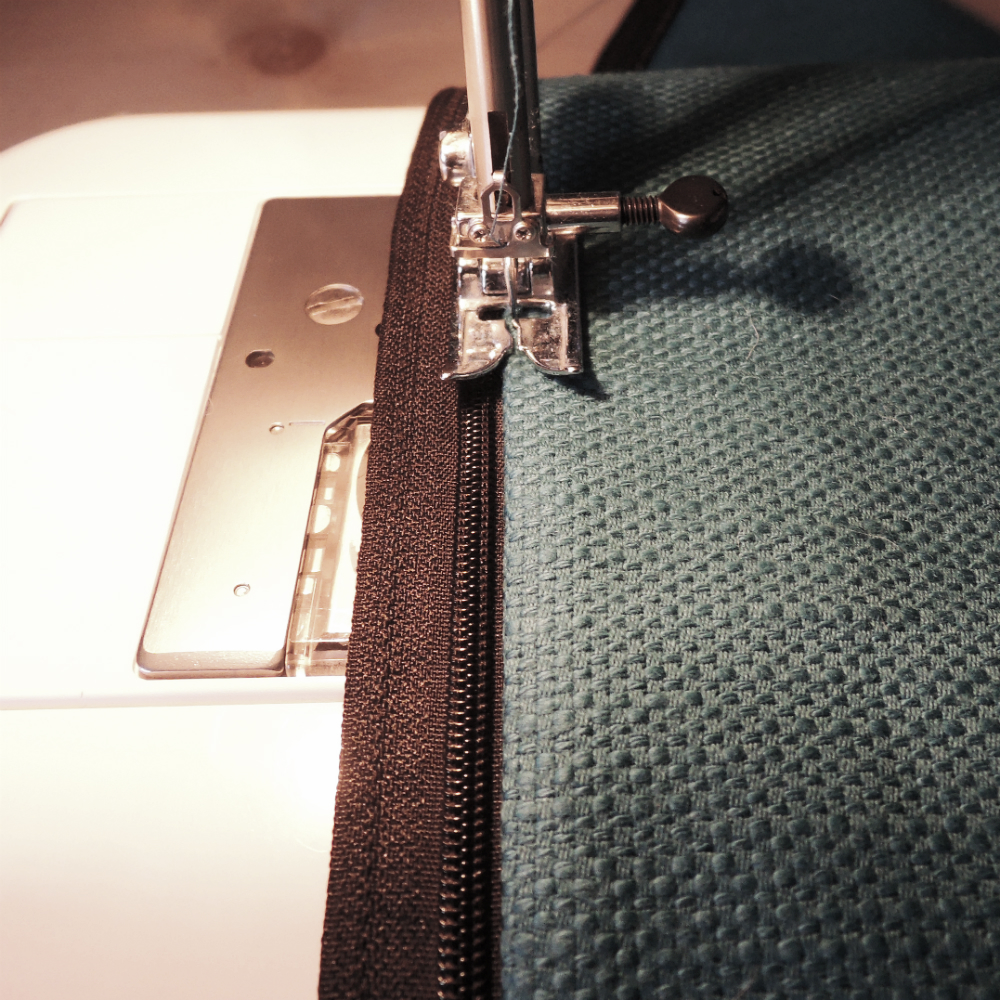
Next came the velcro tape. Evgen stapled it to the frame and I first sewed it on by hand with the cover on and later stitched it in place.

I had to cut some holes on the inside part of the arms cover, because of the screws that hold together the arms and the back. I zigzagged around the holes to prevent it from tearing. For the cushion part I inserted a zipper at the back.
Assembly time!


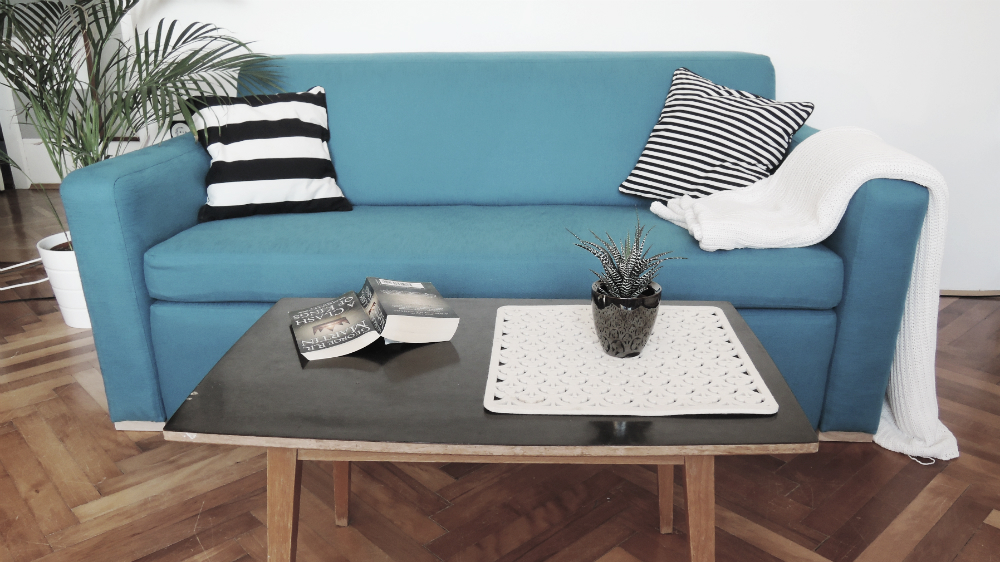
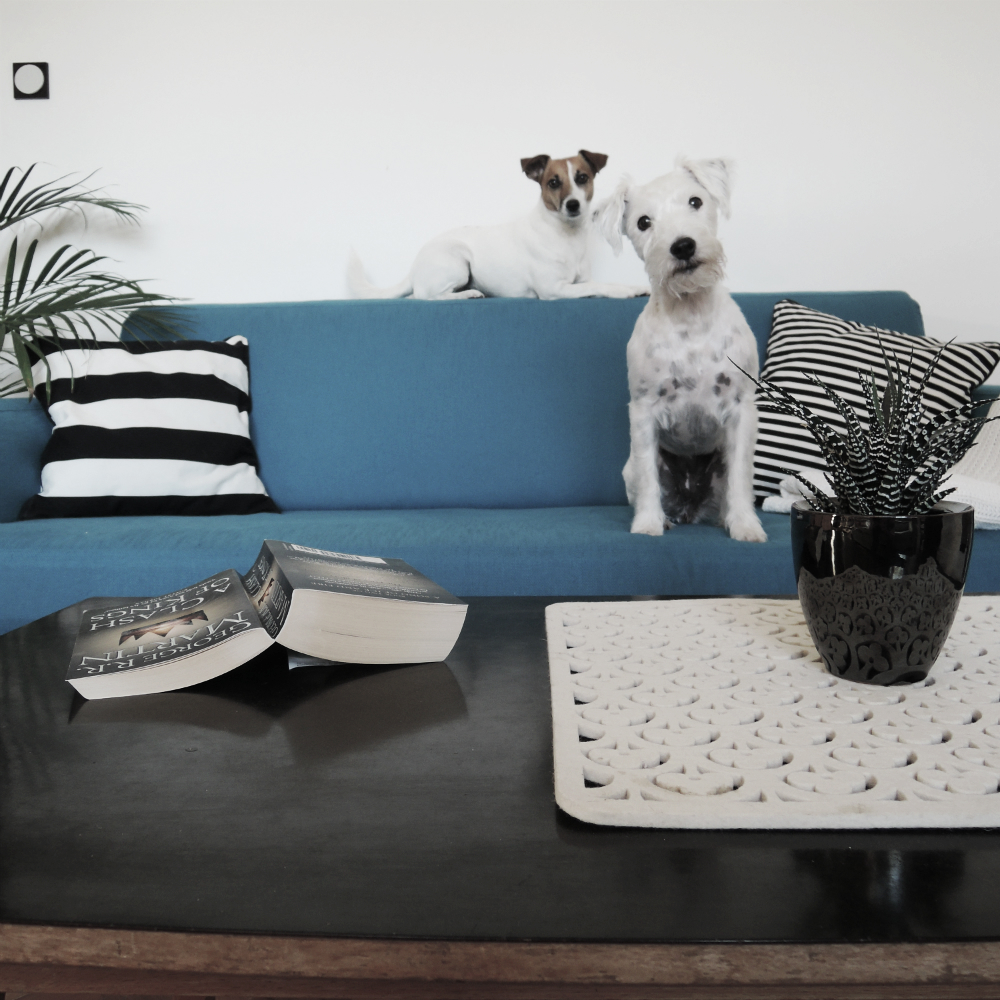
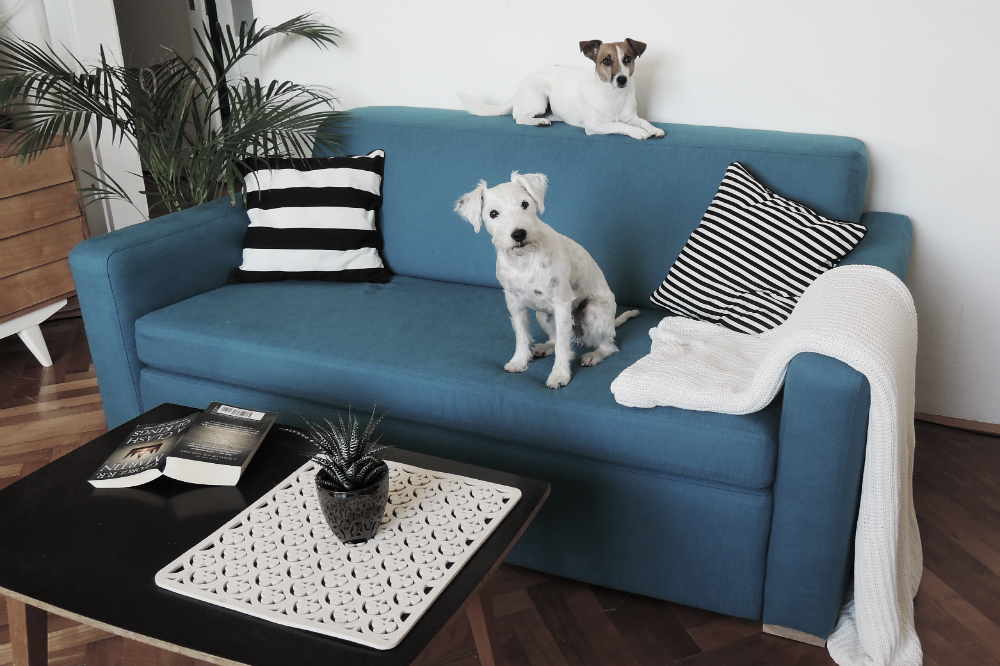
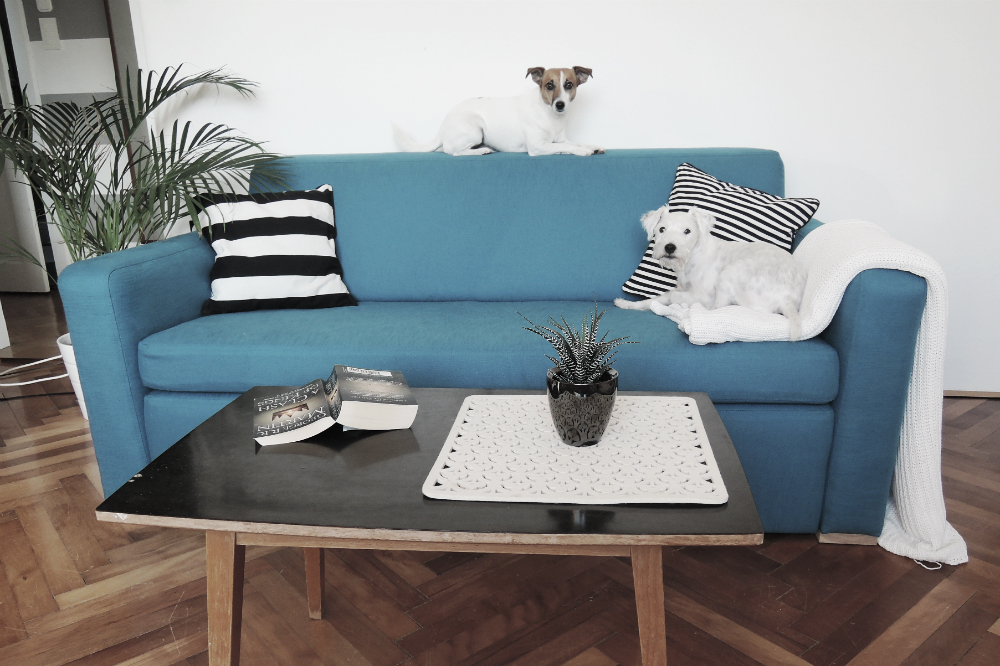
When it was all done we had a little photo shoot using props that we had at home, like our cushions and Chia and Roo. 🙂
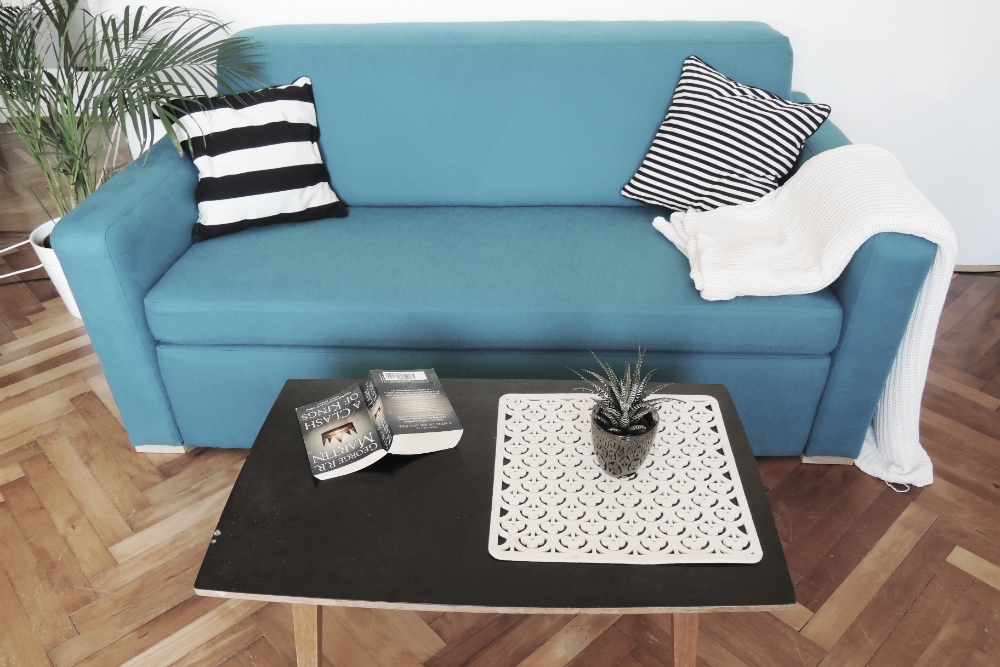
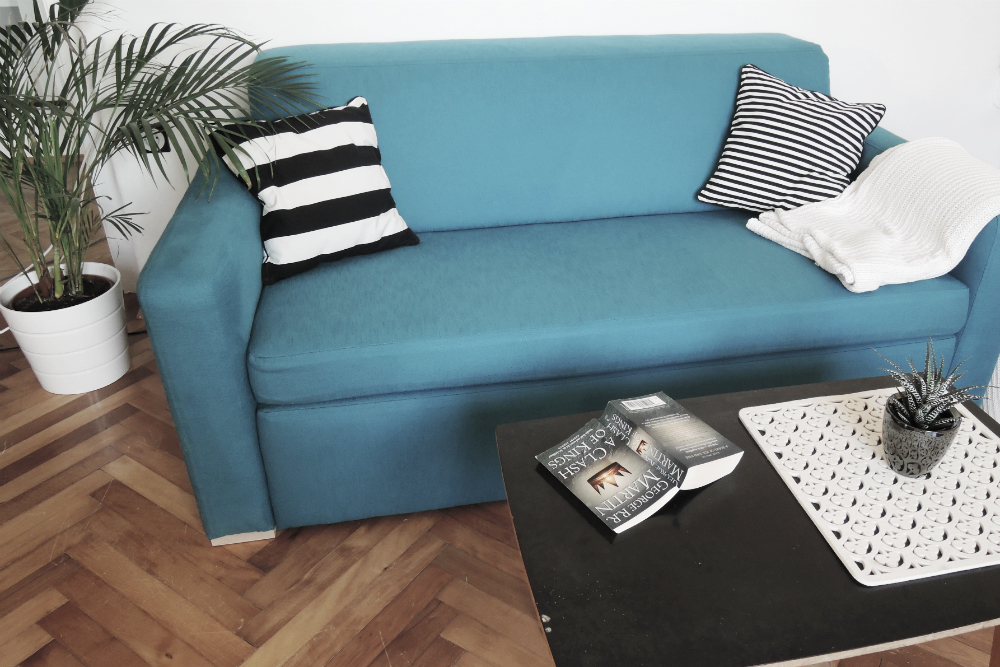
We can’t finish the post with the good old before and after. Quite a difference, don’t you think?
wooooow so beautiful
Thank you mavii! 🙂
Wow! That looks like it was done by a professional! This is 1st time I have been on your blog so I have no clue if you are, lol. That was a lot of work, you should be proud, it came out great!
I’ve been sewing for a couple of years now, but this was a first time doing a sofa. So no, we’re not professionals, just enthusiastic DIYers. 🙂 Thank you for your kind words!
Im impressed! really professional work !
Thank you!
I’m sorry but you need to be brilliant to be able to do this. I would probably shoot myself with the staple gun.
We did have a couple of incidents where it was a close call.
Fantastic. Really, really impressive. You basically made a whole new sofa!
Thank you Lucy!
the before is soo scary, I wonder what make you give the sofa a second chance? awesome work!
For a long time we were wondering if we were able to reupholster something. So when Mrs. N asked us if we were interested in trying it out we of course said YES! 🙂
What a wonderful transformation! What skill level would you say is required for this project, especially for the sewing part? I’m scared that undertaking such a project might end up with me curled up in a ball of tears and snot, rocking back and forth.
P.S: Your dogs look like they have much experience posing for pictures. 🙂
You don’t have to be an expert in sewing. The lines are more or less straight with a few corners. 🙂 For example, a dress or something tailored is waaay harder to make. For me, the hardest part was before the sewing of the covers. All that stapling.. I thought it will never end.
The dogs are quite used to being exploited for their cute looks. Of course they don’t mind it, because of all the treats afterwards. 🙂