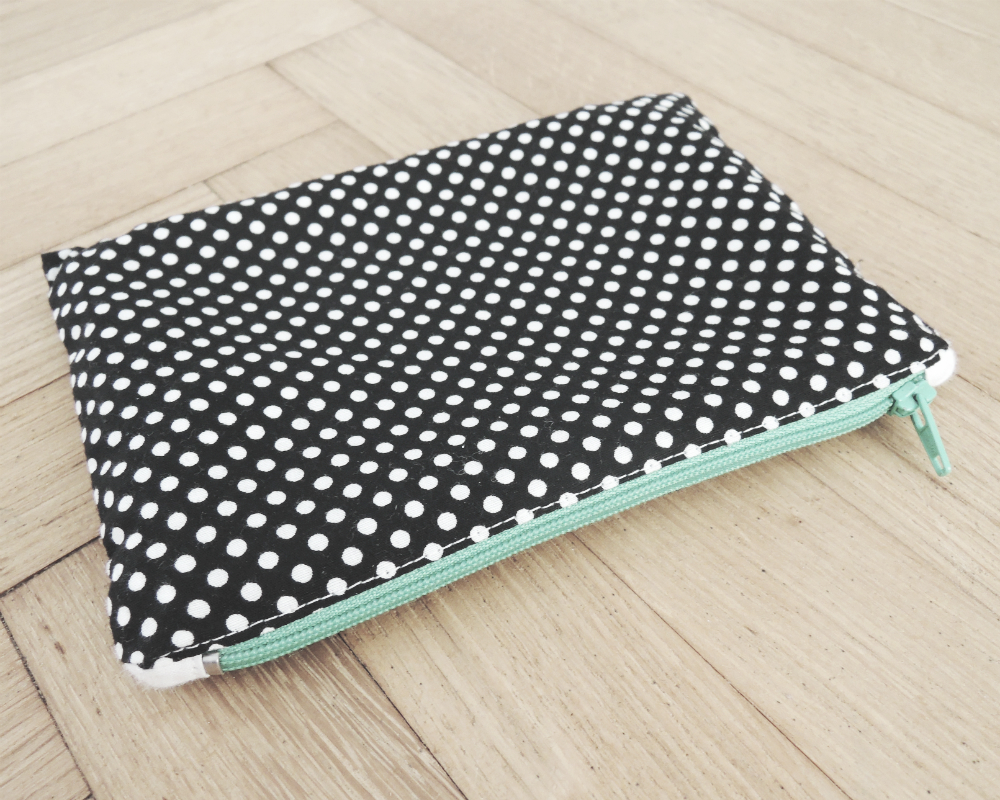
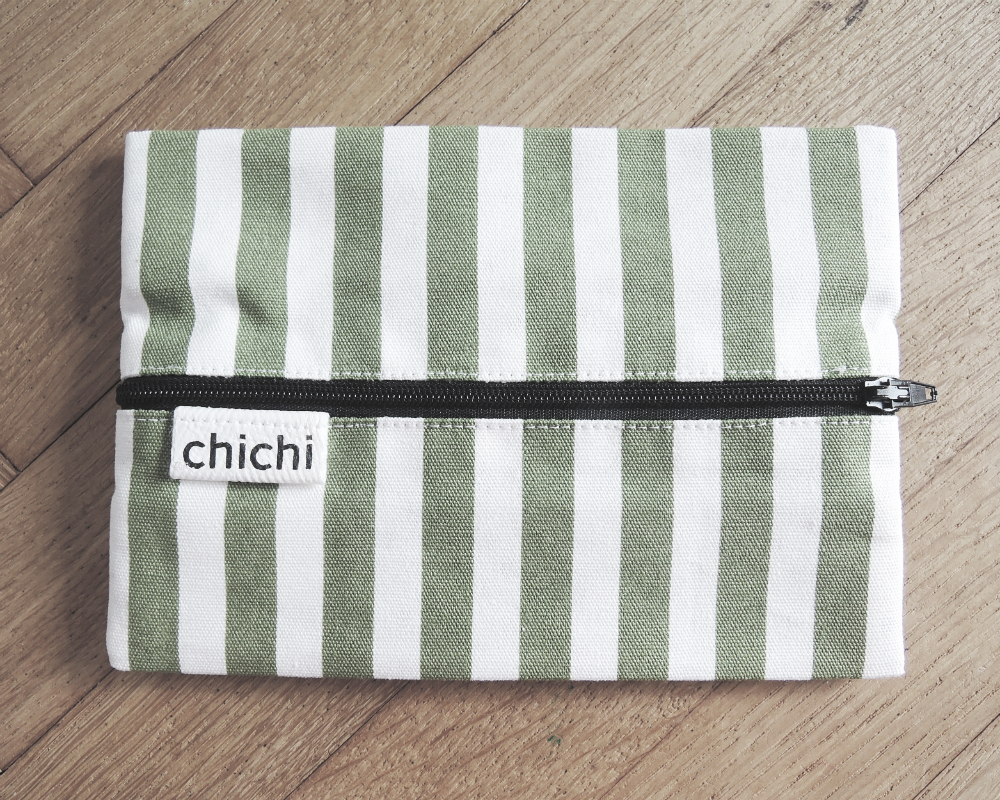
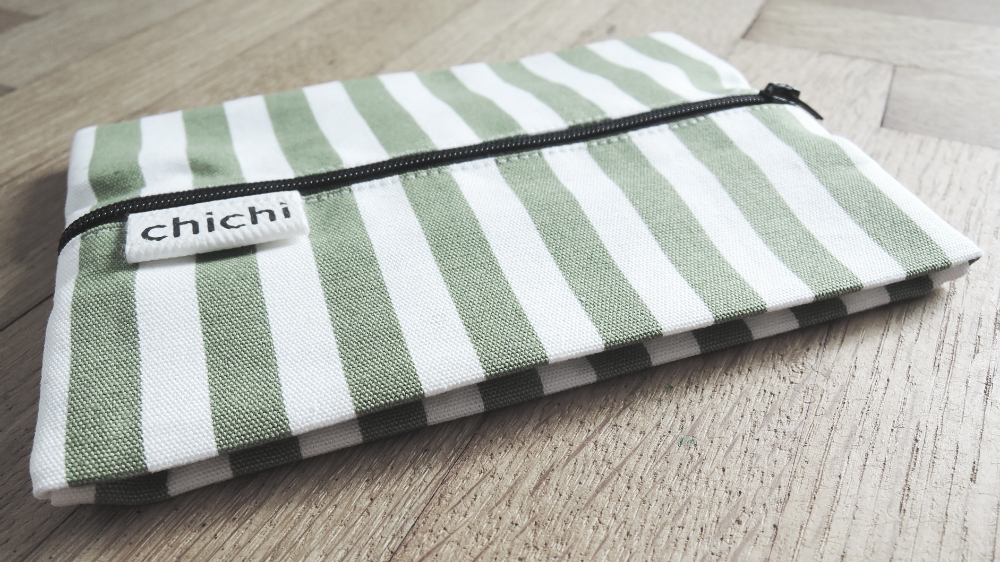
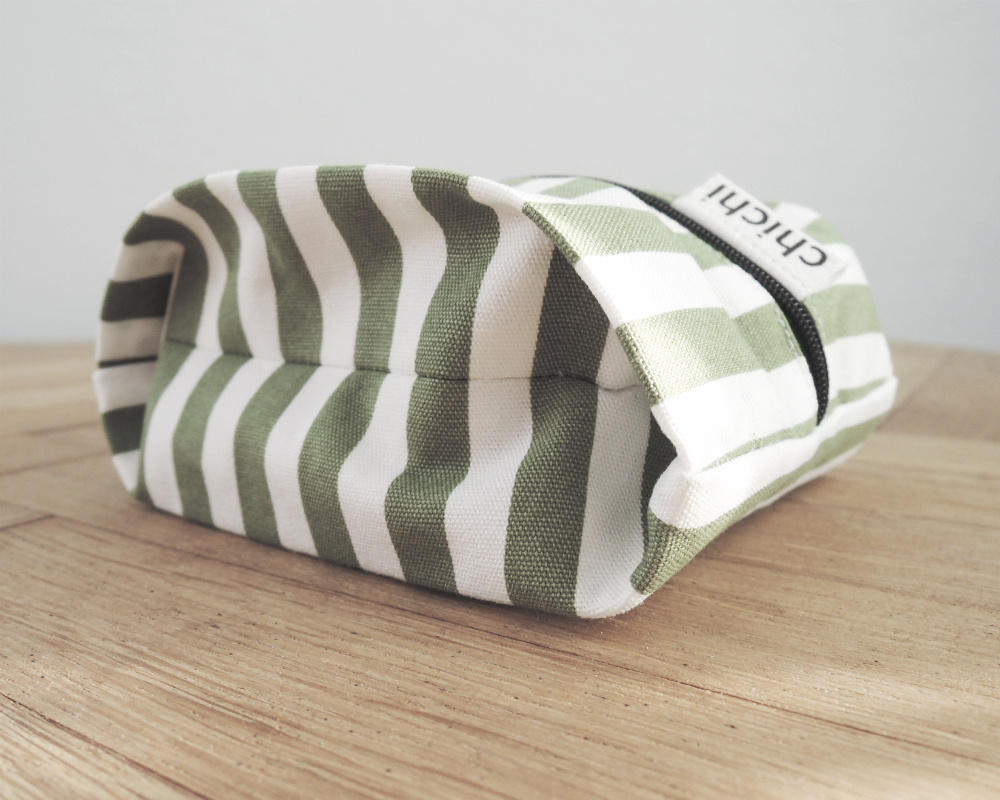
This is going to be another sewing tutorial. Unlike the previous one, that one was more for an experienced sewer, this one is really easy and perfect for a beginner. We’ve all seen a million tutorials of how to make a simple pouch like this one below which is a really easy and fun project.
 But this tutorial is basically the same thing, just with a little twist. I promise, it is also very very simple and you will excel at this even if you are a total newbie. You can make it in an infinite varieties and sizes and with almost any fabric. For a more structured pouch you can use heavier fabric for the outside or even laminated one for a waterproof pouch.

But if you don’t like sewing or just don’t have the time and you’re interested in one of these or similar, just send me an email. I still don’t have an Etsy account, but I’m working on it! 🙂
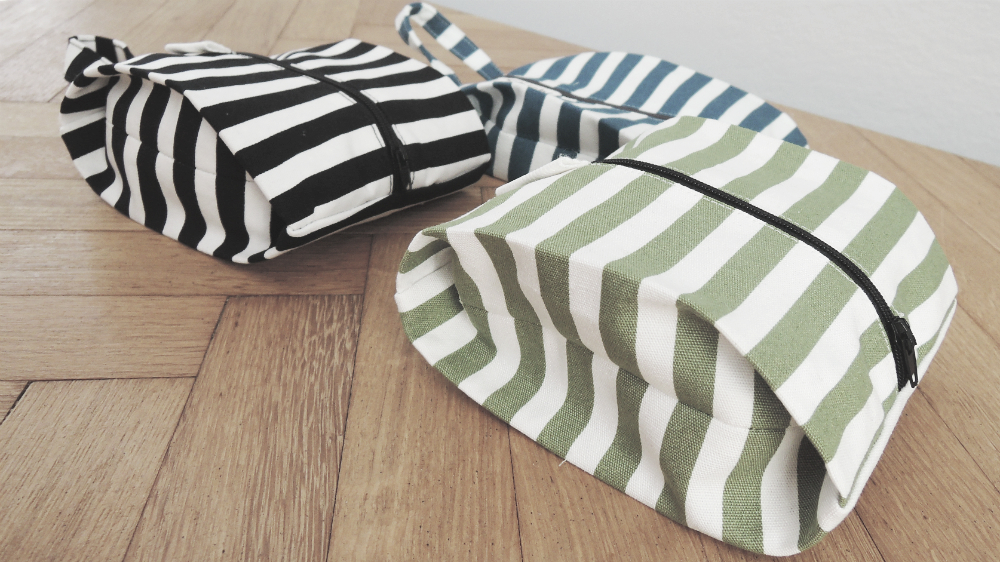
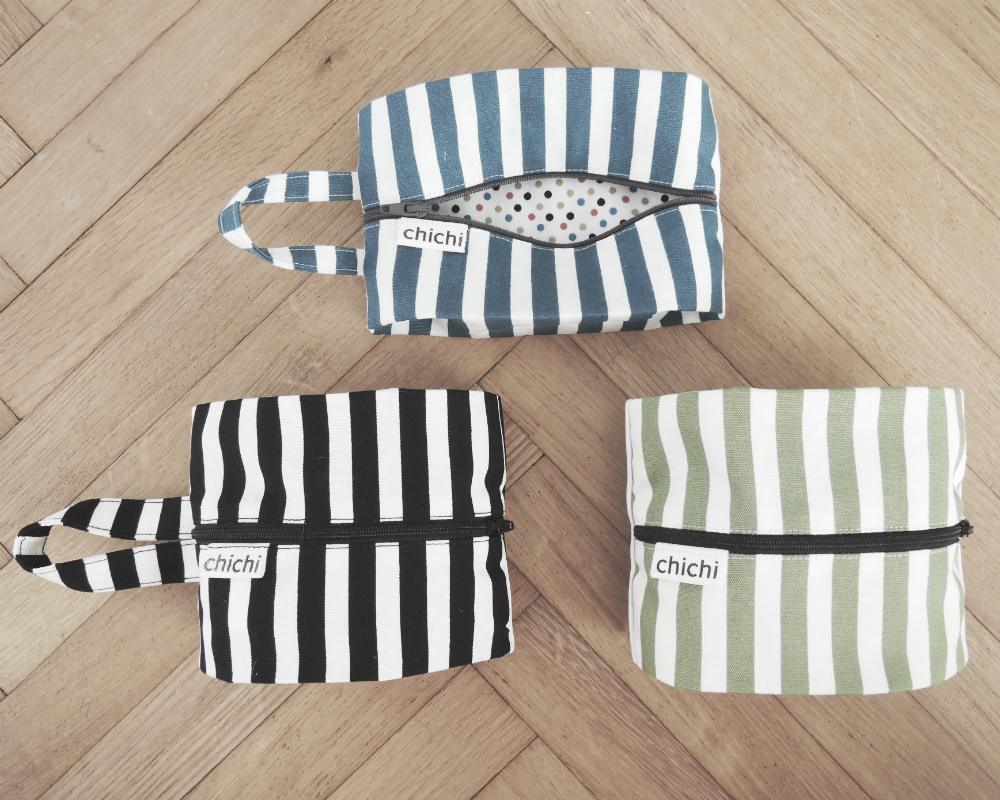
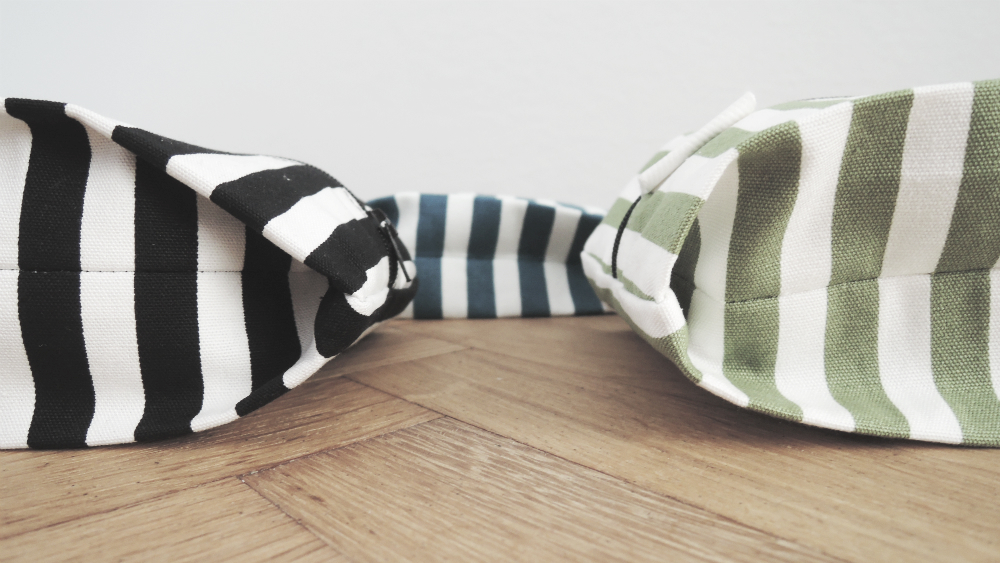
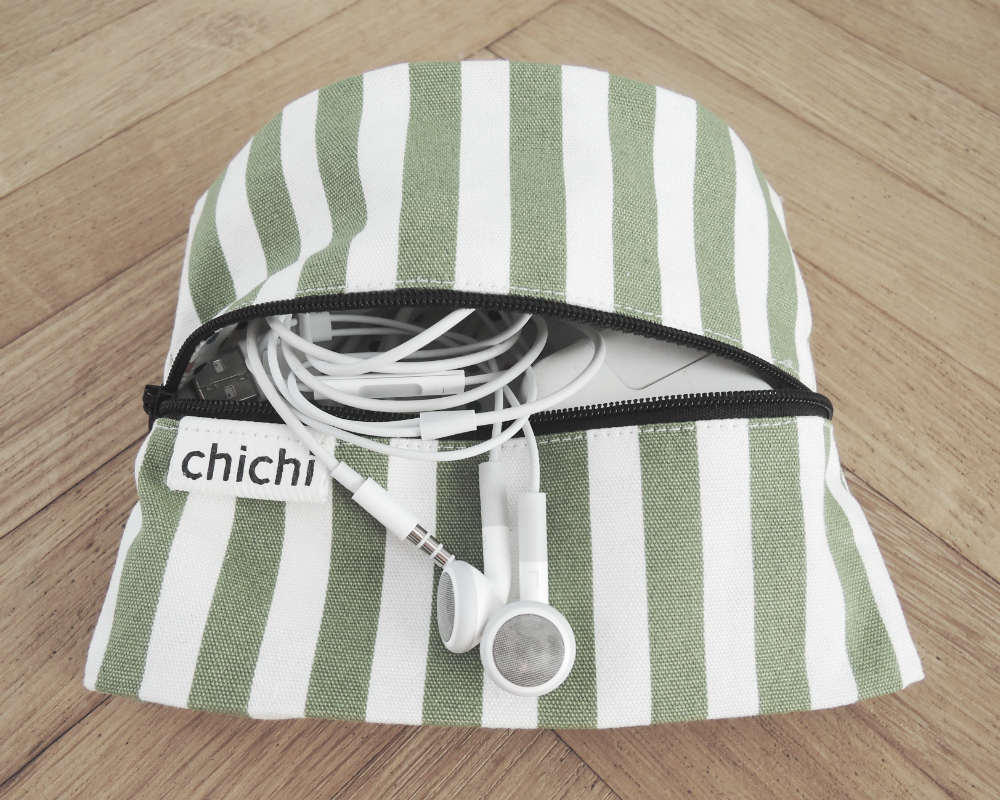
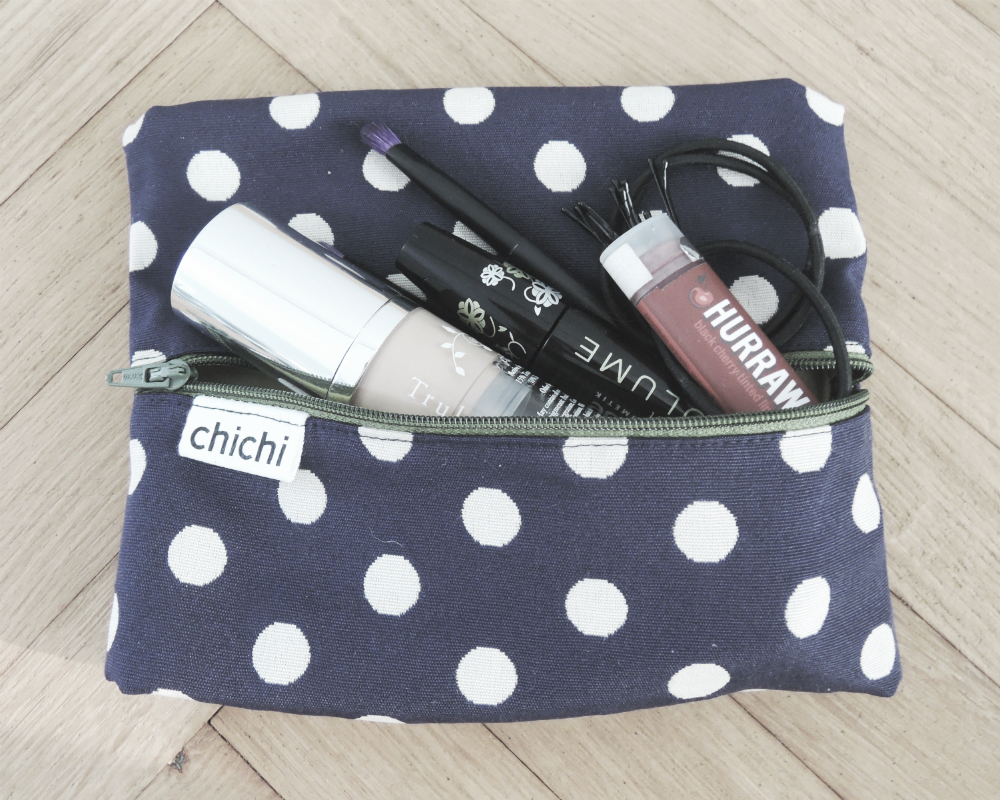
Depends of the size that you’ll make, you can use your pouch for almost everything. I have a couple of these lying around. A big one for my makeup at home, one for my phone charger and earphones and one small that is always in my bag for all the little things like spare hair bands or hair clips that always gets lost in the big black hole that is my bag. You can even add a handle if you want. Even the handle can be narrow or wide as you can see in the black and blue pouches.
They say that a picture says a thousand words. That’s why this tutorial is jam-packed with photos. Bear with me while I’ll try to sufficiently explain the process along with the pictures. If you need any more explanation just send me en email or write a comment below.
THE TUTORIAL
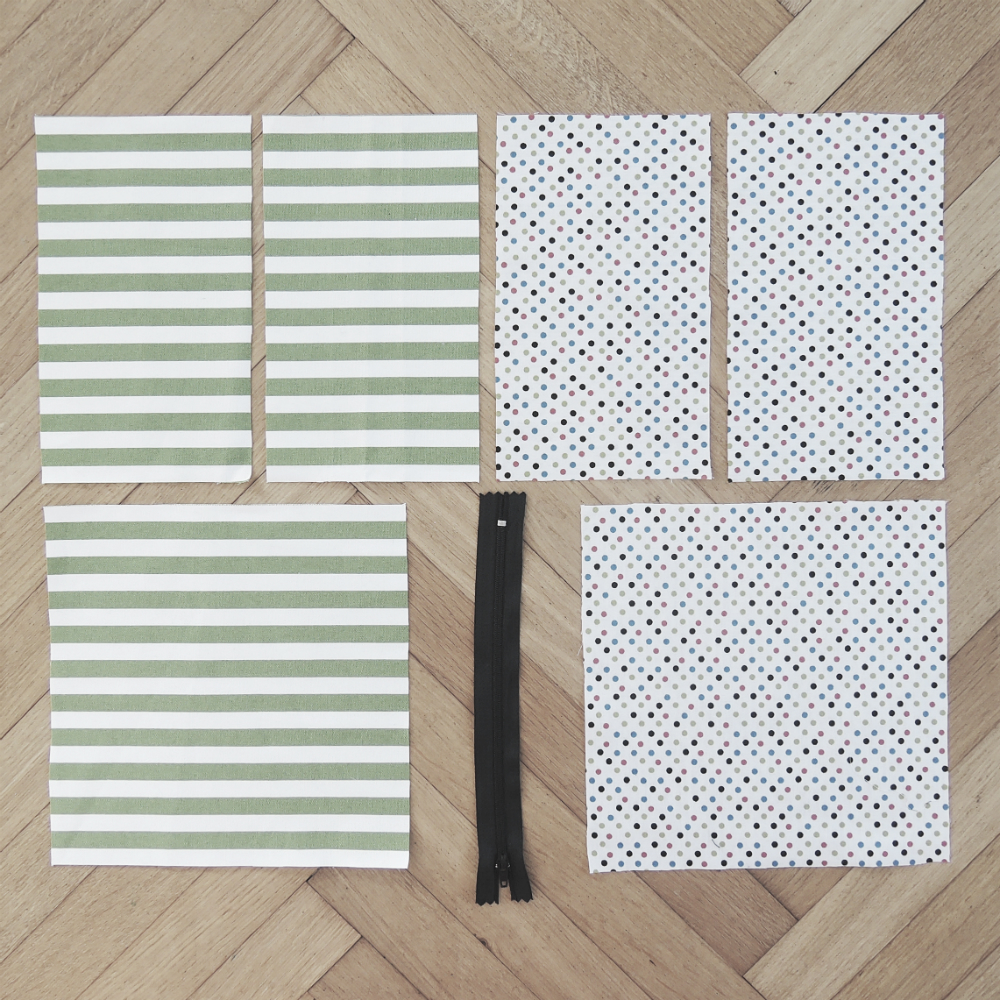
As I said before, you can make the pouch as big as you want and as small as you want. All that matters is that the pieces have to be rectangles. So use these instructions more as a guideline than a strict instructions. The measurements are for the green one and the black one. For the other two I used different measurements.
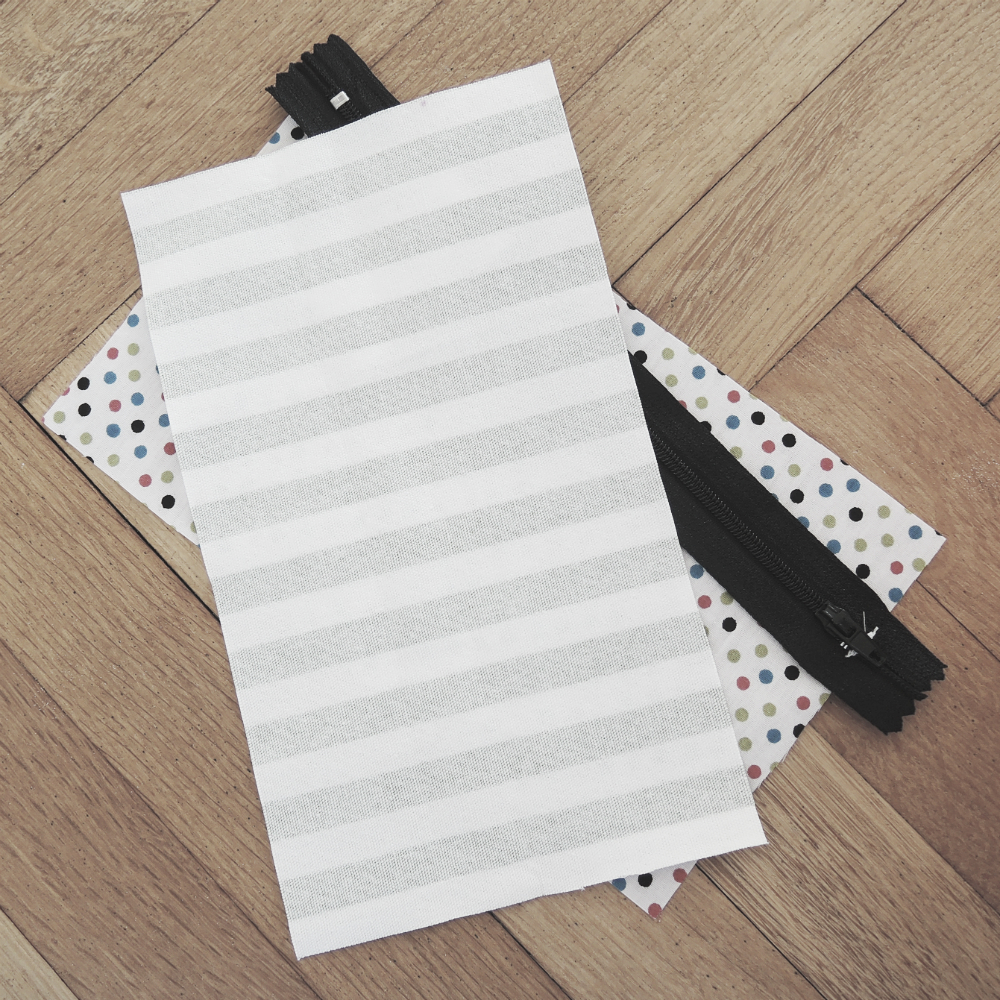
Materials:
– two squares 20 cm (8 in) x 20 cm (8 in) (one for the outer fabric and one for the lining)
– four rectangles 20 cm (8 in) x 12 cm (5 in) (two for the outer fabric and two for the lining)
– a zipper 22 cm ( 8 – 9 in) long
Instructions:
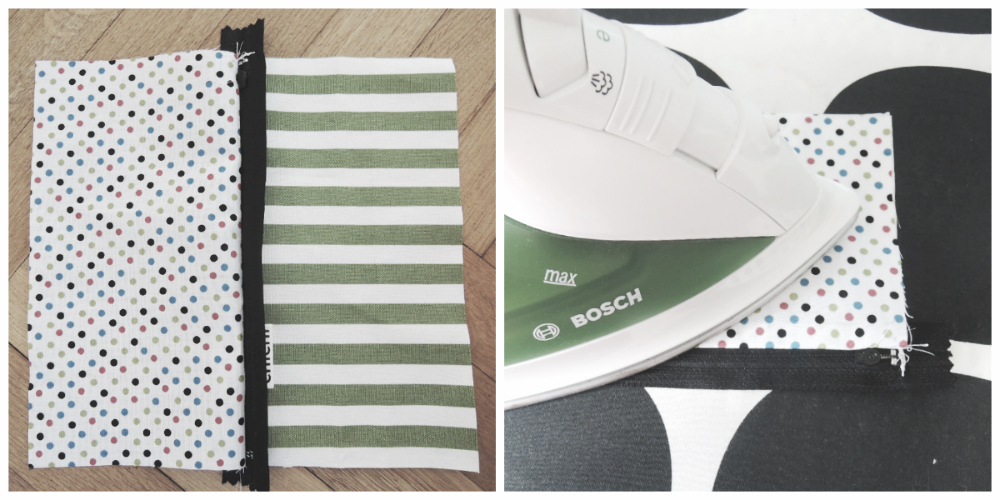
1. Iron all the fabric and cut out the rectangular pieces.
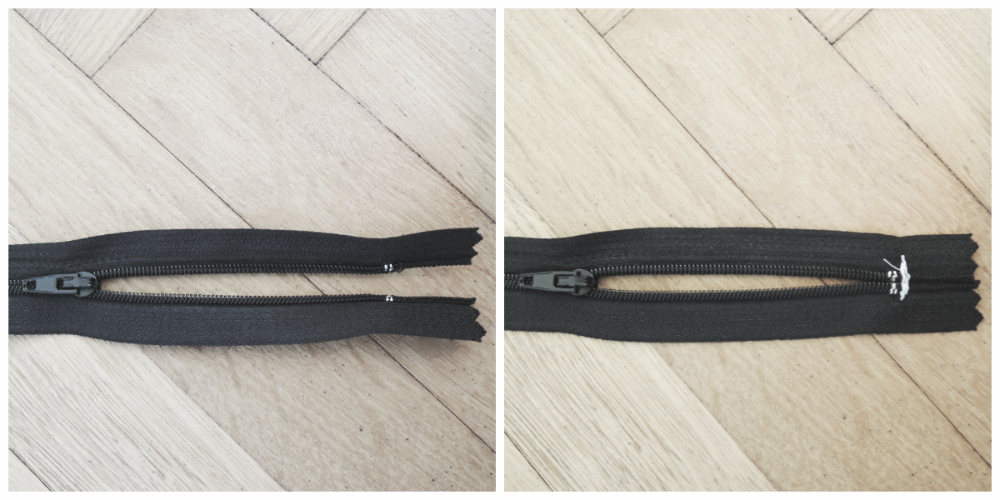
2. Prepare the zipper. At the end where the zipper opens, sew a couple of stitches up and down to hold the tails together.
3. Align the top edge of one rectangular lining piece with the top edge of one outer piece right sides together. In between put a zipper and pin in place. Use a zipper foot (I don’t, because I lost mine somewhere. Shhhhhh! 🙂 ) and sew the sandwich together as close as you can get to the zipper, but be careful not to sew into the teeth of the zipper.
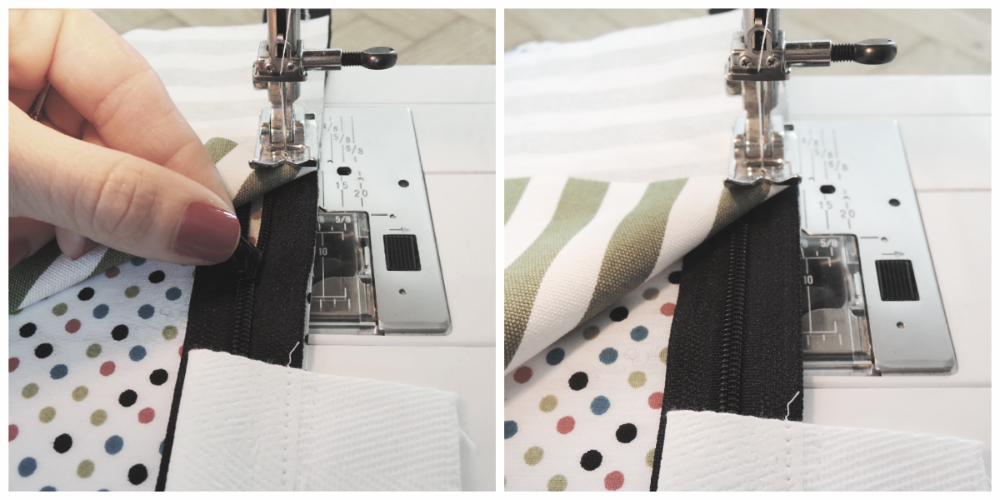
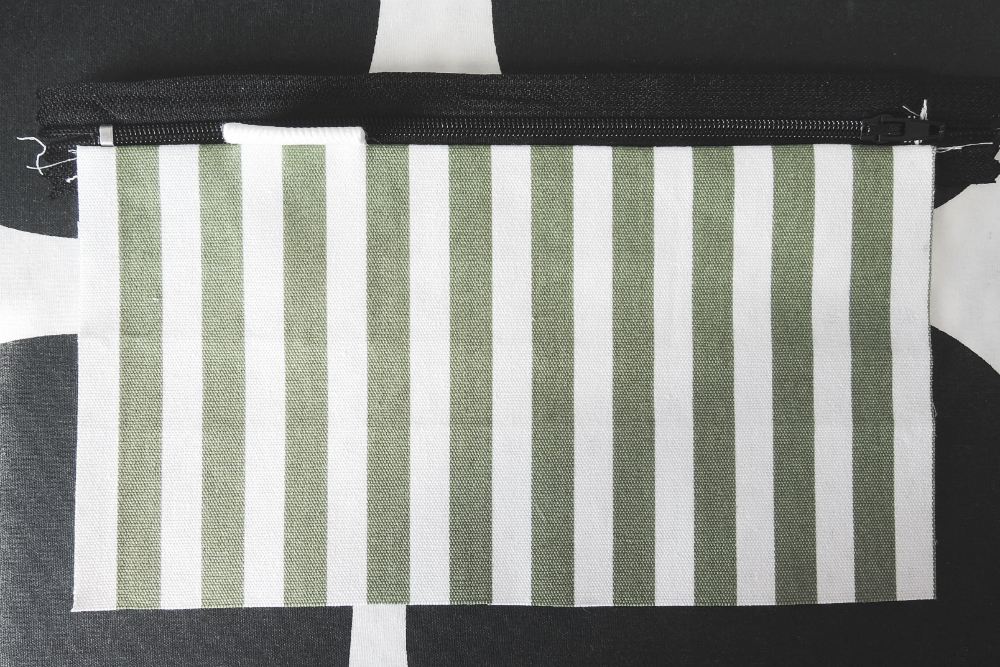
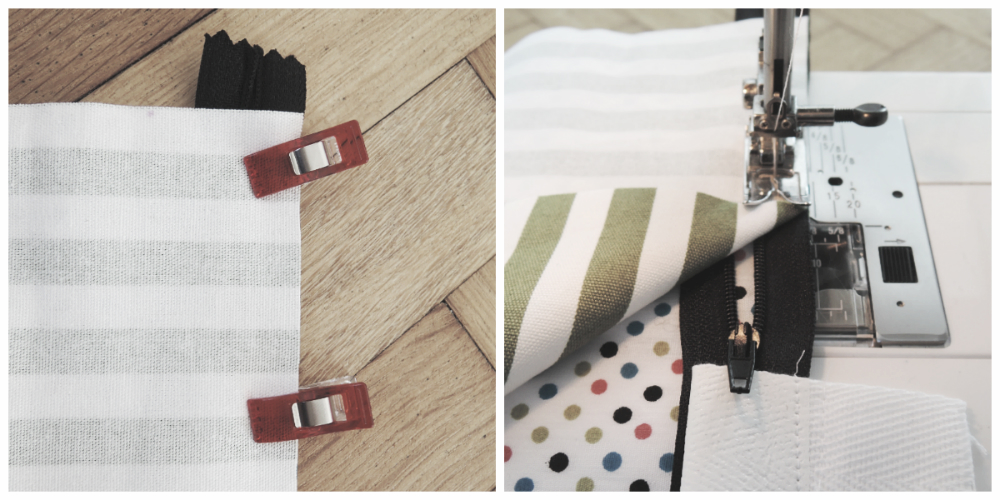 When you get to the pull of the zipper, lift up the foot, but leave the needle down in the fabric. Now carefully close the zipper, so that the pull slides back by the foot of the sewing machine. Put down the foot and continue sewing to the end of the zipper and fabric.
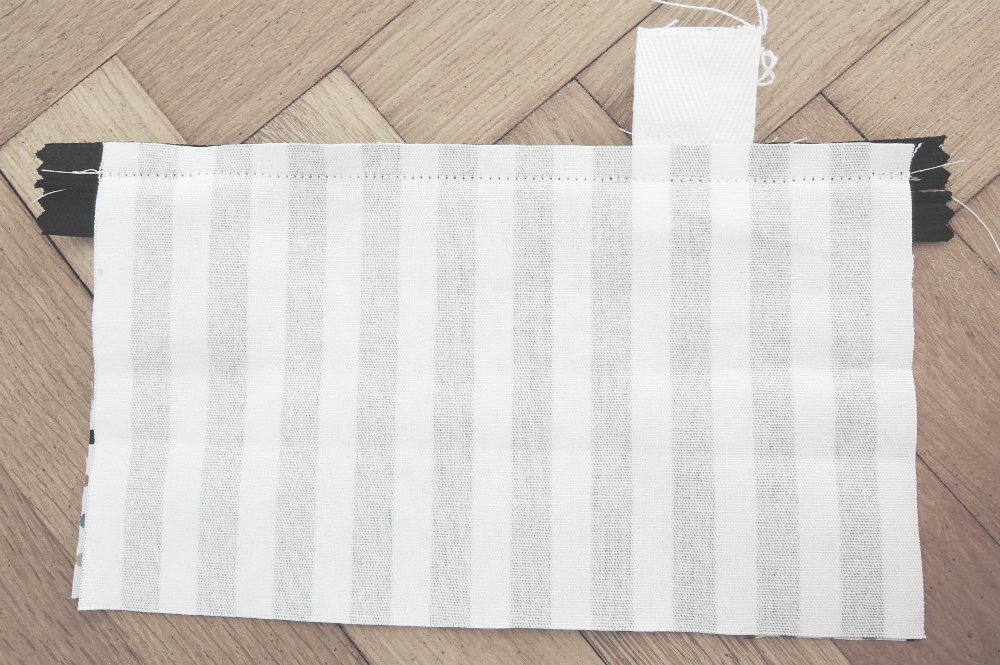
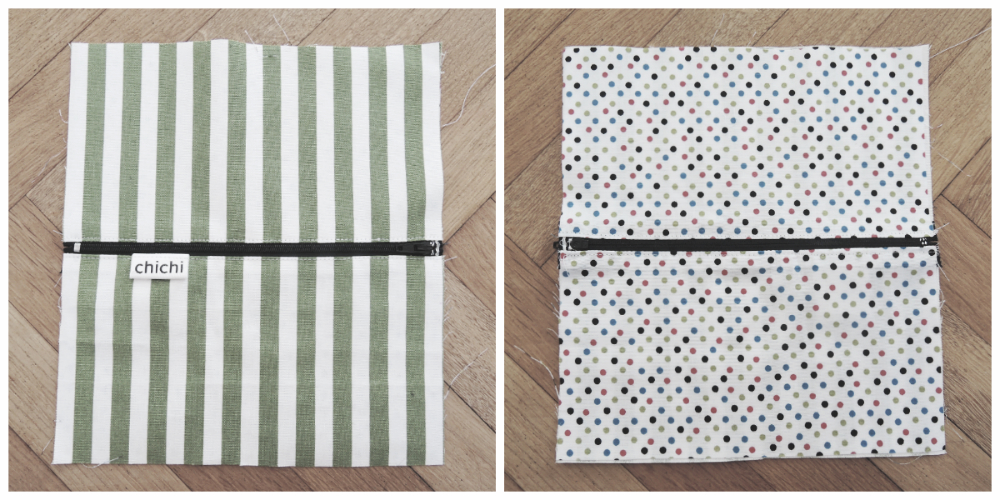
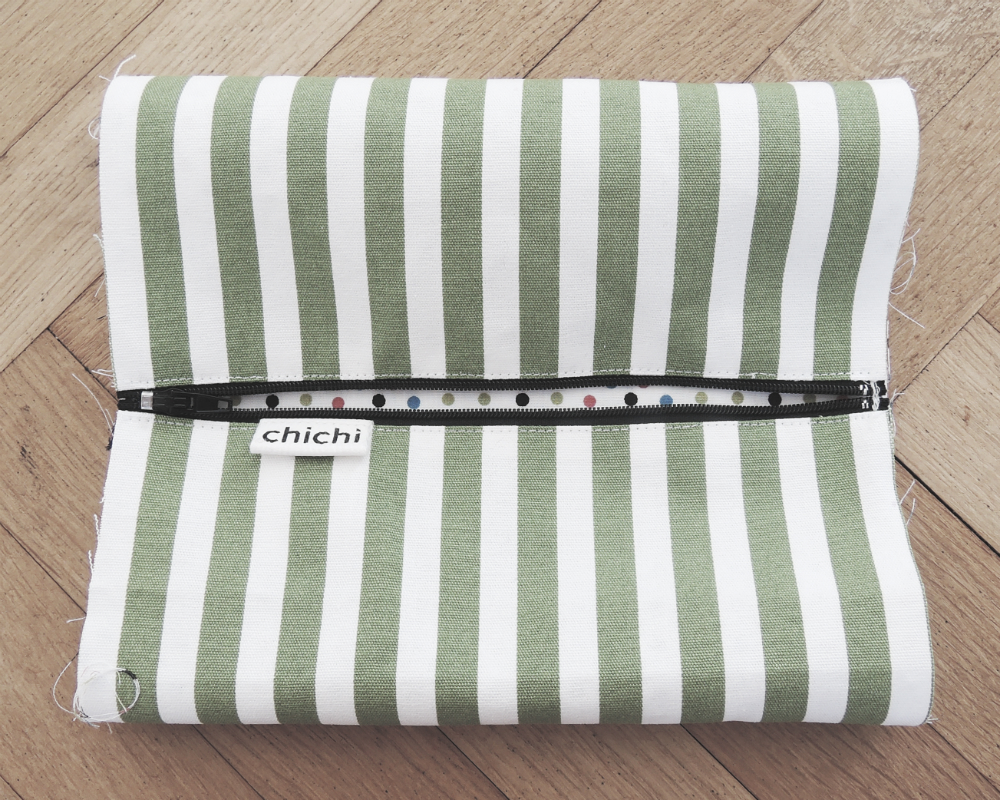
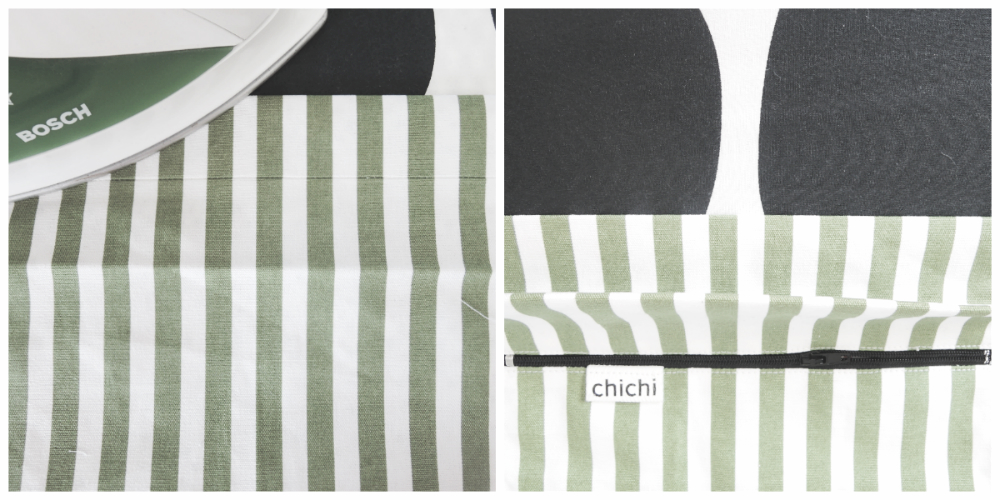
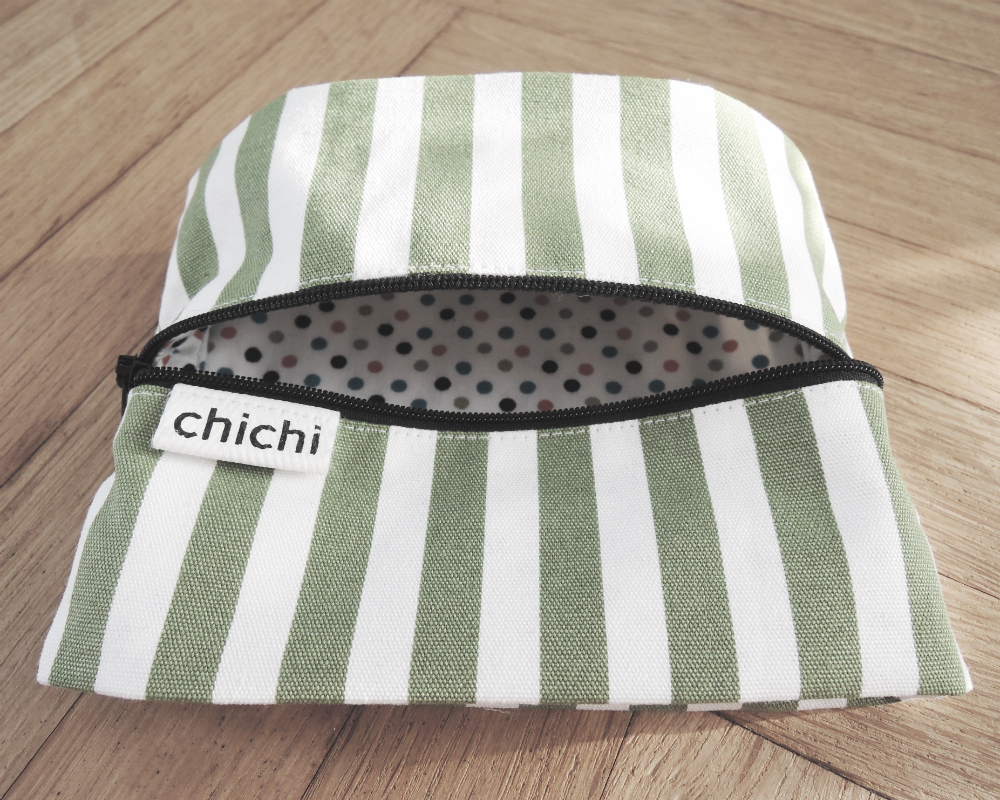
 This is what you should have now. Don’t mind that white piece of ribbon. That’s just my logo. You of course don’t have to do this.
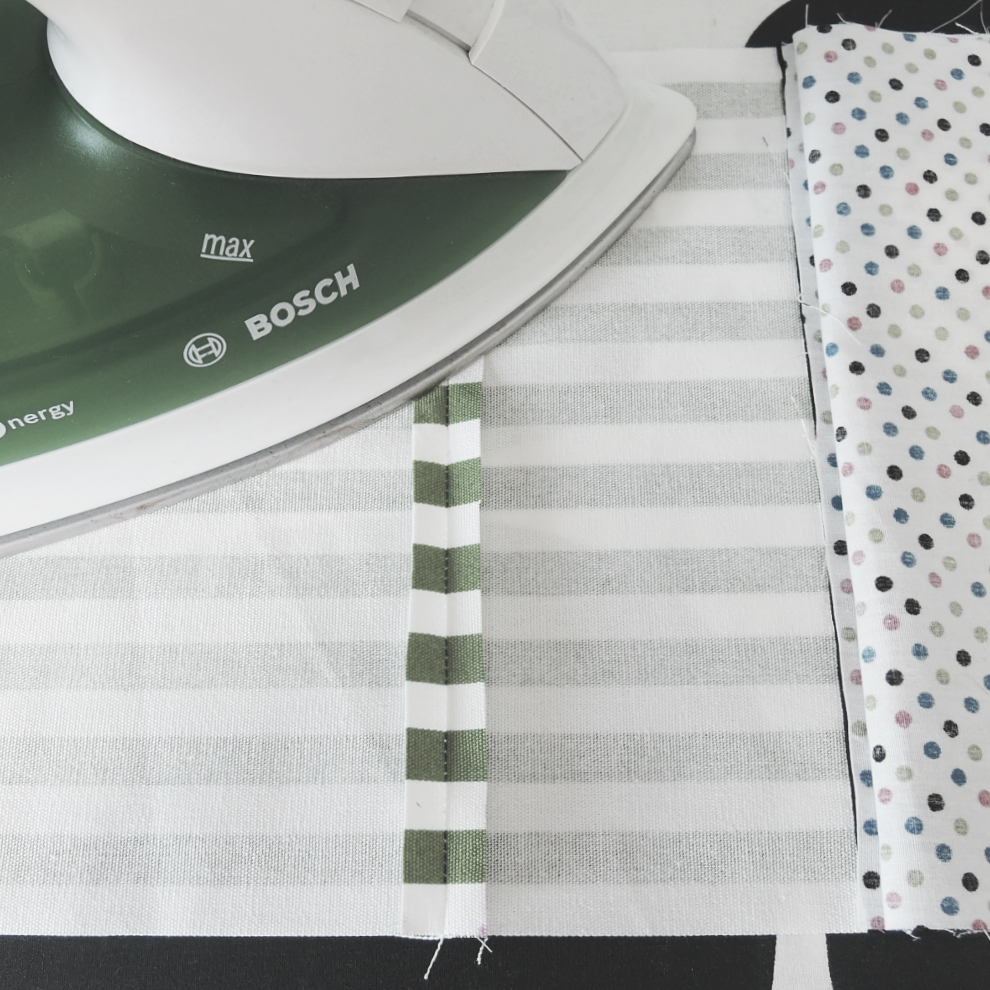
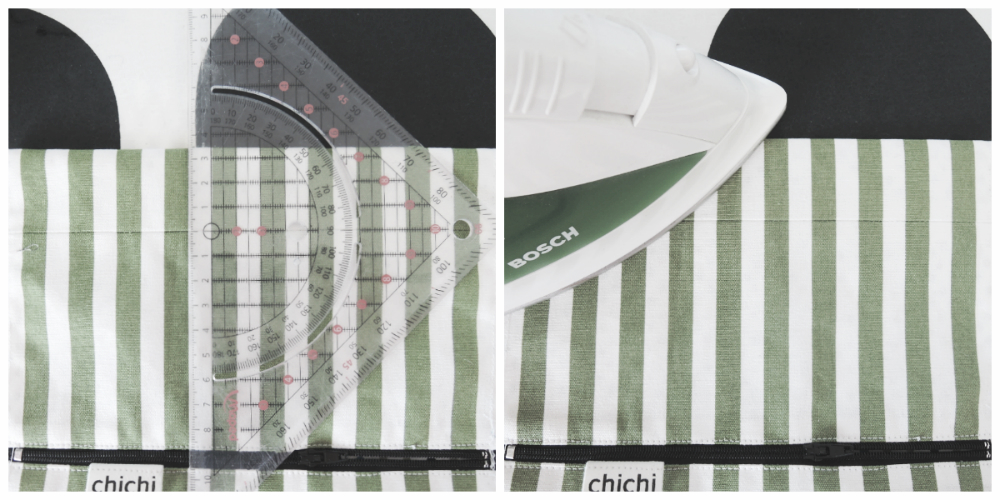
 Turn the pieces wrong sides together and press the seam flat along the zipper on both sides.
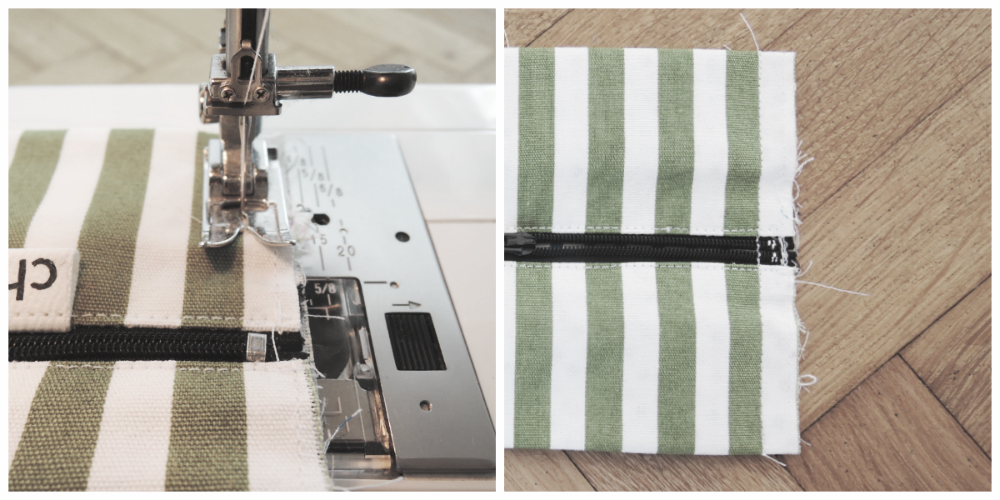
 Top stitch along the zipper to hold the fabric in place so that it will not bother you while opening the pouch. Again when you get to the pull of the zipper, lift up the foot and carefully close the zipper, so that the pull slides back by the foot of the sewing machine. Put down the foot and continue sewing to the end.
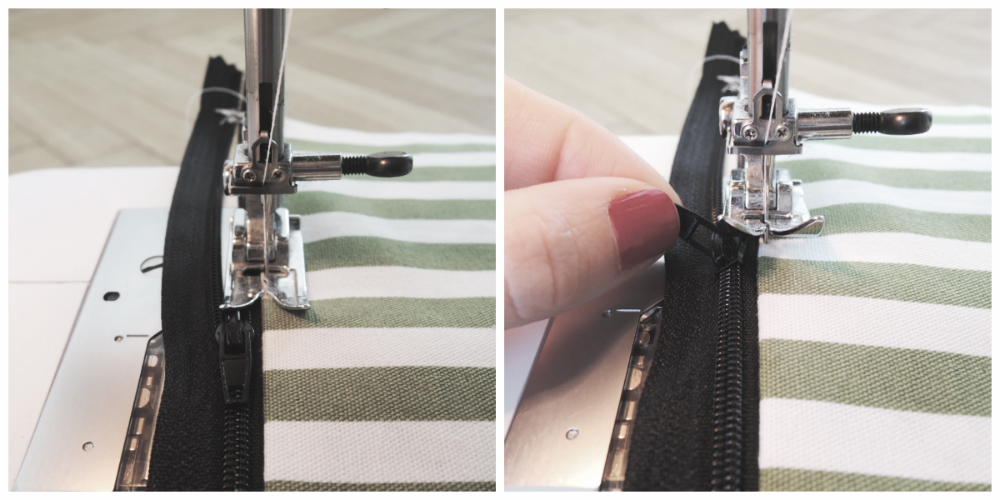
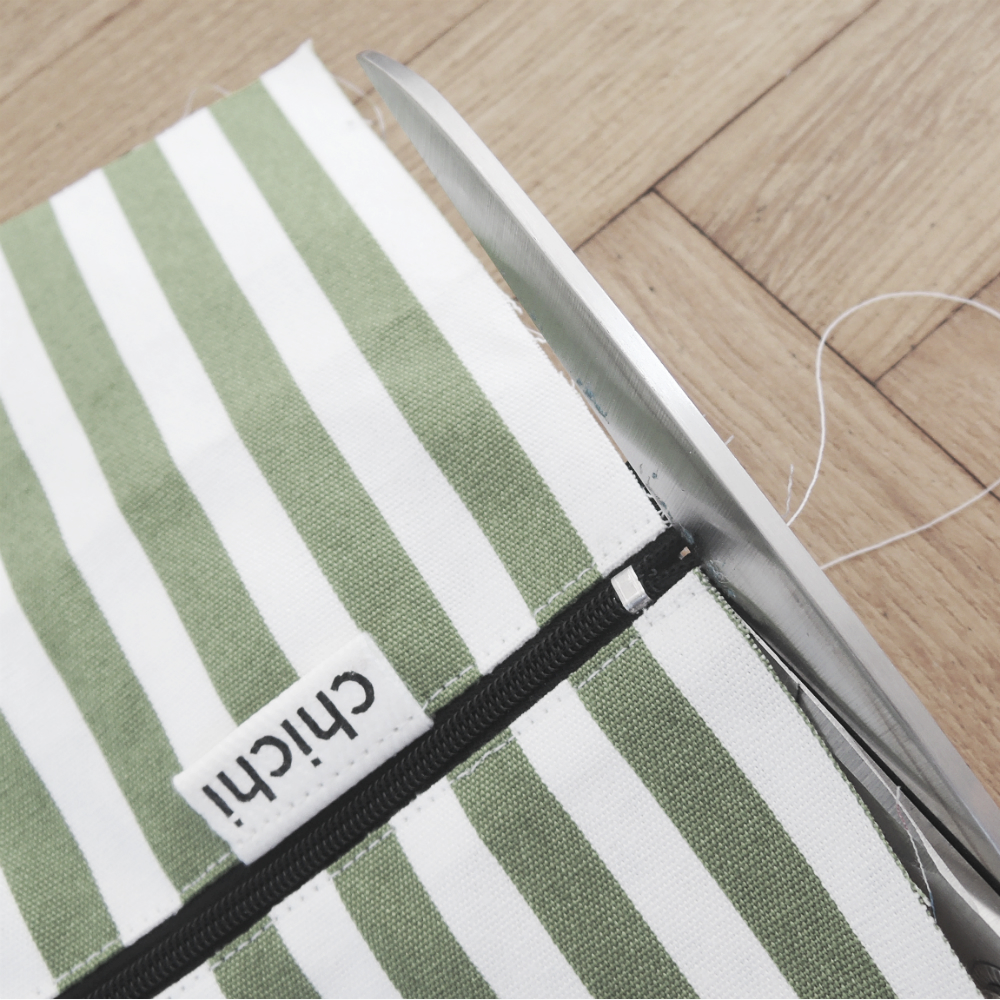
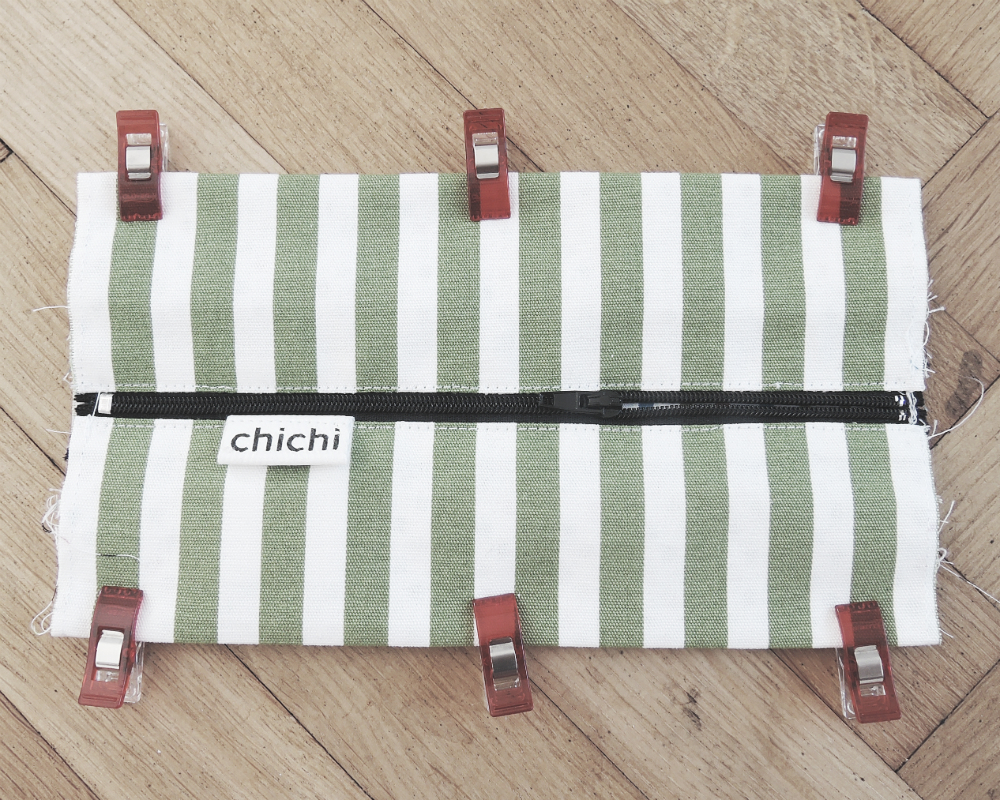
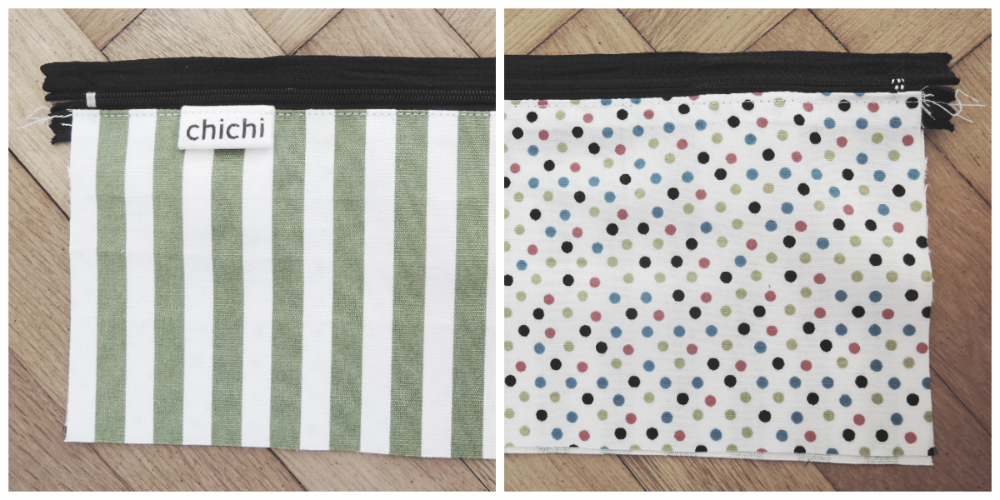 4. Repeat the whole number 3 on the other side. If you have a pattern, for example stripes like me, make sure that the pattern lines up nicely on the other side of the zipper. When you’re done, trim the ends of the zipper to align it with the fabric.
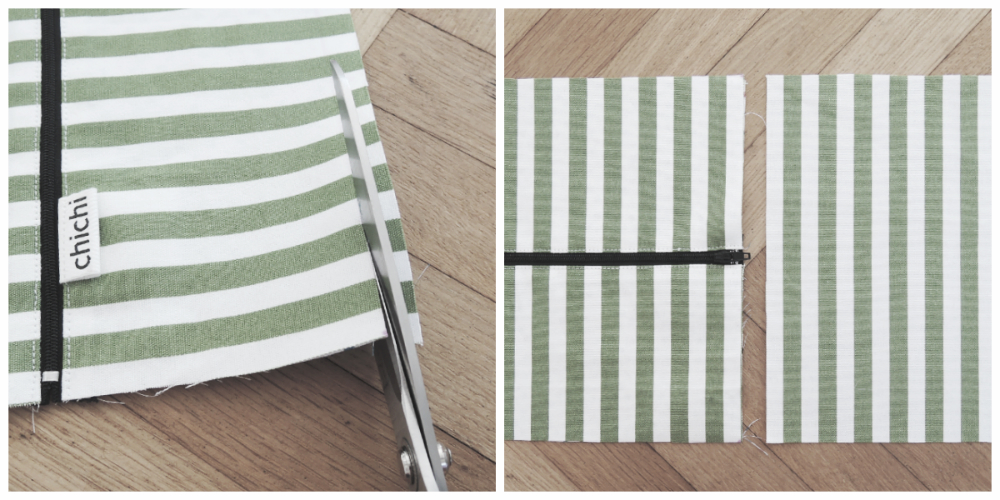
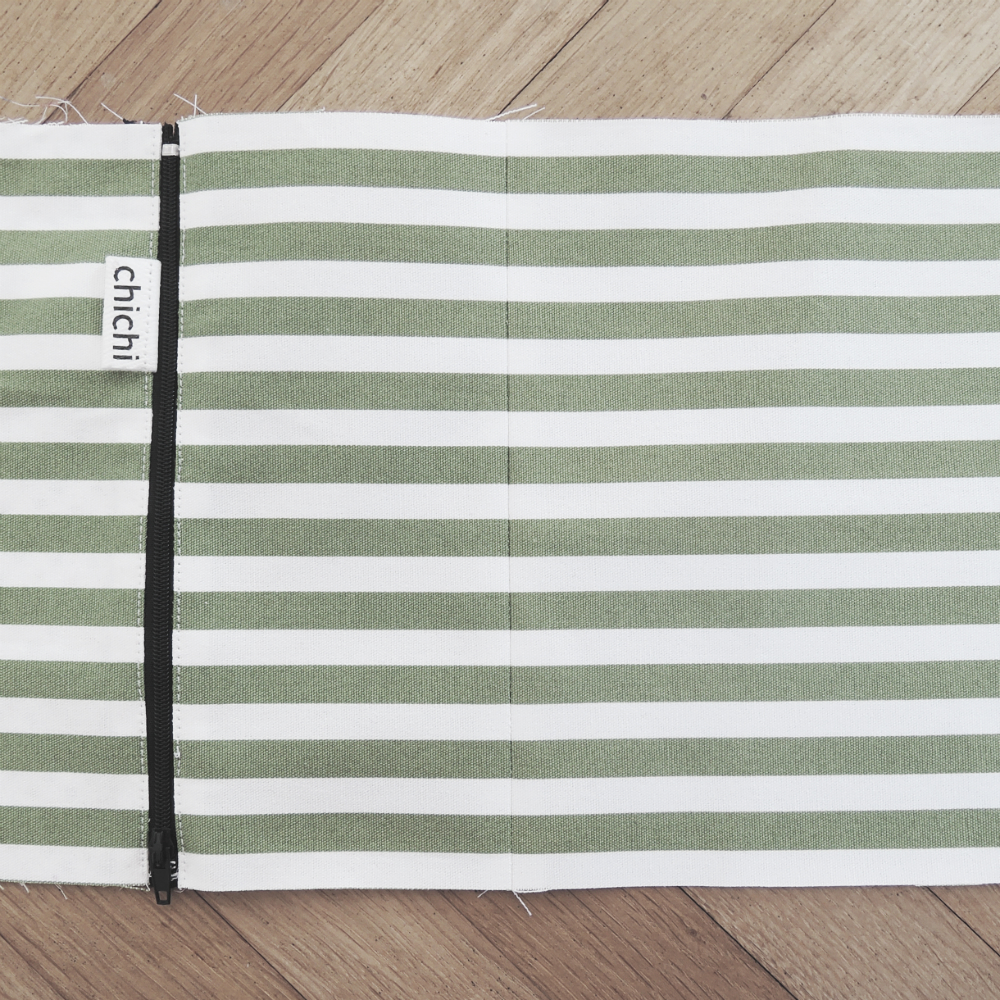
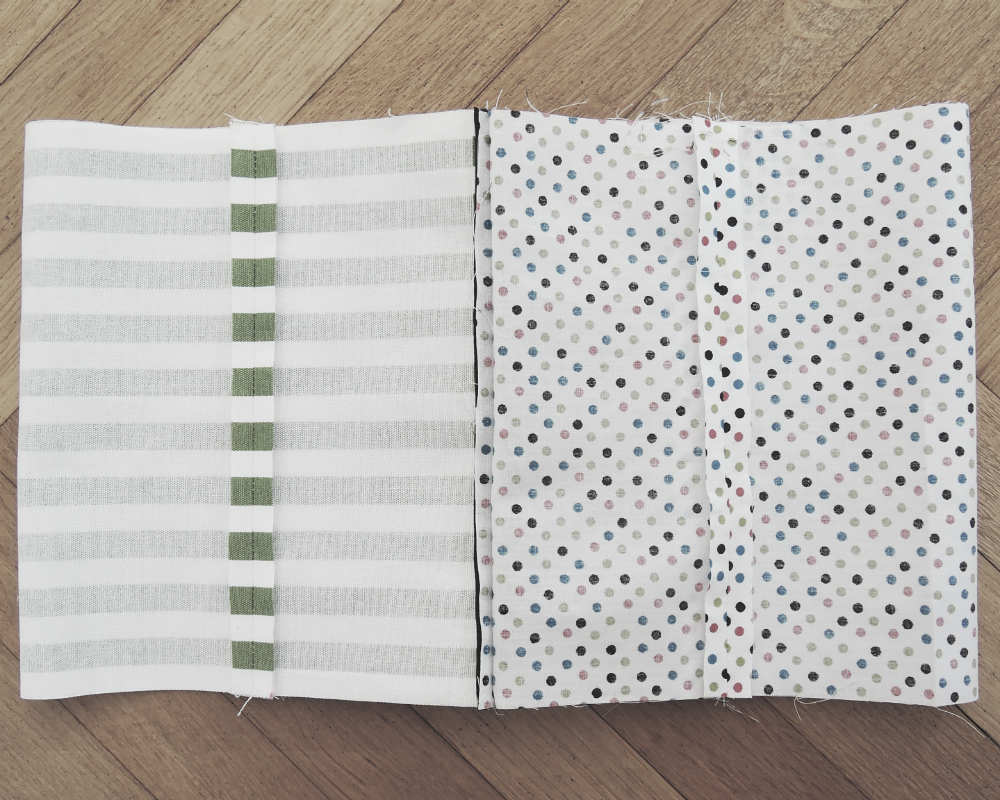
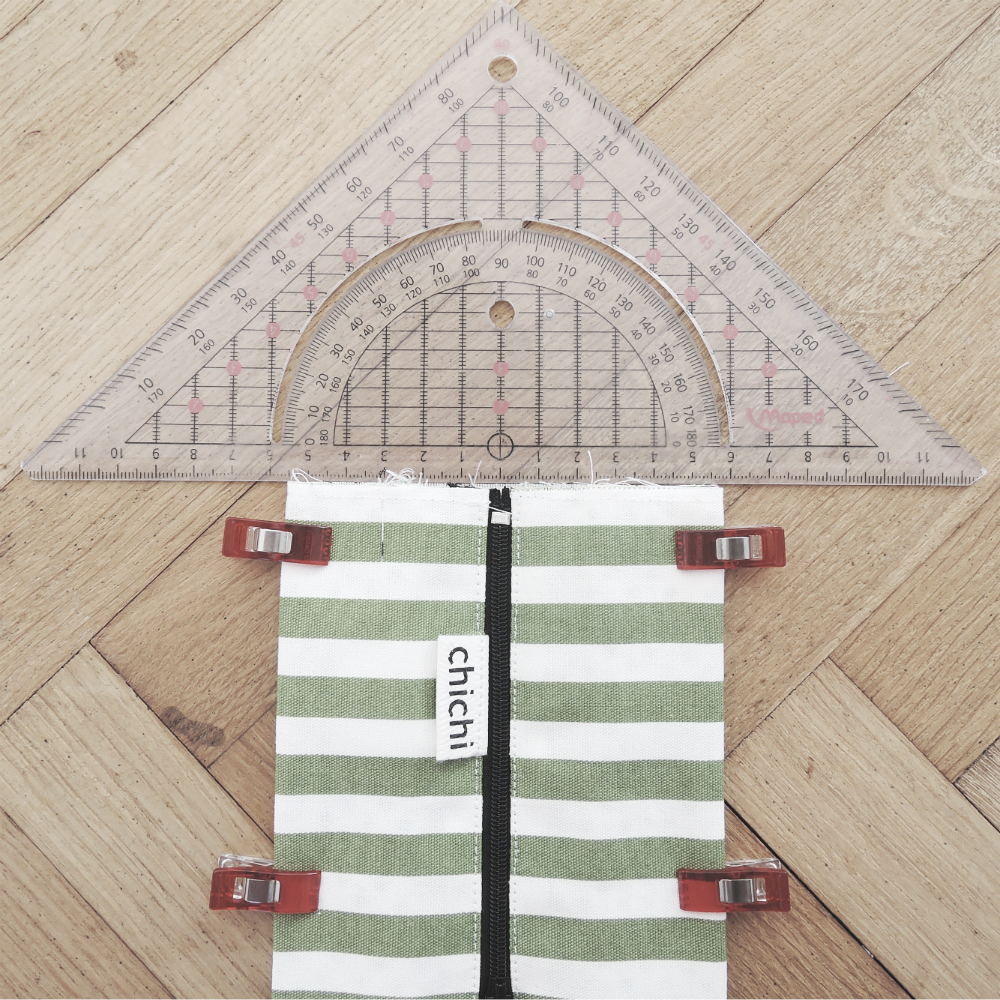
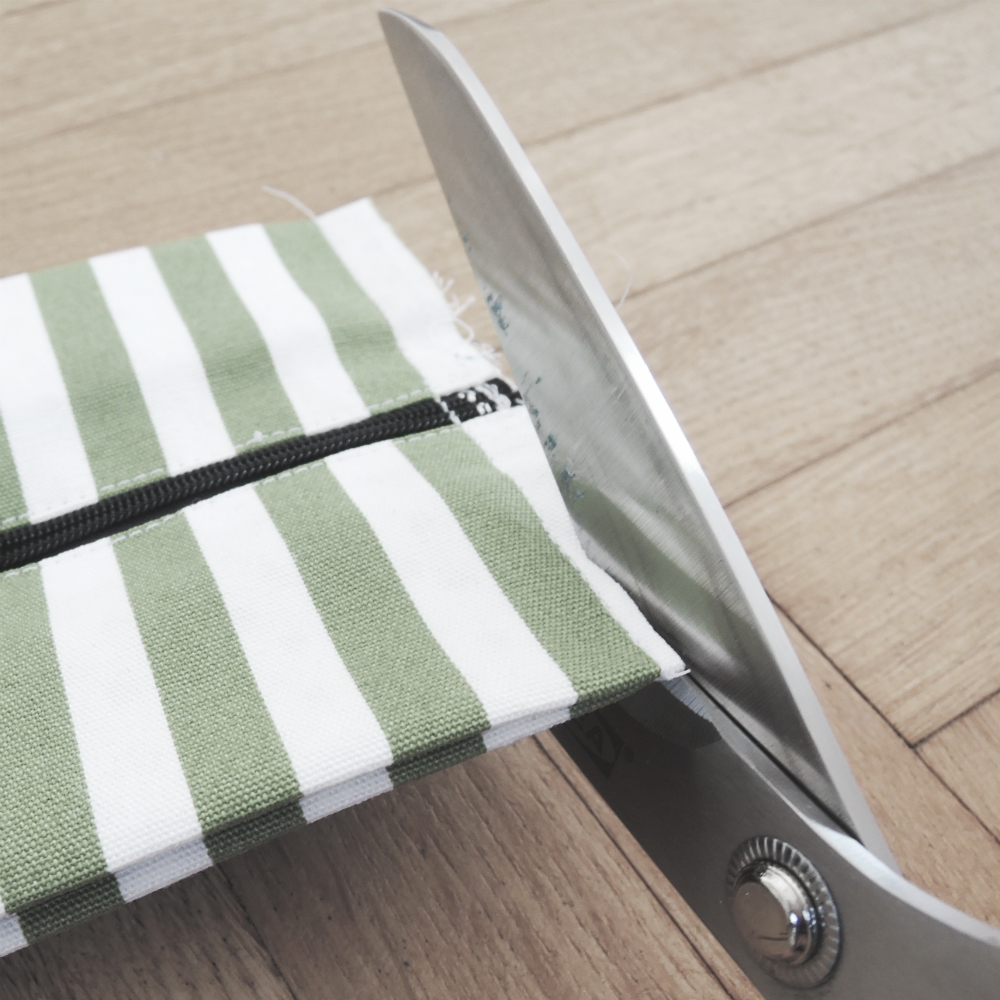
 5. Now you’ll see that you have a slightly bigger rectangular piece than the square pieces. Match it to the square piece and trim as much as you need. Make sure that the zipper is in the center of the square.

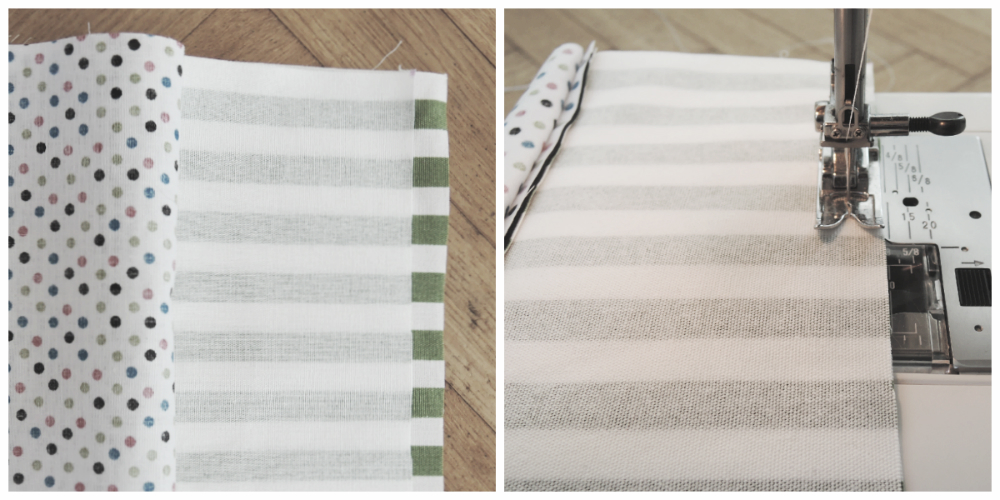
 6. Take just the rectangular outer fabric and align it up with the square piece of fabric. Again, if you have a continuing pattern, watch out that the patterns in the fabric match up. Stitch them together.
 Flat out the seam and press it on both sides. Repeat the whole number 6 on the other side to get a tube.
 7. Now take the rectangular lining piece and align it up with the square lining piece and stitch them together. Repeat on the other side.

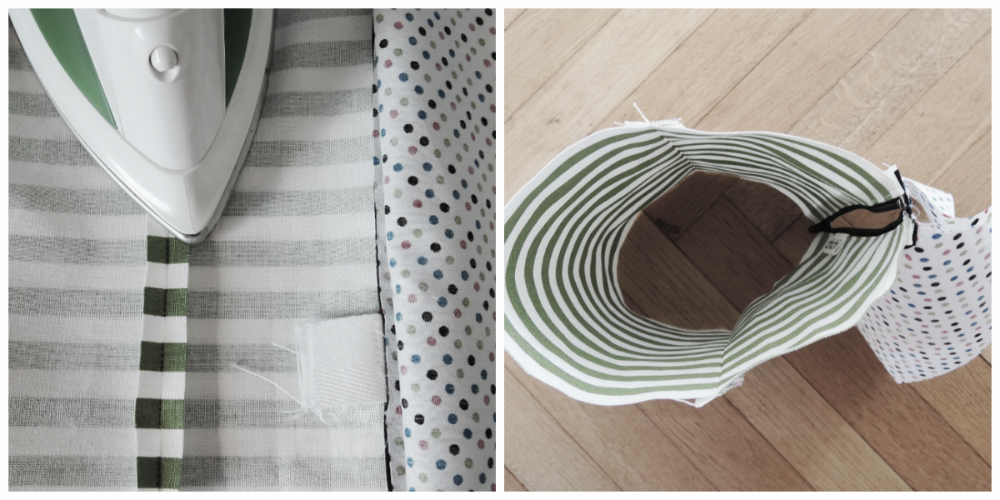
This is what it should look now. You should have 2 tubes and a zipper in between.
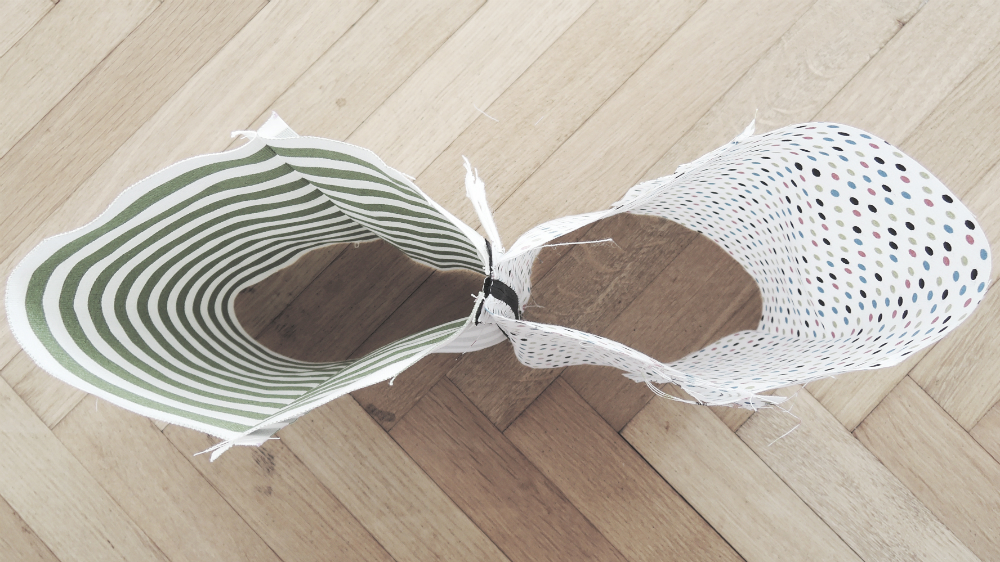
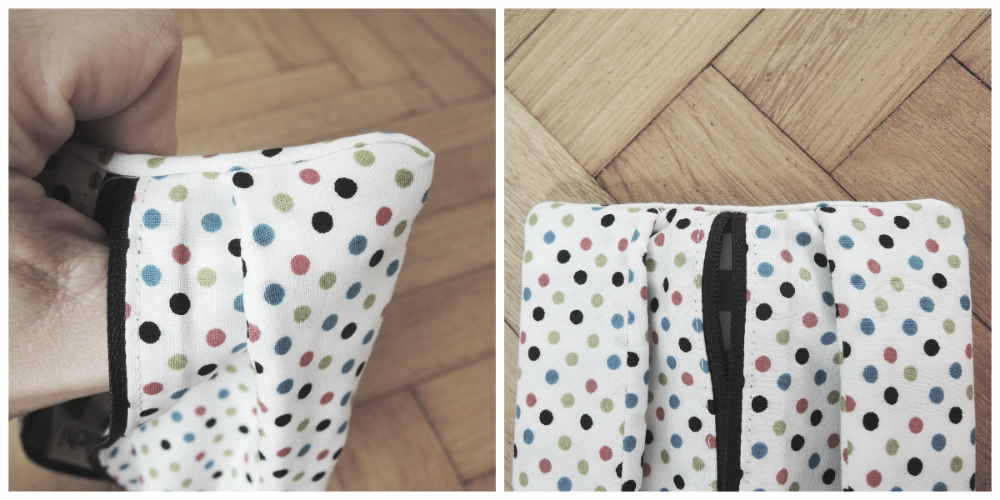
8. Open the zipper and turn the fabrics right side out and smooth out everything. Now it should look like a single tube. This next step is not necessary but I like to do it, because it makes it easier for the next step. So sew around the sides just a couple of mm from the edge to hold the pieces of fabric together.
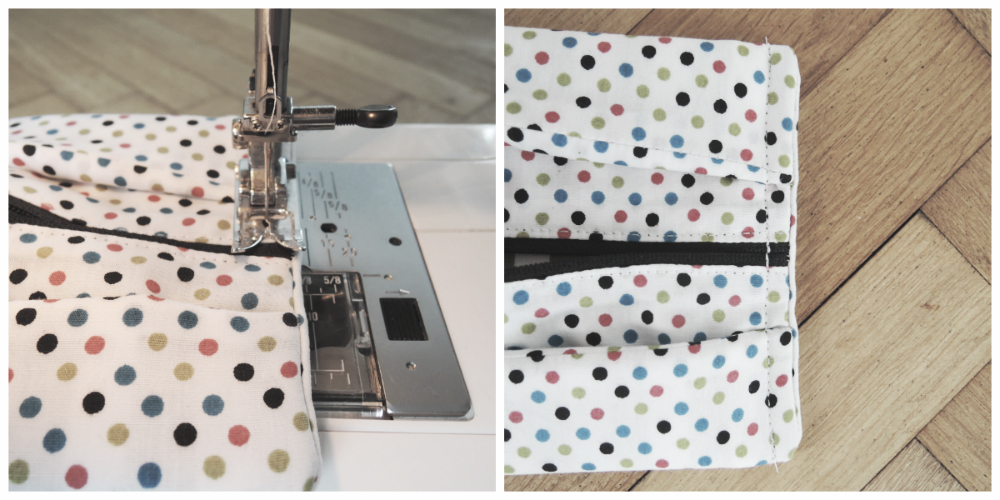
 9. Measure about 3.5 cm (1.5 in) from the side stitch, fold the fabric and press in place. Repeat on the other side of the stitch and pin in place.
 Repeat on the other side of the pouch and pin in place. This is how it looks now. Watch out that the stitch is in the center of the inside fold. But if you didn’t succeed to do that it doesn’t matter that much. I’m just nitpicking now. 🙂
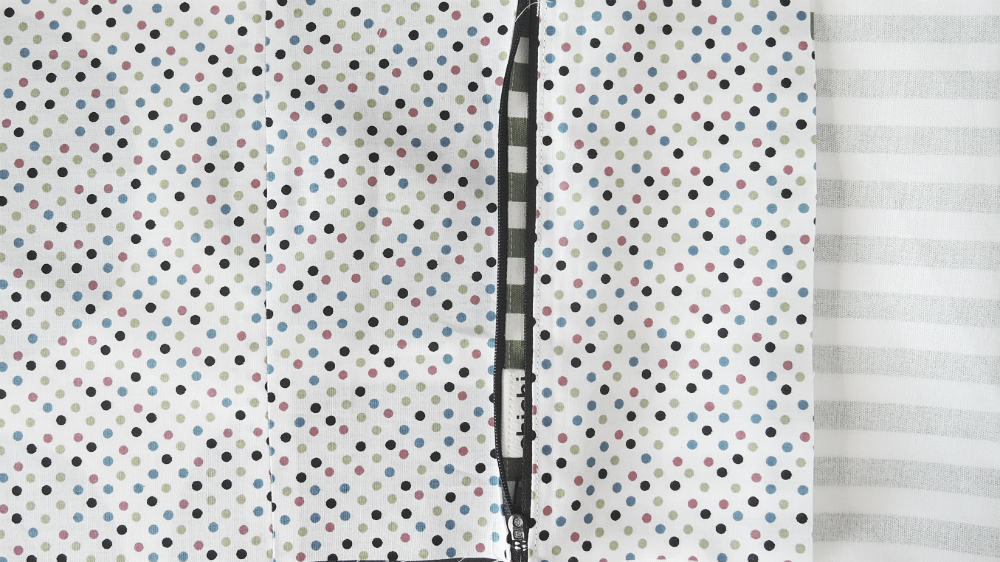
 Make sure that the zipper is still in the center of the pouch.
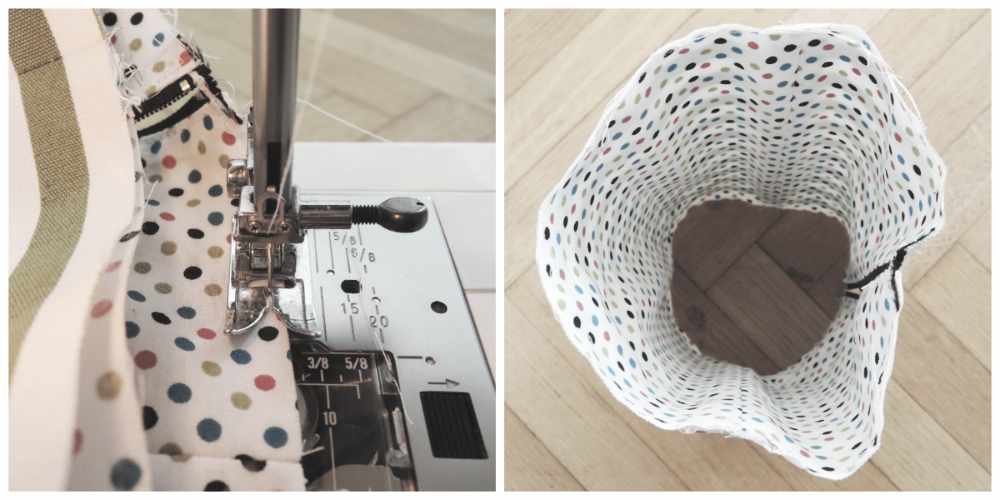
10. Sew along the raw edge about 1 cm from the edge. Backstitch a couple of times at the ends and over the zipper for added durability. You can add the handle at this step like I did with the blue and the black pouch.
 Trim as close as you can get to the stitch (about 3 mm), but be careful not to damage the stitch or the fabric will start to frill.
 11. Turn the pouch inside out and tuck the corners as much as you can. Sew along the edge with about 1 cm of seam allowance. Again backstitch at the ends and over the zipper for added durability. Repeat on the other side.
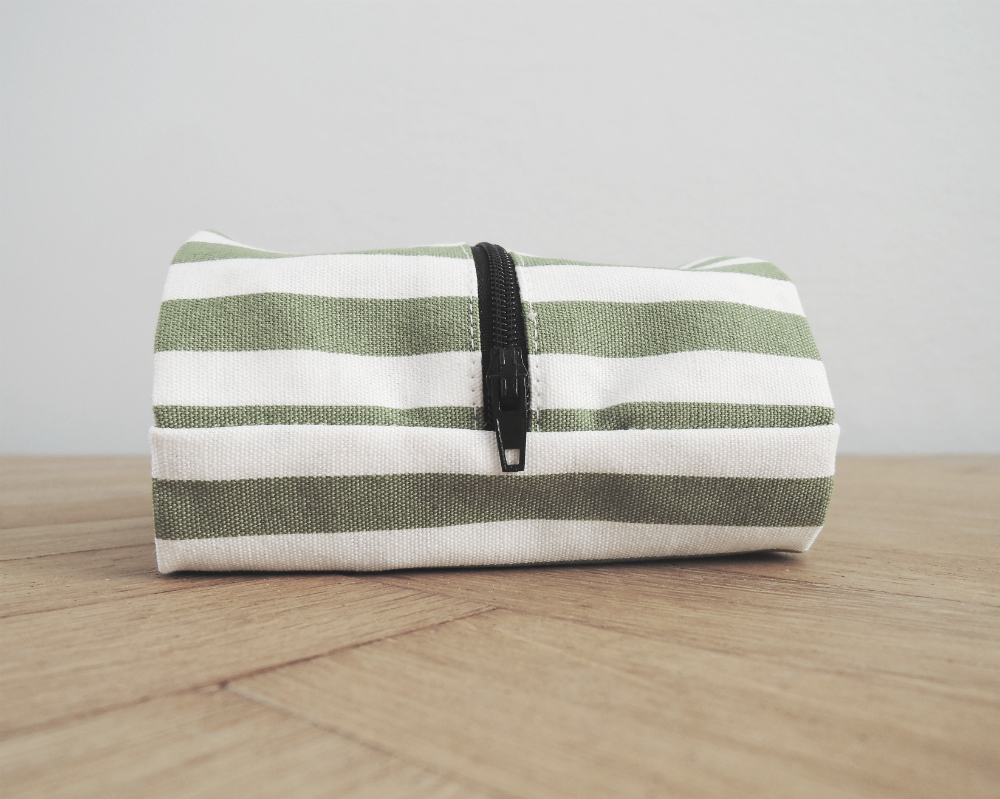
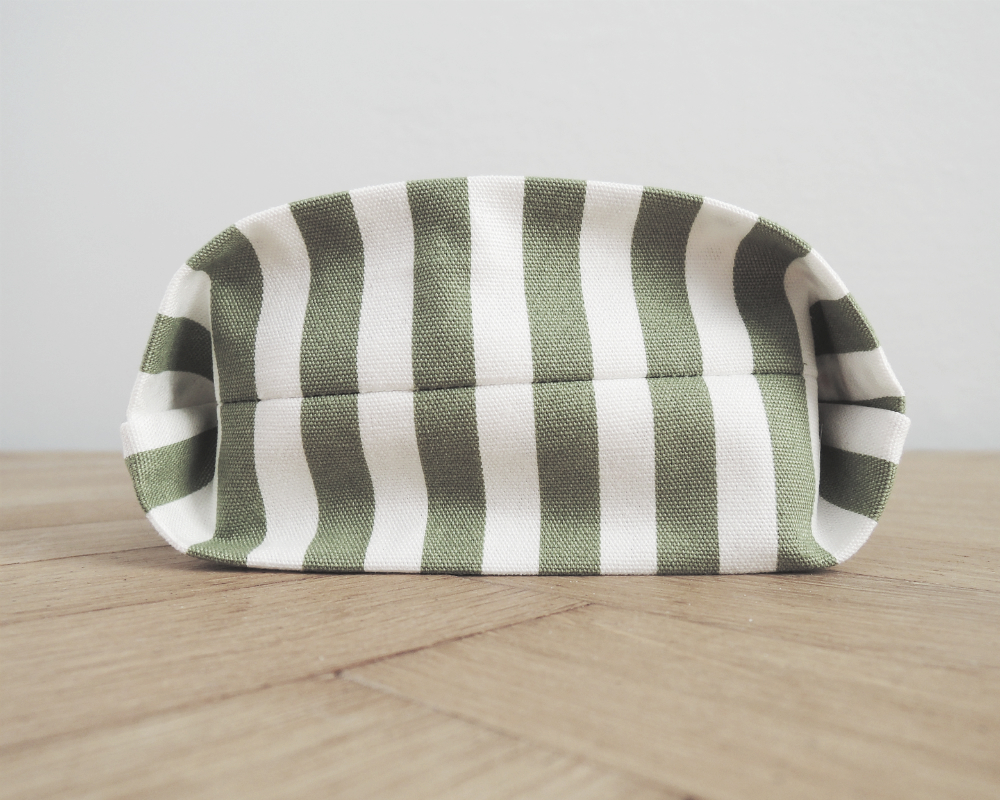
 12. Turn the pouch inside in and TA DAAH! 🙂 You have a brand new pouch! 🙂

Awesome pattern! Can’t wait to make it! You could also leave the zipper open a couple of inches before you see the outer fabric and lining together instead of leaving an opening to turn…..it will save a step and a little hand sewing. 🙂